Stalker XRF Book
This book documents the X-Ray Forge script engine, build pipeline, CLI tools, and supporting modding workflow for S.T.A.L.K.E.R.: Call of Pripyat projects.
Use it when you need to:
- set up the XRF engine project locally;
- build scripts, configs, UI forms, translations, and resources into
target/gamedata; - use the local CLI for linking, verification, packaging, engine switching, and asset utilities;
- understand how the rewritten TypeScript script engine maps to X-Ray Lua scripts;
- debug game logic, UI, weather, logs, and runtime state.
The implementation source lives in stalker-xrf-engine. This book should describe behavior that is implemented there or
in the sibling XRF tool/resource repositories.
Links
Resource Repositories
References
Changes
This page summarizes the main differences XRF introduces compared with a vanilla Call of Pripyat script and data setup.
Development Workflow
- TypeScript source is compiled to Lua scripts with TypeScriptToLua.
- The repository includes a local CLI for building, linking, verification, packaging, engine switching, and asset tools.
- UI XML can be generated from JSX sources.
- LTX/XML configs can be generated from TypeScript sources.
- Translations can be generated from JSON sources and checked with CLI utilities.
- Jest tests and X-Ray/Lua fixtures cover runtime logic without launching the game.
Build Pipeline
- Build targets are split into scripts, UI, configs, translations, and resources.
- Generated output is written to
target/gamedata. - Static resources can be copied from base, override, and locale-specific roots.
- Package commands can create mod or game output under
target. - Verification commands check project setup, gamedata, LTX, and particles data.
Script Engine
- The original Lua script engine is rewritten in TypeScript.
- Runtime logic is organized into managers, schemes, binders, registries, utilities, and typed domain constants.
- The project uses typed declarations for X-Ray engine APIs through
xray16and local typedefs. - Events and callbacks are centralized so game systems can be tested and extended more predictably.
Gameplay and Extensions
XRF aims to preserve the original plot and baseline behavior while making systems easier to test, optimize, and extend. Larger gameplay changes should be isolated as extensions where possible.
Current extension-oriented work includes optional start-position behavior and other modular gameplay changes under
src/engine/extensions.
Documentation and Tasks
Project task boards track ongoing work:
Credits
XRF builds on work from the S.T.A.L.K.E.R. and OpenXRay modding ecosystem.
This community project is not affiliated with GSC Game World.
Installation
This page describes a local development setup for stalker-xrf-engine.
Requirements
- Windows development environment.
- Node.js with
npm. - Git with submodule support.
- Installed S.T.A.L.K.E.R.: Call of Pripyat.
The project can locate the Steam installation for app id 41700. For a non-Steam copy, configure the fallback game path
in cli/config.json.
Set Up the Project
Clone the engine repository and install dependencies:
git clone https://github.com/xray-forge/stalker-xrf-engine.git
cd stalker-xrf-engine
npm install
npm run setup
npm run setup initializes and updates the repository submodules. The important submodules are src/resources for base
game resources and cli/bin for bundled binaries and tooling.
Link the Game
Run the project verification before linking:
npm run verify
Link the built target/gamedata folder, logs, and game folder paths:
npm run cli -- link
Switch to one of the bundled engine variants:
npm run cli -- engine list
npm run cli -- engine use release
Use engine rollback if you need to restore the default game executable.
Build and Start
Build the gamedata output:
npm run build
Start the configured game executable:
npm run cli -- start_game
The build output is written to target/gamedata. Do not edit files there by hand; edit sources under src/engine and
rebuild.
Updating Submodules
Update submodules when resource or binary repositories change:
git submodule update --init --recursive
Local OpenXRay Builds
For a locally built OpenXRay executable, follow the OpenXRay Windows build guide, then configure or copy the executable
into the engine location used by the CLI. Use npm run cli -- engine info to inspect the currently selected engine.
XRF Engine
XRF is a TypeScript rewrite of the S.T.A.L.K.E.R.: Call of Pripyat script engine. The source is compiled to Lua scripts with TypeScriptToLua and packaged with generated configs, UI XML, translations, and static game resources.
The engine repository also includes a Node-based CLI for common modding tasks:
- building
target/gamedata; - linking the project to a local game installation;
- switching bundled OpenXRay engine binaries;
- verifying project data;
- packing mod or game distributions;
- formatting and checking generated data sources.
Source Layout
The main engine source is under src/engine:
scriptscontains TypeScript entry points that become Lua scripts.corecontains runtime systems, schemes, managers, objects, and utilities.configscontains static and generated LTX/XML config sources.formscontains JSX/XML UI form sources.translationscontains JSON and XML translation sources.extensionscontains optional gameplay modules.
Build output and generated artifacts go under target/.
Development Model
Most work starts in TypeScript or source data files and then goes through the CLI build pipeline. The generated files are runtime artifacts for X-Ray; the source of truth stays in the repository.
Building
The build command compiles and copies XRF source files into X-Ray-compatible gamedata output under target/gamedata.
npm run build
npm run cli -- build
Build Targets
The build target names are:
scriptsuiconfigstranslationsresources
By default, build runs all targets. Use --include for focused builds and --exclude to skip targets:
npm run cli -- build --include scripts configs
npm run cli -- build --exclude resources
Options
-i, --include <targets...>: build only selected targets.-e, --exclude <targets...>: build all targets except selected targets.-v, --verbose: print verbose build logs.-l, --language <language>: build with a locale fromcli/config.json.-f, --filter <targets...>: filter source files by regular-expression strings.-c, --clean: removetarget/gamedatabefore building.--nl, --no-lua-logs: strip Lua logger calls from the compiled script output.--na, --no-asset-overrides: skip configured override and locale resource roots.--itz, --inject-tracy-zones: inject Tracy profiling zones into compiled scripts.
Filters must be used with an explicit --include target. The build command rejects filtered implicit all builds.
Build Steps
When all targets run, the build performs these steps:
- optionally clean
target/gamedata; - compile TypeScript scripts to Lua;
- render dynamic UI forms and copy static UI XML;
- render dynamic configs and copy static LTX/XML configs;
- build translations;
- copy static resources;
- write
metadata.json; - collect the build log.
Examples
npm run cli -- build
npm run cli -- build --clean
npm run cli -- build --include ui
npm run cli -- build --include configs --filter system.ltx
npm run cli -- build --exclude resources
npm run cli -- build --no-lua-logs --inject-tracy-zones
Output
The command writes generated gamedata to target/gamedata and collects a build log in target/xrf_build.log.
Do not edit target/gamedata by hand. Change the source file and rebuild.
Build Clean
Clean builds remove the previous target/gamedata output before the selected build targets run.
The option is implemented by the build command, not by individual config or script generators. When --clean is set,
the build process removes the whole target/gamedata directory before running the selected build filters.
Use a clean build when generated output may contain stale files, for example after deleting or renaming scripts, configs, forms, translations, or resources:
npm run cli -- build --clean
npm run cli -- build -c
The clean step removes target/gamedata. It does not change source files under src/engine, src/resources, or
external resource repositories.
When to use it
Use a clean build after:
- deleting or renaming source files;
- changing build filters and wanting to remove output from previous filters;
- switching between resource sets or generated config layouts;
- preparing output before
compress,pack game, orpack mod.
Skip it during tight iteration when you are only changing a file that the selected build step overwrites deterministically.
Building Scripts
The scripts build target compiles TypeScript under src/engine/scripts and related imported engine code to Lua with
TypeScriptToLua.
The output is written into target/gamedata as X-Ray script files. The generated bundle also includes
lualib_bundle.script, which provides helper functions emitted by TypeScriptToLua.
Build Only Scripts
npm run cli -- build --include scripts
npm run cli -- build -i scripts
Use --no-lua-logs when you want compiled scripts without Lua logger calls:
npm run cli -- build -i scripts --no-lua-logs
Use --inject-tracy-zones when profiling with Tracy support:
npm run cli -- build -i scripts --inject-tracy-zones
Watch Mode
Use watch mode during script development:
npm run watch:scripts
Additional script watch commands are available for optimized and Tracy-instrumented builds:
npm run watch:scripts-optimized
npm run watch:scripts-tracy
npm run watch:scripts-tracy-optimized
Type Checking
Run TypeScriptToLua type checking without emitting files:
npm run typecheck
When script compilation reports diagnostics, use typecheck for a focused failure report.
Type Definitions
X-Ray engine APIs are exposed through TypeScript declarations from the xray16 package and the XRF typedefs under
src/typedefs. Use the generated type documentation when checking engine class, method, and enum names:
Luabind Classes
XRF uses custom TypeScriptToLua transforms for luabind-style classes. Classes that need engine-compatible luabind registration use project decorators and generated Lua class shapes instead of plain TypeScriptToLua metatable classes.
Building UI
The UI build target writes game UI XML files to target/gamedata/configs/ui.
It processes sources from src/engine/forms:
.tsand.tsxfiles that exportcreate()are rendered to.xmlwithrenderJsxToXmlText;- static
.xmlfiles are copied as-is; *.test.*files are ignored by the replication helper.
Build Only UI
npm run cli -- build --include ui
npm run cli -- build -i ui
Use a filter when you only need a subset of files:
npm run cli -- build -i ui --filter main_menu
Filters are regular-expression strings matched against source file paths.
Authoring Forms
Dynamic forms use JSX-compatible TypeScript. The generated output is XML for the game engine, so form layout still has to respect X-Ray UI constraints such as absolute coordinates and parent-relative positioning.
Look at existing files in src/engine/forms before adding new forms. Reuse shared helpers and components where they
already exist.
Aspect Ratios
X-Ray UI XML often has separate layout expectations for 16:9 and 4:3 modes. Keep generated forms compatible with the target screen mode and verify in game when changing layout-sensitive XML.
Building Configs
The configs build target writes LTX and XML files to target/gamedata/configs.
It processes sources from src/engine/configs:
- dynamic
.tsfiles exportcreate()orconfigand render to.ltx; - dynamic
.tsxfiles exportcreate()and render to.xml; - static
.ltxand.xmlfiles are copied as-is; *.test.*files are ignored.
Build Only Configs
npm run cli -- build --include configs
npm run cli -- build -i configs
Use filters for focused rebuilds:
npm run cli -- build -i configs --filter system.ltx
Filters are regular-expression strings matched against source file paths. The build command does not allow filters with
the implicit all target, so combine --filter with --include.
Dynamic LTX
Dynamic LTX configs use structured TypeScript descriptors and renderJsonToLtx. This is useful when a config needs
shared constants, loops, generated sections, or tests.
Static LTX is still appropriate for simple files that do not need build-time logic.
Dynamic XML
Dynamic XML configs use JSX and renderJsxToXmlText. They are separate from UI forms: config XML is built from
src/engine/configs, while UI XML is built from src/engine/forms.
Validation
Use the LTX verifier after config changes:
npm run cli -- verify ltx
Strict mode is available for stricter checks:
npm run cli -- verify ltx --strict
Building Translations
The translations build target writes text files to target/gamedata/configs/text.
Translation sources live in src/engine/translations. The build step delegates to the bundled XRF tools binary and
passes the source path, output path, and verbosity mode.
Build Only Translations
npm run cli -- build --include translations
npm run cli -- build -i translations
Selecting a Language
The default locale is configured in cli/config.json as locale. The current default is ukr.
Override it for a build with --language:
npm run cli -- build --include translations --language eng
Supported locale keys are listed in cli/config.json under available_locales.
Locale Resource Packs
Resource packs for voice and localized assets are configured under resources.mod_assets_locales in cli/config.json.
When asset overrides are enabled, the resources build includes override folders plus the locale folders for the selected
language.
JSON and XML Sources
XRF uses JSON translation sources for generated multilingual output and can also copy static XML translation files where they are part of the source tree. Use the translation CLI commands when converting existing game XML into JSON sources.
Building Resources
The resources build target copies static game assets into target/gamedata.
The base resource root is configured in cli/config.json as resources.mod_assets_base_folder and points to
src/resources. Additional override and locale roots can be configured in the same file.
Build Only Resources
npm run cli -- build --include resources
npm run cli -- build -i resources
Use filters for focused resource copies:
npm run cli -- build -i resources --filter textures
Filters are regular-expression strings matched against source file paths.
Diff Checking
Directory resources use a diff check before copy. On non-clean builds, unchanged files are skipped, which keeps static asset rebuilds faster.
Use --clean when you need to force a fresh target/gamedata tree.
Additional Assets
Clone configured resource repositories with:
npm run cli -- clone --list
npm run cli -- clone extended
npm run cli -- clone locale-ukr
The configured roots are:
resources.mod_assets_override_foldersfor general overrides;resources.mod_assets_localesfor locale-specific assets.
Disable override roots for a build with --no-asset-overrides:
npm run cli -- build --no-asset-overrides
Resource Links
CLI
The XRF engine repository includes a local Node CLI. It is wired in cli/run.ts with Commander and is normally run from
the repository root.
Use the npm wrapper:
npm run cli -- <command>
Common package scripts wrap frequently used commands:
npm run build
npm run verify
npm test
Command Groups
The CLI registers commands for building, cloning extra resources, compression, engine management, formatting, icons, linking, logs, opening folders, packaging, parsing, particles, spawn files, starting the game, translations, and verification.
See the command list for a quick index.
Working directories and output
Run commands from the repository root unless a page says otherwise. Most defaults are repository-relative and come from
cli/config.json.
Generated output belongs under target/: built gamedata, parsed helper files, coverage, packed archives, and package
output. Source edits belong under src/engine, src/resources, cli, or the relevant external resource repository.
Global Alias
package.json exposes the binary name xrf, but local development should prefer npm run cli -- ... so the command
uses the repository version and local dependencies.
If the package is installed globally or run through an npm executor, the equivalent command shape is:
xrf build
xrf verify project
Configuration
Most CLI defaults live in cli/config.json: locale, resource roots, build source paths, target paths, compression
tools, package roots, and game executable settings.
When a command cannot find the game, resources, or generated output, check the command page first and then inspect the
matching config key in cli/config.json.
CLI Configuration
The engine CLI reads its defaults from cli/config.json.
This file controls:
- default locale and supported locale keys;
- base, override, and locale resource roots;
- source paths for configs, scripts, translations, extensions, and UI forms;
targetoutput path;- compression and helper binary paths;
- default package engine and root package assets;
- game executable and fallback game path.
Locale
locale is the default language used by builds. available_locales defines the accepted locale keys.
Override the locale for a build with:
npm run cli -- build --language eng
Locale-specific resource roots are configured in resources.mod_assets_locales.
Resources
resources.mod_assets_base_folder points to the base resources folder. In the engine repo this is src/resources.
resources.mod_assets_override_folders lists additional asset roots. resources.mod_assets_locales maps locale keys to
locale resource roots. These roots are included by the resources build unless --no-asset-overrides is passed.
Build Paths
The build section maps source folders:
configs->src/engine/configsscripts->src/engine/scriptstranslations->src/engine/translationsextensions->src/engine/extensionsui->src/engine/forms
Generated output goes under target/gamedata.
Non-Steam Game Path
The targets section contains the Steam app id, fallback game path, and game executable name. Update
stalker_game_fallback_path if the CLI cannot locate a non-Steam installation automatically.
Project Commands and Scripts
Run package scripts from the repository root:
npm run <script>
Run CLI commands through the local wrapper:
npm run cli -- <command>
Package Scripts
setup: initialize and update submodules.verify: runverify project.build: build scripts, configs, UI, translations, and resources.pack:mod: build a mod package.pack:game: build a game package.watch:scripts: rebuild scripts when TypeScript sources change.typecheck: run TypeScriptToLua type checking without emitting files.typecheck:tests: type-check test sources with TypeScript.lint: run ESLint.lint:strict: run the stricter ESLint config.test: run Jest.test:coverage: run Jest coverage.format: run Prettier, ESLint fix, and LTX formatting.help: print CLI help.
CLI Commands
build: buildtarget/gamedata.clone: clone configured additional resource repositories.compress: compress built gamedata into archives.engine: inspect, switch, list, or roll back bundled engines.format ltx: format LTX files.icons: pack and unpack equipment icons and texture descriptions.link,unlink,relink: manage project links to the local game installation.logs: print the last lines from the linked game log.open_game_folder,open_project_folder: open configured folders.pack: create mod or game packages.particles: pack or unpackparticles.xr.parse: parse directory trees or game externals.spawn: unpack ALife spawn files.start_game: start the configured game executable.translations: initialize, convert, and check translation files.verify: run project, gamedata, LTX, and particles verification commands.
Use npm run cli -- <command> --help for command-specific options.
Build
build compiles and copies XRF source assets into target/gamedata. Use it before linking the project into a game
installation, packaging a mod, or validating generated configs/scripts.
npm run cli -- build
What it builds
| Target | Source | Output |
|---|---|---|
scripts | src/engine/scripts | Lua .script files in target/gamedata/scripts and related output folders. |
ui | src/engine/forms plus static UI XML | UI XML under target/gamedata/configs/ui. |
configs | src/engine/configs | Static and generated config files under target/gamedata/configs. |
translations | src/engine/translations | XML string tables under target/gamedata/configs/text. |
resources | configured resource roots | Static assets copied into target/gamedata. |
The build also writes target/gamedata/metadata.json and stores a build log under target/logs.
Options
-i, --include <targets...>: build only selected targets. Choices arescripts,ui,configs,translations, andresources.-e, --exclude <targets...>: skip selected targets. This conflicts with--include.-f, --filter <targets...>: filter copied/generated files by regular-expression strings. Use it only with a specific included target, not with the defaultalltarget set.-l, --language <language>: use a locale fromcli/config.json. The default isukr.-c, --clean: removetarget/gamedatabefore building.--nl, --no-lua-logs: strip Lua logger calls from the compiled script output.--na, --no-asset-overrides: skip configured override and locale resource roots when copying resources.--itz, --inject-tracy-zones: inject Tracy profiling zones while compiling scripts.-v, --verbose: print verbose build logs.
Examples
npm run cli -- build --clean
npm run cli -- build --include scripts configs
npm run cli -- build --include configs --filter system.ltx
npm run cli -- build --exclude resources
npm run cli -- build --include scripts --no-lua-logs
Failure notes
- Unsupported locales fail before asset copying starts.
--filterwith the defaultallinclude set fails; choose a concrete target first.- TypeScriptToLua diagnostics fail the script build. Run
npm run typecheckfor a focused error list.
Clone
clone downloads optional resource repositories configured in cli/config.json. The command clones into the parent
folder of the engine repository, next to stalker-xrf-engine.
npm run cli -- clone <repository>
Repository names
Use --list to print the configured names:
npm run cli -- clone --list
Current configured names include:
extended: full base gamedata assets for custom game packages;locale-eng: English locale resources;locale-ukr: Ukrainian locale resources;locale-rus: Russian locale resources.
Options
-l, --list: print configured repository names and exit.-v, --verbose: print verbose logs.-f, --force: remove an existing target folder before cloning.-s, --safe: treat an already cloned target folder as success.
--force and --safe conflict with each other.
Examples
npm run cli -- clone extended
npm run cli -- clone locale-ukr --safe
npm run cli -- clone extended --force
Failure notes
The command fails when the repository name is missing, not configured, or already cloned without --safe or --force.
It runs git clone, so network and credentials errors come from Git.
Compress
compress packs built target/gamedata content into database archives with xrCompress. Use it after build when you
need DB archives for a game package.
npm run cli -- compress
Targets
Compression target definitions live in cli/compress/configs/compress.json.
| Target | Packed content |
|---|---|
configs | configs, spawns, anims, and ai. |
levels | levels. |
resources | textures and meshes. |
shaders | shader-related .xr files and the shaders folder. |
sounds | sounds, stored without compression. |
Output archives are written under target/db as <target>.dbN.
Options
-i, --include <targets...>: compress selected targets. Defaults toall.-c, --clean: removetarget/dbbefore writing archives.-v, --verbose: printxrCompressoutput.
Examples
npm run cli -- build --clean
npm run cli -- compress --clean
npm run cli -- compress --include configs shaders
Inputs and output
The command reads built files from target/gamedata and writes database archives under target/db. It does not build
missing gamedata by itself, so run build first when source files changed.
Use --include for fast package checks when only one archive group changed. Use --clean before producing a package
that should not contain stale archives from a previous target set.
Failure notes
target/gamedata must exist. If compression target names are wrong, the command prints the valid names from the
compression config.
Engine
engine manages bundled OpenXRay engine binaries under cli/bin/engines. It switches the game installation’s bin
folder to a selected bundled engine by creating a junction.
npm run cli -- engine <command>
Commands
| Command | Purpose |
|---|---|
engine list | Print available bundled engine names. |
engine info | Print whether the active game bin folder is linked and whether a backup exists. |
engine use <engine> | Switch the configured game installation to a bundled engine. |
engine rollback | Restore the backed-up original bin folder. |
Examples
npm run cli -- engine list
npm run cli -- engine use release
npm run cli -- engine info
npm run cli -- engine rollback
How switching works
When engine use <engine> sees an unlinked game bin folder, it renames it to the XRF backup path and then links the
selected bundled engine. When the current bin is already linked, it removes the old link and creates a new one.
engine rollback only restores the backup when a backup folder exists and the current bin folder is an XRF-linked
engine with bin.json.
Related commands
pack game --engine <type> selects a bundled engine for package output without switching the local game installation.
Format
format contains project-specific formatting commands. The current CLI subcommand formats LTX config sources with the
same formatter used by validation tooling.
npm run cli -- format ltx
Options
-c, --check: check formatting without rewriting LTX files.-v, --verbose: print verbose formatter logs.
Examples
npm run cli -- format ltx
npm run cli -- format ltx --check
Inputs and output
format ltx reads LTX config sources from the repository and either rewrites them or reports formatting differences
when --check is set. It is useful before verify ltx because it normalizes layout without changing config meaning.
Run the check form in review or CI-style validation. Run the writing form when you intentionally want the formatter to update files.
Package script difference
The package script is broader:
npm run format
It runs Prettier for JavaScript, TypeScript, TSX, and Markdown, then ESLint fix, then npm run cli -- format ltx. Use
the CLI command when you only want LTX formatting.
Icons
icons wraps texture tooling from cli/bin/tools/xrf-cli. It packs and unpacks equipment icon sprites and UI texture
description sprites using project paths from cli/config.json.
npm run cli -- icons <command>
Commands
| Command | Reads | Writes |
|---|---|---|
icons unpack-equipment | src/resources/textures/ui/ui_icon_equipment.dds and src/engine/configs/system.ltx | src/resources/textures_unpacked/ui/ui_icon_equipment |
icons pack-equipment | unpacked equipment icons and system.ltx | src/resources/textures/ui/ui_icon_equipment.dds |
icons unpack-descriptions | UI texture descriptions and packed textures | src/resources/textures_unpacked |
icons pack-descriptions | UI texture descriptions and unpacked textures | src/resources/textures |
Options
All icon commands support:
-v, --verbose: print verbose logs.-s, --strict: enable strict mode.
Description commands also support:
-d, --description <name>: process one file undersrc/engine/forms/textures_descr.
Examples
npm run cli -- icons unpack-equipment
npm run cli -- icons pack-equipment --strict
npm run cli -- icons unpack-descriptions --description ui_actor.xml
npm run cli -- icons pack-descriptions --description ui_actor.xml
Workflow
Unpack before editing icon sprites or checking generated sprite coordinates. Pack after editing the unpacked files or
texture descriptions. Use --description when working on a single UI texture description file instead of the whole
description set.
Equipment commands are tied to the equipment icon atlas. Description commands are tied to XML texture description files
under src/engine/forms/textures_descr.
Failure notes
Equipment commands depend on valid system.ltx icon coordinates. Description commands depend on XML description names
and matching source textures.
Link
link, unlink, and relink connect the build output and game folders used during local development.
npm run cli -- link
What gets linked
| Link | Source | Destination |
|---|---|---|
| Game link | configured game root | target/game_link |
| Gamedata link | target/gamedata | configured game gamedata folder |
| Logs link | configured game logs folder | target/logs_link |
Game paths come from Steam detection or the fallback values in cli/config.json.
Commands
link: create the game, gamedata, and logs links.unlink: remove the gamedata link, logs link, and game link.relink: rununlink, thenlink.
link and relink support -f, --force to remove existing link targets first. Use it carefully: if a real game
gamedata folder exists, --force removes it before creating the link.
Examples
npm run cli -- build --clean
npm run cli -- link
npm run cli -- relink --force
npm run cli -- unlink
Failure notes
If linking fails, verify the configured game path, executable name, and Steam installation detection. verify project
checks the same paths.
Lint
Linting is exposed through package scripts, not a Commander subcommand. Use it for TypeScript, TSX, and CLI source style checks.
npm run lint
Commands
| Script | Purpose |
|---|---|
npm run lint | Run ESLint with the standard config. |
npm run lint:strict | Run the stricter ESLint config. |
The standard command stores its cache under target/eslint/cache.json.
Examples
npm run lint
npm run lint:strict
npm run lint -- --fix
Inputs and output
Lint reads TypeScript, TSX, and JavaScript sources from the repository and reports rule violations to the terminal. The standard script reuses the ESLint cache, so repeated runs after small edits are faster than a cold run.
Use the normal lint command during documentation-adjacent code edits or focused implementation work. Use strict lint before larger changes when you want the additional repository checks.
Related checks
Use npm run typecheck for TypeScriptToLua script type checks and npm run typecheck:tests for test TypeScript checks.
Use npm test for Jest.
Logs
logs prints the tail of the active engine log from the configured game logs folder.
npm run cli -- logs
npm run cli -- logs 100
Behavior
The optional argument is the number of lines to print. Invalid values fall back to 15, and the command caps output at
200 lines.
The command detects the log file from the configured game paths:
- when
bin/bin.jsonexists, it expectsopenxray_<username>.log; - otherwise it expects
xray_<username>.log.
It reads from the real game logs folder. If you ran link, the same folder is also reachable through
target/logs_link.
Examples
npm run cli -- logs
npm run cli -- logs 50
npm run cli -- logs 500
The last example still prints at most 200 lines.
When to use it
Use logs after start_game or a manual game launch to inspect the newest script/runtime messages without navigating
to the game logs folder. It is the fastest check after a crash during startup, a failed script reload, or a missing file
reported by the engine.
For longer inspection, open the linked logs folder or the real game logs directory and use an editor that can follow file updates.
Failure notes
If no active log is found, start the game once, check the configured game path, or run npm run cli -- link to create
the logs link for easier inspection.
Open
Open commands launch the system file explorer for common project and game folders.
npm run cli -- open_game_folder
npm run cli -- open_project_folder
Commands
| Command | Opens |
|---|---|
open_game_folder | The configured or detected S.T.A.L.K.E.R. game root. |
open_project_folder | The stalker-xrf-engine repository root. |
open_game_folder uses the same game path resolution as link, logs, start_game, and verify project.
open_project_folder uses the repository root detected from the CLI process location.
Examples
npm run cli -- open_game_folder
npm run cli -- open_project_folder
When to use it
Use open_game_folder when checking linked gamedata, engine logs, or installed game binaries after build and
link. Use open_project_folder when a script or tool printed a project-relative path and you want to inspect the
source tree from Explorer.
These commands do not build, link, or verify files. They only open the resolved folders.
Failure notes
If the game folder does not open, check cli/config.json under targets or run npm run cli -- verify project to see
which path is being resolved.
Pack
pack creates distributable mod or game folders from the project.
npm run cli -- pack <type>
<type> must be mod or game.
Output
| Type | Output folder | Contents |
|---|---|---|
mod | target/mod_package | gamedata, and optionally bundled engine binaries. |
game | target/game_package | engine bin, root assets, gamedata, and optionally compressed db archives. |
Options
--nb, --no-build: package already built assets without runningbuild.--nc, --no-compress: for game packages, skip archive compression and copy allgamedata.--na, --no-asset-overrides: pass through to build and skip override/locale resource roots.-e, --engine <type>: use a bundled engine fromcli/bin/engines.--se, --skip-engine: do not include engine binaries. This is allowed formodpackages and rejected forgame.-o, --optimize: build scripts without Lua logs.-v, --verbose: print verbose logs.-c, --clean: remove the package output folder first.
Examples
npm run cli -- pack mod --clean
npm run cli -- pack mod --skip-engine --no-build
npm run cli -- pack game --clean --optimize
npm run cli -- pack game --engine release
npm run pack:mod
npm run pack:game
Failure notes
Game packages require a valid bundled engine. Compressed game packages also require successful build and compression
steps, because target/db is copied into the package.
Particles
particles wraps the external XRF tools binary for packing and unpacking particles.xr.
npm run cli -- particles <command>
Commands
| Command | Default input | Default output |
|---|---|---|
particles unpack | src/resources/particles.xr | src/resources/particles_unpacked |
particles pack | src/resources/particles_unpacked | src/resources/particles.xr |
Options
Both subcommands support:
-p, --path <path>: source file or source directory.-d, --dest <dest>: output file or output directory.-v, --verbose: print verbose logs.-f, --force: remove an existing output before writing.
Examples
npm run cli -- particles unpack
npm run cli -- particles unpack --force
npm run cli -- particles pack
npm run cli -- particles pack --path src/resources/particles_unpacked --dest src/resources/particles.xr
Workflow
Unpack first when you need to inspect or edit particle definitions as files. Pack after edits to rebuild particles.xr
for resources or packaging. Use --force when replacing a previous unpacked folder or packed output.
The command delegates to the bundled XRF tools binary. If you need lower-level particle conversion commands outside the engine repository defaults, use the Tools CLI particle commands directly.
Related verification
npm run cli -- verify particles-packed
npm run cli -- verify particles-unpacked
Parse
parse contains utility commands that generate JSON or HTML support files under target/parsed.
npm run cli -- parse <command>
Commands
| Command | Purpose | Output |
|---|---|---|
parse dir_as_json <path> | Flatten a directory tree into a JSON object keyed by normalized file names. | target/parsed/<folder>.json |
parse externals | Render script declaration externs into a small HTML reference. | target/parsed/externals.html |
dir_as_json resolves <path> relative to the repository root.
Options
parse dir_as_json supports:
-e, --no-extension: omit file extensions in JSON values.
Examples
npm run cli -- parse dir_as_json src/resources/textures
npm run cli -- parse dir_as_json src/resources/textures --no-extension
npm run cli -- parse externals
Output usage
Use dir_as_json when another script needs a compact index of files under a resource folder. The command writes
generated support data under target/parsed, so treat the result as disposable build output.
Use parse externals when checking the script declaration surface exposed by conditions, effects, and dialogs. The
generated HTML is a local reference; edit the TypeScript declaration sources to change the exported behavior.
Failure notes
dir_as_json requires a path argument. parse externals reads TypeScript declaration sources under
src/engine/scripts/declarations and skips tests and index files.
Spawn
spawn contains ALife spawn file utilities. The engine CLI currently exposes the unpack workflow.
npm run cli -- spawn unpack
Defaults
| Field | Default |
|---|---|
| Source | src/resources/spawns/all.spawn |
| Destination | target/all_spawn |
The command delegates to cli/bin/tools/xrf-cli unpack-spawn.
Options
-p, --path <path>: source spawn file path.-d, --dest <dest>: output directory.-v, --verbose: print verbose logs.-f, --force: remove an existing unpacked destination before writing.
Examples
npm run cli -- spawn unpack
npm run cli -- spawn unpack --force
npm run cli -- spawn unpack --path src/resources/spawns/all.spawn --dest target/all_spawn
Output
The output directory contains the unpacked spawn representation produced by the XRF tools CLI. The engine wrapper is intended for inspection and verification workflows in this repository; it does not expose pack or repack commands.
Keep generated unpack output under target/ unless you are intentionally preparing source data for another tool.
Failure notes
The source spawn file must exist. Use the Tools CLI spawn commands when you need lower-level spawn info, pack, repack, or verification operations.
Start
start_game starts the configured game executable.
npm run cli -- start_game
The executable path is resolved from the same game-path logic used by link, open_game_folder, logs, and
verify project. Configuration lives in cli/config.json under targets:
stalker_game_steam_id: Steam app id used for automatic detection;stalker_game_fallback_path: fallback game folder when Steam detection is not enough;stalker_app_path: executable name inside the game folder.
Typical workflow
npm run cli -- build --clean
npm run cli -- link
npm run cli -- start_game
Inputs and output
The command reads the configured game target and launches the executable from that folder. It does not rebuild scripts, copy gamedata, or wait for the engine process to finish.
Use it after build and link when you want to test the currently linked project output. Use logs after the game
starts if you need the script engine error output.
Failure notes
If the process does not start, run npm run cli -- verify project and check the resolved game folder and executable.
The command starts the executable asynchronously, so later runtime errors are written to the engine log rather than to
the CLI process.
Test
Tests are run through package scripts rather than a Commander subcommand. The project uses Jest with the config at
cli/test/jest.config.ts.
npm test
Common commands
| Command | Purpose |
|---|---|
npm test | Run the Jest suite. |
npm test -- <path-or-pattern> | Run focused tests. |
npm run test:coverage | Run Jest with coverage output. |
npm run typecheck | Run TypeScriptToLua type checking without emitting scripts. |
npm run typecheck:tests | Type-check test sources with TypeScript. |
Coverage output is written under target/coverage_report.
Examples
npm test
npm test -- src/engine/scripts/register.test.ts
npm run test:coverage
npm run typecheck
npm run typecheck:tests
Notes
Runtime tests use fixtures and mocks under src/fixtures for X-Ray APIs, Lua behavior, engine helpers, and CLI
utilities. Use focused Jest paths first when changing a specific manager, scheme, binder, or CLI helper.
The typecheck commands do not execute tests. They catch TypeScript and TypeScriptToLua issues that can pass Jest when a
mocked runtime path is not exercised. For gameplay logic changes, run the focused Jest test and npm run typecheck
before broader validation.
Translations
translations contains helper commands for JSON translation sources and original X-Ray XML string tables.
npm run cli -- translations <command>
Commands
| Command | Purpose |
|---|---|
translations init <path> | Add all configured language keys to a JSON translation file or folder. |
translations to_json <path> | Convert XML string table files or folders into JSON translation sources. |
translations check | Verify the project translation sources under src/engine/translations. |
The configured languages come from cli/config.json. Current locales are eng, fra, ger, ita, pol, rus,
spa, and ukr.
Options
init supports:
-v, --verbose: print verbose logs.
to_json supports:
-l, --language <locale>: language key to fill from the XML text.-c, --clean: clean the output path before writing.-o, --output <path>: output file or directory. Defaults totarget/parsed.-e, --encoding <encoding>: source XML encoding. If omitted, the command tries to read the XML header and then uses locale defaults.-v, --verbose: print verbose logs.
check supports:
-l, --language <locale>: check one language instead of all languages.-s, --strict: fail on missing entries.-v, --verbose: print verbose logs.
Examples
npm run cli -- translations init src/engine/translations/st_dialogs.json
npm run cli -- translations to_json configs/text/eng --language eng --output src/engine/translations
npm run cli -- translations check
npm run cli -- translations check --language ukr --strict
Failure notes
to_json requires a known locale. When converting a folder, the output path must be a directory, not a single file.
Verify
verify runs project and gamedata validation commands.
npm run cli -- verify <command>
The package script npm run verify is shorthand for npm run cli -- verify project.
Commands
| Command | Checks |
|---|---|
verify project | CLI config, game path, game executable, engine link, gamedata link, logs link, and configured resources. |
verify gamedata | Asset references across configured resource roots and config sources. |
verify ltx | LTX includes, inheritance, section shape, and $scheme validation. |
verify particles-packed | Packed src/resources/particles.xr. |
verify particles-unpacked | Unpacked particles under src/resources/particles_unpacked. |
Options
verify gamedata -v, --verbose: print verbose external-tool logs.verify ltx -s, --strict: run strict LTX validation.verify ltx -v, --verbose: print verbose external-tool logs.- Particle verification commands support
-v, --verbose.
Examples
npm run verify
npm run cli -- verify project
npm run cli -- verify ltx
npm run cli -- verify ltx --strict
npm run cli -- verify gamedata --verbose
npm run cli -- verify particles-packed
Failure notes
verify project reports setup problems but catches its own top-level error. verify ltx and particle verification
delegate to the tools binary and fail the process on invalid data.
Extensions
Extensions are optional script modules loaded from gamedata/extensions. They let XRF keep larger gameplay changes
separate from the core script engine.
The engine scans extension folders, loads each main.script, synchronizes the list with saved user preferences, and
registers enabled extensions during game start.
Extension Entry Point
Each extension has its own folder under extensions and an entry file named main.script after build output.
The module can export:
register(isNewGame, extension): called when the extension is enabled.unregister(isNewGame, extension): optional cleanup hook called when the extension is disabled.save(data): optional hook for extension dynamic data.load(data): optional hook for restoring extension dynamic data.
The TypeScript sources for built-in extensions live under src/engine/extensions.
Runtime State
Loaded extensions are stored in the runtime registry by name. The load order and enabled state are saved to
extensions_order.scopo in the game saves folder.
The main menu includes an extensions dialog. It lets the user reorder extensions and toggle extensions that declare they can be toggled.
Built-In Extensions
The current engine source includes these extension folders:
| Source folder | Extension name | Default state |
|---|---|---|
achievements_rewards | Achievement rewards | enabled |
enhanced_items_drop | Enhanced items drop (with upgrades) | disabled |
enhanced_location_progression | Enhanced location progression | enabled |
enhanced_treasures | Enhanced treasures | enabled |
original_start_position | Original start position | disabled |
Use the built-in extension pages as implementation references when adding a new extension:
- Achievement rewards
- Enhanced items drop
- Enhanced location progression
- Enhanced treasures
- Original start position
Config Files
Extensions can open extension-local LTX files through the extension utilities. main.ltx is the default relative file
name when no file name is provided.
Limitations
The current implementation covers discovery, ordering, enabling/disabling, registry registration, and save/load hooks. More advanced extension packaging, dependency declarations, and extension-specific build steps should be treated as future work unless the source adds them.
Achievement Rewards
Achievement rewards restores periodic reward spawns for selected vanilla achievements.
The source lives under src/engine/extensions/achievements_rewards.
Default State
The extension exports:
export const name = "Achievement rewards";
export const enabled = true;
It is enabled by default unless saved extension state overrides it.
Runtime Behavior
On registration, the extension subscribes to EGameEvent.ACTOR_UPDATE.
Each update checks whether the actor has gained these info portions:
detective_achievement_gained;mutant_hunter_achievement_gained.
When the configured period has elapsed, it spawns reward items into the configured actor treasure box and emits a tip notification.
Rewards
The reward period is 12 * 60 * 60 game seconds.
Reward targets:
| Achievement | Story box | Items |
|---|---|---|
| Detective | zat_a2_actor_treasure | medkit and antirads |
| Mutant hunter | jup_b202_actor_treasure | armor-piercing ammo and shells |
The spawn count is fixed in the update code: detective rewards spawn with count 4, and mutant hunter rewards spawn
with count 5.
Save Data
The extension persists two timestamps in dynamic extension data:
lastDetectiveAchievementSpawnAt;lastMutantAchievementSpawnAt.
The timestamps are serialized through the time helpers and restored on extension load.
Editing Notes
- Keep reward timing in
AchievementRewardsConfig.ts. - Keep achievement checks in
update.ts. - Add save/load fields when adding a new persistent reward timer.
- Keep notification captions aligned with translation ids.
Enhanced Items Drop
Enhanced items drop (with upgrades) adds random upgrades to weapons, outfits, and helmets when those items go online
for the first time.
The source lives under src/engine/extensions/enhanced_items_drop.
Default State
The extension exports:
export const name = "Enhanced items drop (with upgrades)";
export const enabled = false;
It is disabled by default. Saved extension state can enable it.
Runtime Behavior
On registration, the extension subscribes to:
ITEM_WEAPON_GO_ONLINE_FIRST_TIME;ITEM_OUTFIT_GO_ONLINE_FIRST_TIME;ITEM_HELMET_GO_ONLINE_FIRST_TIME.
For each item, onItemGoOnlineFirstTime reads the owner id. Actor-owned items are skipped.
The extension then calculates a random chance and applies a different rate depending on whether the item belongs to:
- a trader;
- another owner;
- the world.
If the chance passes one of the configured thresholds, the extension calls addRandomUpgrades.
Upgrade Tiers
The default config lives in EnhancedDropConfig.ts.
| Tier | Chance | Upgrade count |
|---|---|---|
| Common | 20 | 1 |
| Rare | 12 | 3 |
| Epic | 6 | 7 |
| Legendary | 1 | 30 |
The final upgrade count includes random dispersion from ADD_RANDOM_DISPERSION.
Save Data
This extension does not export save or load. It changes items when first-online item events are emitted.
Editing Notes
- Keep chance and count tuning in
EnhancedDropConfig.ts. - Keep item filtering in
enhanced_items_drop_utils.ts. - Do not apply this extension to actor-owned starting items unless that behavior is intentional.
Enhanced Location Progression
Enhanced location progression requires smart terrains to be discovered before some map and travel behavior can use
them.
The source lives under src/engine/extensions/enhanced_location_progression.
Default State
The extension exports:
export const name = "Enhanced location progression";
export const enabled = true;
It is enabled by default unless saved extension state overrides it.
Runtime Behavior
On registration, the extension sets:
mapDisplayConfig.REQUIRE_SMART_TERRAIN_VISIT = true;
This flag is checked by map display and travel code.
Map Spots
updateTerrainsMapSpotDisplay shows global terrain spots only when:
REQUIRE_SMART_TERRAIN_VISITis disabled; or- the actor has the
"<terrain>_visited"info portion.
Restrictor lifecycle code gives visited info portions when the actor reaches the matching restrictor.
Travel
TravelManager.isSmartAvailableToReach rejects smart terrain travel targets on the current level when
REQUIRE_SMART_TERRAIN_VISIT is enabled and the terrain has not been visited.
Save Data
This extension does not export save or load. It changes runtime config during extension registration.
Editing Notes
- Keep the progression toggle in
main.ts. - Check map and travel behavior together when changing this flag.
- Preserve visited info portion naming because other code checks
"<terrain>_visited".
Enhanced Treasures
Enhanced treasures enables typed treasure map spots.
The source lives under src/engine/extensions/enhanced_treasures.
Default State
The extension exports:
export const name = "Enhanced treasures";
export const enabled = true;
It is enabled by default unless saved extension state overrides it.
Runtime Behavior
On registration, the extension sets:
treasureConfig.ENHANCED_MODE_ENABLED = true;
The treasure map helper uses this flag when choosing the map spot icon for a treasure descriptor.
Map Spots
When enhanced mode is disabled, every treasure uses the generic treasure map mark.
When enhanced mode is enabled, getTreasureMapSpot maps treasure type to mark:
| Treasure type | Map mark |
|---|---|
COMMON | treasure |
RARE | treasure_rare |
EPIC | treasure_epic |
UNIQUE | treasure_unique |
Treasure state itself is still owned by TreasureManager and treasureConfig.TREASURES.
Save Data
This extension does not export save or load. Treasure manager state is saved by TreasureManager.
Editing Notes
- Keep the extension toggle in
main.ts. - Keep treasure type-to-icon behavior in
map_spot_treasure.ts. - Keep treasure state changes in
TreasureManager, not in this extension.
Original Start Position
Original start position changes the actor’s start vertex and position for new games.
The source lives under src/engine/extensions/original_start_position.
Default State
The extension exports:
export const name = "Original start position";
export const enabled = false;
It is disabled by default. Saved extension state can enable it.
Runtime Behavior
The extension receives isNewGame from the extension registration flow.
When isNewGame is true, it calls:
set_start_game_vertex_id(287);
set_start_position(createVector(268, 20, 560));
When isNewGame is false, it does nothing. This prevents loaded saves from having their actor position changed.
Save Data
This extension does not export save or load.
Editing Notes
- Keep the
isNewGameguard. - Use engine start-position APIs only during new-game startup.
- Update tests if the vertex id or vector changes.
- Check the extension registration state when the code looks correct but the actor still starts elsewhere.
XRF Tools
stalker-xrf-tools is the companion tools workspace for XRF development. It contains reusable Rust crates, a CLI, and a
Tauri desktop application.
Use it for tasks that are awkward to do by hand:
- reading and unpacking X-Ray archives;
- verifying and formatting LTX configs;
- converting and checking translations;
- inspecting script exports;
- packing and unpacking equipment icons and texture descriptions;
- inspecting or converting spawn, particles, OGF, and OMF data.
Repository Layout
crates/: reusable Rust crates for X-Ray formats and project validation.bin/xrf-cli: command-line tool.bin/xrf-app: Tauri backend for the desktop application.bin/xrf-ui: React frontend for the desktop application.
The engine repository uses a bundled tools binary from cli/bin for some build and asset operations.
Interfaces
Use the desktop app for manual inspection and editing workflows. Use the CLI for repeatable scripts, CI checks, and engine build integration.
Choosing an interface
Use the CLI when the command must be repeatable, run in CI, or become part of an engine build step. Examples include LTX verification, translation builds, archive unpacking, spawn conversion, and texture packing.
Use the desktop app when you need to inspect structured project data with navigation: archives, configs, dialogs, exports, icons, spawns, and translations. Some app routes are read-only or prototype workflows; the page for each app tool calls out what is currently wired.
Source truth
Tool behavior comes from the tools workspace, not from the book text:
- CLI commands:
stalker-xrf-tools/bin/xrf-cli/src/commands; - desktop backend commands:
stalker-xrf-tools/bin/xrf-app/src; - desktop frontend routes:
stalker-xrf-tools/bin/xrf-ui/src/applications; - reusable format logic:
stalker-xrf-tools/crates.
Tools Application

The XRF tools application is a Tauri desktop app backed by Rust commands and a React UI. Use it for manual inspection, visual browsing, and one-off conversion tasks while working with X-Ray game data.
The application source is split across:
stalker-xrf-tools/bin/xrf-app: Tauri backend plugins and commands;stalker-xrf-tools/bin/xrf-ui: React routes, pages, stores, and components;stalker-xrf-tools/crates/*: reusable parsers, verifiers, packers, and project readers.
Tools
| Tool | Use it for | Writes files |
|---|---|---|
| Archive editor | Browse .db archive projects, read files, and unpack archives. | Unpack workflow writes files. |
| Config editor | Verify and format LTX config projects. | Formatter can write files. |
| Dialog editor | Inspect the current dialog graph prototype. | No production data workflow is wired. |
| Exports viewer | Browse parsed condition, dialog, and effect declarations. | No |
| Icon editor | Open equipment sprites and pack equipment icons. | Pack workflow writes DDS output. |
| Spawn editor | Inspect, import/export, save, pack, and unpack spawn data. | Save/export/pack/unpack workflows write files. |
| Translation editor | Open and inspect translation JSON projects. | No write workflow is exposed in the current UI. |
Project paths
The app stores selected XRF project and configs paths in local storage. Several tools use those paths to prefill common
locations such as src/engine/configs, target/gamedata/spawns/all.spawn, target/game_link, and
src/engine/translations.
CLI vs app
Use the app when you need to inspect data interactively. Use Tools CLI when the task should be repeatable, scripted, or run in CI.
Archive Editor
The archive editor works with X-Ray .db archive projects. It can open an archive set, show project metadata, read
individual files as text, and unpack archives to a destination folder.
Screens
| Screen | Route | Purpose |
|---|---|---|
| Navigator | /archives_editor | Choose between opening an archive project and unpacking archives. |
| Open/editor | /archives_editor/editor | Open an archive project and browse loaded archive data. |
| Unpacker | /archives_editor/unpacker | Select a packed archive folder and an output folder, then unpack. |
Backend commands
The Tauri archives-editor plugin exposes:
open_archives_project;close_archives_project;has_archives_project;get_archives_project;read_archive_file;unpack_archives_path.
unpack_archives_path opens the selected archive path as an ArchiveProject and unpacks it in parallel with 32
workers.
Workflow
- Use Open to inspect archives without extracting everything.
- Use file reading from the editor view when you need to inspect a text file inside the archive.
- Use Unpack when you need the archive contents on disk.
Default project-aware paths point the unpacker at target/game_link for source archives and target/unpacked_archives
for output when an XRF project path is configured.
CLI equivalent
Use xrf-tool unpack-archive for repeatable unpacking from scripts.
Dialog Editor
The dialog editor is currently a prototype UI surface for dialog graph work. It is useful for checking the shape of the future graph editor, not for production dialog data editing.
Current routes
| Route | Purpose |
|---|---|
/dialog_editor | Navigator with an Open entry. |
| Experimental graph route | Test graph page using React Flow dialog and phrase nodes. |
The current app source does not register a dialog-editor Tauri plugin and does not expose import, export, save, or validation commands for real dialog XML.
What is implemented
- A navigator page.
- A test graph with dialog and phrase node components.
- Client-side graph interactions through React Flow.
What is not implemented
- Opening engine dialog XML.
- Saving dialog XML.
- Validating phrase links or script predicates/actions.
- Synchronizing dialog text with translation files.
Production workflow
For real dialog changes, edit the engine sources directly:
- dialog XML under
src/engine/configs/gameplay; - dialog extern declarations under
src/engine/scripts/declarations/dialogs; - dialog text under
src/engine/translations.
See Dialog configs for the current production documentation.
Config Editor
The config editor works with LTX config projects. The current production-ready workflows are verification and formatting.
Screens
| Screen | Route | Purpose |
|---|---|---|
| Navigator | /configs_editor | Choose Explorer, Verifier, or Formatter. |
| Explorer | /configs_editor/explorer | Route and form shell for opening config folders. The current source does not wire the open action. |
| Verifier | /configs_editor/verifier | Verify an LTX project folder and display validation errors. |
| Formatter | /configs_editor/formatter | Check formatting or format all LTX files under a folder. |
Backend commands
The Tauri configs-editor plugin exposes:
verify_configs_path;check_format_configs_path;format_configs_path.
Verification opens the folder with scheme checking enabled and strict checking disabled. Formatting uses the shared
xray-ltx formatter.
Workflow
- Select the configs folder. When an XRF project path is configured, the app can prefill
src/engine/configs. - Run Verifier after config edits to inspect include, inheritance, section, and scheme errors.
- Run Formatter in check mode first when reviewing changes.
- Disable check mode only when you want the formatter to rewrite files.
CLI equivalent
Use xrf-tool verify-ltx and xrf-tool format-ltx for repeatable checks. In the engine repository, use
npm run cli -- verify ltx and npm run cli -- format ltx.
Exports Viewer
The exports viewer reads script declaration folders and displays exported conditions, dialog functions, effects, and their parameter declarations.
Use it when editing config logic and you need to confirm which script externs are available.
Screens
| Screen | Route | Purpose |
|---|---|---|
| Navigator | /exports_editor | Open export sources. |
| Exports view | /exports_editor/exports | Browse parsed declarations and filter the displayed exports. |
Backend commands
The Tauri exports-editor plugin exposes:
open_xr_exports: parse conditions, dialogs, and effects folders together;get_xr_exports;close_xr_exports;open_xr_effects;parse_xr_effects;get_xr_effects;close_xr_effects;has_xr_effects.
Source folders
When an XRF project path is configured, the UI can derive default declaration paths from:
src/engine/scripts/declarations/conditions;src/engine/scripts/declarations/dialogs;src/engine/scripts/declarations/effects.
Notes
The viewer is read-only. To change exports, edit the declaration source files in the engine repository and reload the viewer.
Use the CLI-generated externs reference when you need a static artifact under target/parsed. Use the app viewer when
you are browsing declarations interactively while editing configs.
If a condition or effect is missing from the viewer, check that it is declared in the expected conditions, dialogs, or effects folder and that the project path points at the engine repository you are editing.
Icon Editor
The icon editor works with equipment icon sprites and icon descriptor data. The fully wired workflow is equipment sprite opening and equipment icon packing.
Screens
| Screen | Route | Status |
|---|---|---|
| Equipment editor | /icons_editor/icons_equipment | Opens a DDS equipment sprite with system.ltx descriptors and displays it. |
| Equipment pack | /icons_editor/icons_equipment_pack | Packs separate icon files into an equipment DDS sprite. |
| Equipment unpack | /icons_editor/icons_equipment_unpack | Route and form shell. No backend unpack command is wired in the current UI. |
| Description editor | /icons_editor/icons_description | Route shell. |
| Description pack | /icons_editor/icons_description_pack | Route and form shell. |
| Description unpack | /icons_editor/icons_description_unpack | Route and form shell. |
Backend commands
The Tauri icons-editor plugin exposes:
open_equipment_sprite;reopen_equipment_sprite;get_equipment_sprite;close_equipment_sprite;pack_equipment.
open_equipment_sprite reads the DDS as a PNG preview and reads equipment descriptors from system.ltx.
pack_equipment packs source icons into a DDS using BC3 RGBA compression.
Workflow
- Open the equipment sprite with the matching
system.ltx. - Inspect section icon rectangles in the equipment editor.
- Use Equipment pack when separate icon files should be packed into the final equipment DDS.
When an XRF project path is configured, the app tries to prefill common paths such as src/engine/configs/system.ltx
and src/resources/textures/ui/ui_icon_equipment.dds.
CLI equivalent
Use xrf-tool unpack-equipment-icons, xrf-tool pack-equipment-icons, xrf-tool unpack-texture-description, and
xrf-tool pack-texture-description when you need workflows that are not fully wired in the app.
Spawn Editor
The spawn editor opens and inspects ALife spawn data. It can read packed spawn files, import unpacked spawn folders, export unpacked data, and save packed spawn files.
Screens
| Screen | Route | Purpose |
|---|---|---|
| Navigator | /spawn_editor | Choose Open, Unpack, or Pack. |
| Editor | /spawn_editor/editor | Open and inspect the current spawn file. |
| Unpack | /spawn_editor/unpack | Unpack a spawn file into a folder. |
| Pack | /spawn_editor/pack | Pack an unpacked spawn folder into a spawn file. |
Data views
The backend exposes accessors for:
- header data;
- graph data;
- ALife spawn objects;
- artefact spawn points;
- patrols;
- full loaded spawn file data.
Backend commands
The Tauri spawns-editor plugin exposes:
open_spawn_file;import_spawn_file;export_spawn_file;save_spawn_file;close_spawn_file;get_spawn_file;get_spawn_file_header;get_spawn_file_graphs;get_spawn_file_alife_spawns;get_spawn_file_artefact_spawns;get_spawn_file_patrols;has_spawn_file.
Workflow
- Use Open for a packed
all.spawnfile. - Inspect header, graph, ALife, artefact, and patrol chunks in the editor.
- Use Unpack to export a packed spawn file into editable structured data.
- Use Pack to rebuild a packed spawn file from an unpacked folder.
When an XRF project path is configured, default paths point at target/gamedata/spawns/all.spawn,
target/spawns/unpacked, and target/spawns/repacked/repacked.spawn.
Safety note
Spawn files are binary game data. Keep a backup before saving or replacing a spawn file.
Translation Editor
The translation editor opens and reads XRF translation projects. The current app workflow is read-only inspection.
Screens
| Screen | Route | Purpose |
|---|---|---|
| Navigator | /translations_editor | Open a translation project. |
| Project view | /translations_editor/project | Inspect the loaded translation project. |
Backend commands
The Tauri translations-editor plugin exposes:
open_translations_project;read_translations_project;get_translations_project;close_translations_project.
Both open/read paths use TranslationProject::read_project.
Workflow
- Open a translation project folder or file.
- Inspect loaded translation ids and language values in the project view.
- Close and reopen after editing translation sources outside the app.
When an XRF project path is configured, the app can prefill src/engine/translations.
Output and limitations
The app keeps the parsed translation project in the Tauri plugin state and displays it in the project view. It does not currently expose a save action, build XML output, or run translation verification from the UI.
Use the app for inspection while comparing ids across languages. Use the CLI when you need to initialize files, build game XML, or validate translation structure.
CLI equivalent
Use xrf-tool initialize-translation, xrf-tool build-translation, and xrf-tool verify-translation for write, build,
and verification workflows. In the engine repository, use npm run cli -- translations ... for XML-to-JSON conversion
and project translation checks.
Tools CLI
The Tools CLI is the Rust xrf-tool binary from stalker-xrf-tools/bin/xrf-cli. Use it for repeatable asset
inspection, conversion, packing, unpacking, formatting, and verification outside the engine repository wrapper.
xrf-tool <command> --help
The engine CLI wraps some of these commands through npm run cli -- ..., but xrf-tool is the lower-level interface
used by both the engine scripts and the desktop tools.
Command groups
| Group | Commands |
|---|---|
| Archive | unpack-archive |
| Gamedata | verify-gamedata |
| LTX | format-ltx, verify-ltx |
| Models | info-ogf, info-omf |
| Particles | info-particles, unpack-particles, pack-particles, repack-particles, re-unpack-particles, verify-particles |
| Spawn | info-spawn, unpack-spawn, pack-spawn, repack-spawn, verify-spawn |
| Textures | info-dds, unpack-equipment-icons, pack-equipment-icons, unpack-texture-description, pack-texture-description |
| Translations | initialize-translation, build-translation, verify-translation, parse-translation |
Logging
Most commands support command-specific --silent or --verbose flags. The binary also initializes Rust logging from
RUST_LOG when the environment variable is present.
Read and write commands
Inspection commands such as info-ogf, info-omf, info-dds, info-spawn, and info-particles read input files and
print parsed metadata. Conversion commands such as archive unpacking, spawn packing, particle packing, texture packing,
and translation building write output paths.
Use explicit --path and --dest values when documenting or scripting a command. Defaults are useful for local manual
work, but explicit paths make generated assets easier to reproduce.
Usage pattern
Use the command-specific page when working with a file format. Each page lists the required input, output behavior, and the commands that are safe to run as read-only inspection versus commands that write files.
When running from the engine repository, prefer the engine CLI wrapper if it already exposes the workflow. Use
xrf-tool directly when you need a lower-level command that the engine wrapper does not register.
Archive CLI
Archive commands work with X-Ray .db database archives.
unpack-archive
unpack-archive opens an archive project and exports the contained files to a folder.
xrf-tool unpack-archive --path gamedata.db0 --dest unpacked
Options
-p, --path <path>: path to a.dbarchive file. Required.-d, --dest <dest>: destination folder. Defaults tounpacked.--parallel <count>: number of parallel unpack workers. Defaults to32.--dry: read and summarize the archive without writing files.-s, --silent: disable command logging.
Relative destination paths are resolved from the current working directory.
Output
Without --silent, the command prints:
- archive count;
- file count;
- compressed size;
- real unpacked size;
- unpack duration when files are written.
With --dry, the command still reads the archive metadata but does not write the extracted files. Use it to confirm
that a database can be opened before spending time on a full unpack.
Examples
xrf-tool unpack-archive --path .\db\configs.db0 --dest .\unpacked\configs
xrf-tool unpack-archive --path .\db\textures.db0 --dest .\unpacked\textures --parallel 8
xrf-tool unpack-archive --path .\db\sounds.db0 --dry
Failure notes
The source path must point to a readable X-Ray database archive. If the destination already contains files, choose a new folder or clean it before running the command.
Gamedata CLI
Gamedata commands validate a project across one or more gamedata roots. Use them before packaging or when investigating missing textures, meshes, animations, scripts, configs, particles, or weather data.
verify-gamedata
xrf-tool verify-gamedata --root ./gamedata --configs ./gamedata/configs
Options
-r, --root <paths...>: one or more gamedata roots. Required. Multiple paths are comma-separated.-i, --ignore <names...>: ignored files or folders. Multiple names are comma-separated.-c, --configs <path>: configs folder. Defaults toconfigsunder the first root.--checks <checks...>: selected verification checks. If omitted, all checks run.--silent: disable logging.-v, --verbose: enable verbose logging.-s, --strict: enable strict mode.
If --ignore is omitted, the command ignores common repository and unpacked-source entries: .git, .idea,
particles_unpacked, textures_unpacked, .gitignore, .gitattributes, README.md, and LICENSE.
Examples
xrf-tool verify-gamedata --root ./gamedata
xrf-tool verify-gamedata --root ./base,./override --configs ./override/configs
xrf-tool verify-gamedata --root ./gamedata --ignore .git,textures_unpacked --strict
Result
The command exits with a non-zero status when the project is invalid. In normal logging mode it prints each failure message before exiting.
LTX CLI
LTX commands format and verify .ltx and .ini config files. Use them for standalone config projects or when you need
the lower-level tool behind the engine repository’s format ltx and verify ltx commands.
format-ltx
Formats one file or every LTX file under a folder.
xrf-tool format-ltx --path ./gamedata/configs
xrf-tool format-ltx --path ./gamedata/configs --check
Options:
-p, --path <path>: file or folder to format. Required.-c, --check: check formatting without rewriting project files.-s, --silent: disable logging.-v, --verbose: enable verbose logging.
--check is implemented for folders. Single-file mode formats the file.
verify-ltx
Verifies an LTX project folder with scheme and strict-project options enabled.
xrf-tool verify-ltx --path ./gamedata/configs
xrf-tool verify-ltx --path ./gamedata/configs --strict
Options:
-p, --path <path>: configs root folder. Required.--silent: disable logging.-v, --verbose: enable verbose logging.-s, --strict: enable strict checking.
Failure notes
verify-ltx expects a directory, not a single file. It fails when includes, inheritance, section fields, or scheme
validation produce errors.
Scheme definitions are documented in Script config schemes.
OGF CLI
OGF commands inspect X-Ray model files.
info-ogf
xrf-tool info-ogf --path ./meshes/example.ogf
Options:
-p, --path <path>: path to an.ogffile. Required.
Output
The command reads the model and prints available metadata:
- header version, model type, shader id, bounding box, and bounding sphere;
- texture and shader names;
- description chunk data when present;
- bones and parent names when present;
- motion references when present;
- child model texture and shader names for nested OGF data.
When to use it
Use info-ogf to confirm that a mesh file can be parsed, to inspect texture references, or to compare model metadata
without opening a graphical tool.
Workflow
Run info-ogf before texture or model packaging when you need to confirm what a mesh references. The command is
read-only: it does not rewrite chunks, normalize paths, or repair model data.
If a model fails to parse, first confirm the file is an OGF from the expected game version. Then compare the reported failure with neighboring meshes from the same source archive.
OMF CLI
OMF commands inspect X-Ray motion files.
info-omf
xrf-tool info-omf --path ./meshes/example.omf
Options:
-p, --path <path>: path to an.omffile. Required.
Output
The command reads the motion file and prints:
- OMF version;
- motion count and motion names;
- total bone count;
- animation part names;
- bones assigned to each animation part.
When to use it
Use info-omf when checking whether a motion file is readable, whether expected motions are present, or how motion
parts map to skeleton bones.
Workflow
Run info-omf when debugging missing animations or checking a packed resource set. The command is read-only and prints
the parsed structure; it does not merge, split, or repair motion files.
If an expected animation is absent, check the source OMF first and then inspect the model or config that references the motion name.
Failure notes
The command expects a readable .omf file. It reports parsed metadata to stdout and leaves the source file unchanged.
When comparing animation packages, run the command on both files and compare motion names before checking higher-level
config references.
Particles CLI
Particle commands inspect, verify, pack, unpack, and round-trip particles.xr data.
Commands
| Command | Purpose | Writes files |
|---|---|---|
info-particles | Print version, effect count, and group count. | No |
unpack-particles | Export a packed particles.xr into a folder. | Yes |
pack-particles | Build a packed particles.xr from an unpacked folder. | Yes |
repack-particles | Read a packed file and write it to another packed file. | Yes |
re-unpack-particles | Read an unpacked folder and export it to another unpacked folder. | Yes |
verify-particles | Check whether packed or unpacked particle data can be parsed. | No |
Examples
xrf-tool info-particles --path ./particles.xr
xrf-tool unpack-particles --path ./particles.xr --dest ./particles_unpacked --force
xrf-tool pack-particles --path ./particles_unpacked --dest ./particles.xr --force
xrf-tool repack-particles --path ./particles.xr --dest ./particles.repacked.xr
xrf-tool re-unpack-particles --path ./particles_unpacked --dest ./particles_unpacked_roundtrip
xrf-tool verify-particles --path ./particles.xr
xrf-tool verify-particles --path ./particles_unpacked --unpacked
Shared options
Read commands require -p, --path <path>. Write commands that create output also use -d, --dest <dest>.
unpack-particles and pack-particles support -f, --force to remove an existing destination before writing.
Failure notes
Packing fails if the output file already exists and --force is not supplied. Unpacking fails if the destination folder
already exists and --force is not supplied.
Spawn CLI
Spawn commands inspect, verify, pack, unpack, and round-trip ALife .spawn files.
Commands
| Command | Purpose | Writes files |
|---|---|---|
info-spawn | Print header, object, artefact spawn, patrol, and graph counts. | No |
unpack-spawn | Export a packed spawn file into a folder. | Yes |
pack-spawn | Build a packed spawn file from an unpacked folder. | Yes |
repack-spawn | Read a packed spawn file and write it to another packed file. | Yes |
verify-spawn | Check whether a packed spawn file can be parsed. | No |
Examples
xrf-tool info-spawn --path ./all.spawn
xrf-tool unpack-spawn --path ./all.spawn --dest ./all_spawn --force
xrf-tool pack-spawn --path ./all_spawn --dest ./all.spawn --force
xrf-tool repack-spawn --path ./all.spawn --dest ./all.repacked.spawn
xrf-tool verify-spawn --path ./all.spawn
Options
pack-spawn:
-p, --path <path>: unpacked spawn folder. Required.-d, --dest <dest>: output.spawnfile. Defaults tounpacked.-f, --force: remove an existing output file first.
unpack-spawn:
-p, --path <path>: source.spawnfile. Required.-d, --dest <dest>: output folder. Defaults tounpacked.-f, --force: remove an existing output folder first.-s, --silent: disable logging.
info-spawn, verify-spawn, and repack-spawn require -p, --path <path>. repack-spawn also requires
-d, --dest <dest>.
Failure notes
Packing and unpacking reject existing destinations unless --force is supplied.
Texture CLI
Texture commands inspect DDS files and pack or unpack icon-related assets.
Commands
| Command | Purpose |
|---|---|
info-dds | Print DDS size, metadata, mipmap, format, and compression details. |
unpack-equipment-icons | Slice an equipment icon sprite into section icon files using system.ltx. |
pack-equipment-icons | Pack section icon files into an equipment DDS sprite using system.ltx. |
unpack-texture-description | Slice textures based on XML texture descriptions. |
pack-texture-description | Pack textures based on XML texture descriptions. |
DDS inspection
xrf-tool info-dds --path ./textures/ui/ui_icon_equipment.dds
The command prints file size, metadata size, pixel data size, dimensions, mipmap information, pitch or linear size when present, block size, bits per pixel, FourCC, and D3D/DXGI format when known.
Equipment icons
xrf-tool unpack-equipment-icons --system-ltx ./configs/system.ltx --source ./textures/ui/ui_icon_equipment.dds --output ./textures_unpacked/ui/ui_icon_equipment
xrf-tool pack-equipment-icons --system-ltx ./configs/system.ltx --source ./textures_unpacked/ui/ui_icon_equipment --output ./textures/ui/ui_icon_equipment.dds --strict
pack-equipment-icons also accepts --gamedata <path> for resource lookup, plus -v, --verbose and -s, --strict.
unpack-equipment-icons supports -v, --verbose.
Texture descriptions
xrf-tool unpack-texture-description --description ./configs/ui/textures_descr/ui_actor.xml --base ./textures --output ./textures_unpacked --parallel
xrf-tool pack-texture-description --description ./configs/ui/textures_descr/ui_actor.xml --base ./textures_unpacked --output ./textures --strict
Description commands require --description and --base. If --output is omitted, output defaults to the base path.
Both support -v, --verbose, -s, --strict, and --parallel.
The engine repository wraps the common equipment and description workflows through npm run cli -- icons ....
Translation CLI
Translation commands work with XRF JSON translation projects and generated gamedata string tables.
Commands
| Command | Purpose |
|---|---|
initialize-translation | Ensure translation files have the expected language keys. |
build-translation | Build translation JSON into gamedata output files. |
verify-translation | Check translation completeness. |
parse-translation | Registered command for parsing XML translations; the current implementation accepts --path and returns without conversion. |
Initialize
xrf-tool initialize-translation --path ./translations
Options:
-p, --path <path>: translation file or folder. Required.-s, --silent: disable logging.-v, --verbose: enable verbose logging.
Build
xrf-tool build-translation --path ./translations --output ./gamedata/configs/text --language ukr
Options:
-p, --path <path>: translation file or folder. Required.-o, --output <path>: output folder. Required.-l, --language <language>: target language. Defaults toall.-s, --silent: disable logging.-v, --verbose: enable verbose logging.--sort: toggles sorting for dynamic translation files.
Verify
xrf-tool verify-translation --path ./translations --language ukr --strict
Options:
-p, --path <path>: translation file or folder. Required.-l, --language <language>: target language. Defaults toall.--strict: exit with a non-zero status when translations are missing.-s, --silent: disable logging.-v, --verbose: enable verbose logging.
Notes
The engine repository’s npm run cli -- translations ... command provides a separate XML-to-JSON conversion workflow
implemented in TypeScript. Use that wrapper when converting original X-Ray XML string tables into XRF JSON sources.
Useful Links
This page collects external tools and references commonly useful for X-Ray and S.T.A.L.K.E.R. modding.
X-Ray Engine and Modding
- OpenXRay: open-source X-Ray engine fork used by XRF.
- Anomaly modding book: community documentation for Anomaly-style modding concepts.
- STALKER Anomaly modded exes: useful reference for engine-side ideas and DLTX-related behavior.
Asset Tools
- AXRToolset: utilities for unpacking and working with gamedata.
- NVIDIA Texture Tools Exporter: DDS texture import/export tooling.
- xray-skls-file-browser: animation-related file browser and converter.
Development Tools
- Windows Terminal: terminal for running build, CLI, and validation commands on Windows.
- TypeScriptToLua: TypeScript-to-Lua compiler used by the XRF script build.
- Tauri: framework used by the XRF tools desktop app.
Game SDK
The X-Ray Game SDK is the editor/toolchain used for assets such as levels, spawns, particles, models, and other engine-native data.
XRF does not replace the SDK. The project adds source-controlled script/config/UI/translation workflows and helper tools around game data, while SDK-style tools remain useful for native X-Ray asset authoring.
When to Use the SDK
Use SDK tools when you need to work with data that is not represented well as text source:
- level editing;
- spawn and graph authoring;
- particle authoring;
- model or animation workflows;
- engine-native visual/editor data.
Use XRF source files and CLI tools when the change belongs to scripts, LTX/XML configs, UI XML, translations, or repeatable validation.
OpenXRay Reference
OpenXRay includes SDK-related work and documentation in its repository:
When SDK output is committed back to a project, keep generated binary output separate from hand-authored XRF sources.
Boundary with XRF
Treat SDK output as source only when the project intentionally owns that binary or editor-authored asset. Do not edit
target/ output by hand and do not treat packed game data as the source of truth.
For script/config changes, prefer XRF text sources and validation commands. For native asset changes, use the SDK or format-specific XRF tools, then document how the generated asset should be reproduced.
Common handoff pattern
- Author or inspect the native asset in the SDK or a format-specific tool.
- Export the asset into the project-owned resource location.
- Rebuild or repack with XRF CLI commands.
- Verify the resulting game data in game, especially for spawn, level, model, animation, and particle changes.
Lua Debugger
Lua debugging for X-Ray scripts is limited by the engine runtime, luabind objects, and the fact that XRF source starts as TypeScript before being emitted as Lua.
For most day-to-day script work, start with:
- focused Jest tests around TypeScript source;
- XRF logs and game logs;
- generated Lua inspection under
target/gamedata; - engine-side debugging when the issue crosses into C++ or luabind behavior.
Breakpoints
Breakpoints in original TypeScript source are not equivalent to breakpoints in emitted Lua. If you attach a Lua debugger, set breakpoints against generated Lua paths and verify that the generated script names match what the engine loads.
Luabind classes, userdata, and C++ callbacks may not expose enough Lua-level state for convenient inspection.
Practical workflow
Start with the generated Lua file that corresponds to the TypeScript module. Confirm that the file exists under
target/gamedata/scripts after a script build, then compare the emitted Lua names with the stack trace or log line from
the engine.
Use Lua debugging for runtime-only questions such as callback order, engine object state, and values passed through luabind. Use Jest and TypeScript tests for parser, manager, scheme, and utility behavior that can be reproduced outside the engine.
When a Lua debugger cannot inspect userdata, add temporary logging around the TypeScript source and rebuild scripts. Keep those logs local or remove them before committing documentation or code changes.
Visual Studio Lua Debugger Research
The previous research link for Lua debugging is:
Treat this as research material, not a documented XRF-supported debugging workflow.
Related Pages
AI and Logics
Use this page when an NPC is alive in game but its scheme, planner, relation, or animation state does not match what you expect.
Start with the in-game overlays when you need visual context. Switch to log dumps when you need the exact script state or GOAP action IDs.
Capturing an NPC
NPC capture is an engine debug feature. It is useful when you need to inspect the world from the NPC perspective.
- Run the game with a mixed or debug engine build.
- Hold left
Alt. - Click the NPC.
The camera switches to the captured object. Release the capture before continuing normal gameplay testing.
AI Overlays
Enable stalker and monster overlays from the console:
ai_dbg_stalker on
ai_dbg_monster on
ai_dbg_stalker on renders debug details for stalker objects:
ai_dbg_monster on renders debug details for monster objects:
Use the matching off command to hide each overlay.
Planner and Scheme Logs
The XRF debug panel can print the selected object’s script state to the log. Open the main menu, press F11, switch to
the object section, then choose one of the log buttons.
The object section can print:
- the active scheme, active section, logic section, smart terrain, enemy, portable store, and scheme-specific state;
- the engine action planner and the XRF state planner action IDs;
- the state manager target state, current animation state, animstate, look target, combat flag, and ALife flag;
- inventory contents, best weapon, best item, and relation data.
Planner show(...) output is only available when the engine exposes it. If the log says to run in mixed or debug mode,
restart with a debug-capable engine build and repeat the dump.
Performance Stats
Use engine stats when you need frame-level AI cost, not a script-level dump:
rs_stats on
ai_stats on
The AI stats overlay shows rows in this shape:
[name][min_time][avg_time][max_time][call_rate][call_count][total_time]
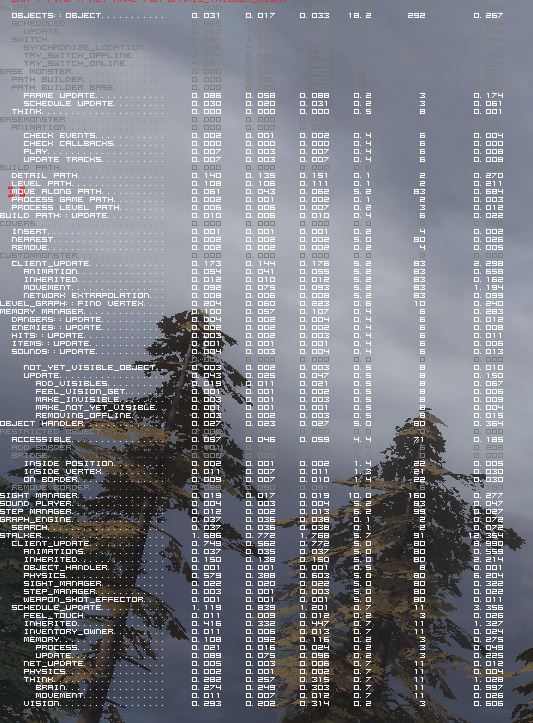
For Lua call profiling, use the XRF debug panel general section. It can start or stop the ProfilingManager, print
hooked call counts, print manually marked profiling portions, show Lua memory use, and force Lua garbage collection.
Run Lua profiling with -nojit when you need cleaner call stats. The profiler logs a warning when LuaJIT is enabled
because JIT compilation can change the measured call pattern.
Useful Console Commands
Common AI debug toggles are listed in the game engine command reference:
Engine Debug (C++)
Use engine debugging when the problem crosses from TypeScript/Lua into xray runtime behavior: scheduler timing, rendering, physics, UI initialization, luabind bindings, or console command implementation.
For script-only behavior, start with logs and the XRF debug panel first. They are faster and do not require rebuilding the engine.
Set Up the Engine Project
OpenXRay has build guides for both supported development paths:
For local XRF development on Windows, the usual flow is:
- Build or select a mixed/debug-capable engine.
- Link XRF output and logs to the game folder with the XRF CLI link command.
- Start the engine from Visual Studio when you need C++ breakpoints.
- Start from the XRF CLI when you only need game logs and Lua output.
Debugging Lua from Visual Studio
Lua debugging is possible through the Visual Studio Lua debugger extension, but it is limited by the engine and by the compiled Lua output.
- Install the LuaDkmDebugger Visual Studio extension.
- Use an engine configuration that loads Lua debug symbols.
- Run the game from Visual Studio.
- Set breakpoints in the generated Lua files, not in TypeScript source.
XRF TypeScript is compiled to Lua by TypeScriptToLua. Visual Studio will see the generated Lua code that the engine executes.
What to Debug in C++
Use the engine source when you need to verify:
- console command behavior such as
rs_stats,rs_fps,ai_stats,set_weather, orrun_string; - luabind signatures exposed through
level,game,game_object, UI classes, planners, and packets; - UI XML initialization behavior in
CScriptXmlInitand CUI controls; - engine-only debug overlays, stats, scheduler, physics, and renderer behavior.
Limitations
- TypeScript breakpoints are not available in the engine. Debug generated Lua or C++ instead.
- LuaDkmDebugger support is old and does not reliably inspect every luabind class or userdata value.
- Some debug console commands are compiled only into mixed/debug engine builds.
- Optimized script builds can strip Lua logger calls when built with
--no-lua-logs.
Logs
Logs are the quickest way to inspect XRF runtime behavior. By default, forge.ltx enables debug mode, regular Lua
logging, and the separate Lua log file.
Where Logs Go
The engine writes the main log into the game logs folder. XRF tooling can link that folder into the project as
target/logs_link.
Common files are:
openxray_<username>.logwhen a custom OpenXRay binary descriptor is present;xray_<username>.logfor the base engine name;xrf_lua.logwhen separate Lua logging is enabled;- module-specific files such as
xrf_profiling.logwhen a logger is configured with a file target.
The exact prefix depends on the logger configuration and the engine variant.
Checking Logs
With a prebuilt engine:
- Select the engine build you want to run.
- Link the game folders with the XRF link command.
- Start the game.
- Inspect
target/logs_link.
With Visual Studio:
- Start the engine project from Visual Studio.
- Check the Visual Studio Output window.
- Check the same game log files if the message was written through the engine logger.
Printing Logs with the CLI
The XRF CLI can print the end of the active engine log:
npm run cli -- logs
npm run cli -- logs 100
The default count is 15 lines. Values are capped at 200 lines. The CLI looks for the linked logs folder and then
chooses openxray_<username>.log or xray_<username>.log depending on the detected engine.
Writing Lua Logs
Use LuaLogger from runtime code:
const logger: LuaLogger = new LuaLogger($filename);

logger.info("Spawned object: %s", object.name());
logger.table(state);
logger.pushSeparator();
logger.printStack();
LuaLogger formats messages with the current engine time, file prefix, level, and formatted text. It writes to the
engine log unless a file-only logger is configured. When separate_lua_log_enabled is true, it also writes to the
shared Lua log file.
Use a file logger when the stream is noisy or belongs to a specific subsystem:
const logger: LuaLogger = new LuaLogger($filename, {
  mode: ELuaLoggerMode.DUAL,
  file: "profiling",
});
DUAL writes both to the named file and to the normal engine log.
Flushing
Use the engine flush console command after generating important logs:
flush
The profiling manager calls flush after printing profiling reports so the latest stats are persisted before you leave
the session.
Build-Time Logging Flag
For performance or release-like builds, script compilation can strip Lua logger calls:
npm run cli -- build -i scripts --no-lua-logs
Do not use that flag when you are investigating runtime behavior.
Debugging UI Forms
XRF UI forms are authored as TSX/XML sources and loaded at runtime through xray CUI classes. Debug UI problems by checking both sides: the generated form structure and the runtime code that initializes named nodes.
Source and Runtime Files
Most UI work touches one of these areas:
- form sources in
src/engine/forms; - reusable form components in
src/engine/forms/components; - runtime window classes in
src/engine/core/ui; - XML render/build helpers in
cli/utils/xml; - generated output under
target, which should be regenerated instead of edited by hand.
When a runtime class calls xml.InitStatic, xml.Init3tButton, xml.InitScrollView, or another CScriptXmlInit
method, the named XML node must exist in the form source.
Check the Form Path
Runtime code usually resolves a form by path:
const base: TPath = "menu\\debug\\DebugDialog.component";
this.xml = resolveXmlFile(base);
If a form does not appear, verify:
- the
basepath matches the TSX/XML source path; - the build generated the matching XML file;
- every node name used by the runtime class exists in the form;
- both 4:3 and 16:9 variants were updated when the form has paired variants.
Use Engine UI Debugging
OpenXRay includes UI inspection tools for layout and control rectangles. They are most useful for positioning issues, wrong sizes, and overlapping controls.
The show_wnd_rect_all console command is available in XRF command constants and can help identify active UI control
bounds in debug builds:
show_wnd_rect_all 1
show_wnd_rect_all 0
Some UI debug tools depend on the engine build. If the command has no effect, run with a mixed/debug-capable engine.
Common Failure Points
- A runtime
Init...call references a missing XML node. - A section exists in TSX but is not registered by the runtime dialog.
- A button is visible but not registered with
RegisterandAddCallback. - Text or controls fit in one aspect ratio but not in the paired 16:9 form.
- The generated XML in
targetis stale after changing the TSX source.
References
Circular References
Circular references usually show up in XRF as initialization problems: a manager asks for another manager while modules are still loading, or a debug dump walks a graph of tables that point back to each other.
Manager Resolution
Use getManager(ManagerClass) for normal manager access. It initializes the manager on first use and stores it in the
runtime registry.
Use getManagerByName("ManagerName") only when importing the manager class would create a circular module dependency.
It returns an already initialized manager by name and cannot create one by itself.
const surgeManager: SurgeManager = getManagerByName("SurgeManager") as SurgeManager;
If the result can be missing during startup, handle null instead of assuming the manager exists.
Resolve Logging
forge.ltx has a debug flag for logger creation:
[debug]
resolve_log_enabled = true
When enabled, each LuaLogger prints a Declared logger message when it is created. This is noisy, but useful when you
need to see which modules are loaded before a crash or circular dependency failure.
Turn it back off after the investigation:
[debug]
resolve_log_enabled = false
Dumping Circular Data
The XRF JSON helper used by debug dumps is circular-reference aware. When it sees a table it has already visited, it writes:
"<circular_reference>"
When the dump exceeds the configured depth limit, it writes:
"<depth_limit>"
Use the debug panel general section to dump Lua state to _appdata_\\dumps\\lua_data.json, then search for these
markers to find strongly connected runtime state.
Practical Checks
- Move type-only imports to
import typewhen the dependency is only needed by TypeScript. - Prefer event callbacks or weak manager lookup when two managers need to observe each other.
- Avoid top-level runtime work in modules that are imported by many systems.
- Keep debug dumps bounded; do not serialize raw engine userdata.
Generating Externals Docs
External functions are script functions that configs can call from condlists, effects, dialogs, and other game data. The XRF CLI can scan declaration sources and generate an HTML reference for them.
Run the Generator
From the XRF engine repository:
npm run cli -- parse externals
The command scans declaration files under:
src/engine/scripts/declarations
It skips *.test.ts files and index.ts files, groups declarations by parent folder, and writes:
target/parsed/externals.html
Open the generated file in a browser when you need to inspect the currently exported external names.
What Gets Documented
The generator reads TypeScript declaration sources, extracts external function metadata, renders the result as HTML, and writes the rendered file with the project XML renderer.
Keep extern declarations close to the runtime implementation and tests. The generated page is only as useful as the names, parameters, and comments present in the declaration files.
Updating JSDoc
When adding or changing an external:
- Update the declaration function and its JSDoc.
- Keep the exported external name exactly aligned with the function registered for game configs.
- Add or update the focused tests for the declaration.
- Regenerate the externals HTML with
npm run cli -- parse externals.
Prefer short comments that explain what config authors need: required arguments, optional arguments, side effects, and what happens when the target object or parameter is missing.
Running Custom Scripts
The engine exposes two development console commands for running Lua from the game console: run_script and
run_string. They are useful for short investigations on a throwaway save.
These commands are engine debug tools. Availability depends on the engine build.
Run a Script File
Use run_script to run a .script file from the game scripts directory:
run_script my_debug_script
The engine rescans the scripts path before adding the script to the level script processor. Use this for repeatable debug snippets that are too large for a single console line.
Run One Lua Expression
Use run_string for a single Lua command:
run_string level.set_weather("default_clear", true)
run_string db.actor:set_actor_position(vector():set(0, 0, 0))
The engine preserves argument casing for run_string, sends the string to the level script processor when one exists,
and otherwise loads the buffer directly as @console_command.
XRF Helper Examples
Many XRF declarations are available through registered Lua modules after scripts are loaded. For example, debug notes in spawn configs use command shapes like:
run_string xr_effects.clear_smart_terrain(nil,nil,{"sim_smart_1"})
run_string alife():object(56):set_squad_position(patrol("tst"):point(0))
Prefer existing effects and helpers over hand-mutating unrelated manager state.
Safety
- Test on a disposable save.
- Keep commands small enough to read in logs.
- Use logs or the debug panel to verify the effect after running the command.
- Restart the session if you mutate state that the current manager lifecycle would normally own.
Stats
Use engine stats for frame/render timing and script stats for Lua-side call patterns. They answer different questions, so enable the smallest view that matches the problem.
Rendering and Frame Stats
Use these console commands while the game is running:
rs_stats on
rs_fps on
rs_fps_graph on
rs_stats enables the engine statistics overlay. rs_fps shows the FPS counter. rs_fps_graph shows the FPS graph.
Use off to disable each toggle.
These commands are implemented by the engine, not by XRF scripts. Availability can depend on the engine build and renderer configuration.
AI Stats
For AI scheduler and planner timing:
ai_stats on
The AI stats overlay is useful when you need to see whether a cost is coming from engine AI updates rather than an XRF manager or scheme.
Lua Profiling
The XRF ProfilingManager measures Lua call counts and manually marked profiling portions.
Open the XRF debug panel, switch to general, then use:
- start/stop profiling to attach or clear the Lua debug hook;
- log profiling stats to print hooked call counts;
- log portions to print manually captured
ProfilingPortionmeasurements; - refresh or collect memory to inspect Lua memory use.
For cleaner Lua hook stats, start the game with -nojit. LuaJIT can inline or alter execution in ways that make hook
counts less representative.
Manual Profiling Portions
Use ProfilingPortion when you need to measure a specific code block:
const portion: ProfilingPortion = ProfilingPortion.mark("my_operation");

// Code to measure.

portion.commit();
The debug panel prints count, total duration, average duration, min, and max for captured portions.
Weather
XRF weather is managed by WeatherManager. It reads level weather settings, dynamic weather graphs, AtmosFear-style
configuration, and weather FX state, then updates weather on actor spawn and on hourly game-time changes.
Runtime Weather Flow
On actor network spawn, the manager:
- reads the current level’s
weatherssetting fromgame.ltx; - parses it as a condlist;
- initializes the current weather period and graph state;
- applies the first weather immediately.
During actor updates, it:
- advances graph state when the game hour changes;
- switches between good and bad weather periods;
- marks transition and pre-blowout weather states;
- updates depth-of-field settings for AtmosFear weather;
- resumes weather FX from saved state when an FX is active.
Use the debug panel general section to dump Lua state when you need to inspect the live WeatherManager fields. The
dump is written to _appdata_\\dumps\\lua_data.json.
Changing Weather from Scripts
Script effects can force weather through xr_effects.set_weather, which calls level.set_weather:
on_info = %+some_info =set_weather(default_clear:true)%
The first argument is the weather section. The optional second argument controls whether the change is forced.
From Lua/TypeScript runtime code, the underlying engine call is:
level.set_weather(weatherName, isForced);
For weather effects, the engine exposes:
level.set_weather_fx("fx_surge_day_3");
level.start_weather_fx_from_time("fx_surge_day_3", time);
Weather Console Settings
WeatherManager applies commands from the weather_console_settings section in
environment\\dynamic_weather_graphs.ltx during initialization. Use that section for console settings that must be
applied with the dynamic weather system.
Debugging Weather Editor Issues
OpenXRay includes a weather editor project and editor documentation. Use it for visual tuning of weather sections and effects, then confirm the resulting section names and graph entries in XRF configs.
If a weather change does not appear:
- verify the level
weathersfield resolves to the expected section or condlist branch; - verify the weather graph exists in
dynamic_weather_graphs.ltx; - check whether a weather FX is currently playing;
- check whether the level is treated as underground;
- dump Lua state and inspect
currentWeatherSection,nextWeatherSection,weatherFx, andweatherState.
References
XRF Debug Panel
The XRF debug panel is an in-game CUI dialog for development-only actions. It is available when forge.ltx has
debug.enabled = true, which is the default project config.
Open the main menu and press F11. The panel hides the main menu while it is open. Press Esc or the cancel button to
return to the main menu.
General
The general section shows Lua version, LuaJIT state, command-line arguments, and Lua memory usage.
It can also:
- refresh memory usage;
- force Lua garbage collection;
- start or stop Lua profiling;
- print profiling hook stats;
- print manual profiling portion stats;
- toggle simulation debug map overlays;
- dump merged
system.inito_appdata_\\dumps\\system.ltx; - dump Lua manager state to
_appdata_\\dumps\\lua_data.json.
Lua data dumping emits DUMP_LUA_DATA, so managers that registered a debug dump callback add their own state to the
JSON payload.
Commands
The commands section exposes checkbox shortcuts for known console toggles.
Boolean commands are written as:
<command> on
<command> off
Numeric commands are written as:
<command> 1
<command> 0
The list includes AI debug toggles, HUD toggles, g_god, g_unlimitedammo, g_autopickup, and wpn_aim_toggle.
Object
The object section works with either the current target object or the nearest game object, depending on the section
checkbox.
It can log:
- scheme state and active section;
- action planner and state planner details;
- state manager details;
- inventory contents;
- relation data.
It can also set the actor relation to the object, kill the object, or set the object wounded. Use these actions on a throwaway save.
Items
The items section spawns inventory items for the actor. Categories are built from game config sections:
- ammo;
- artefacts;
- consumables;
- detectors;
- helmets;
- outfits;
- weapons.
Ammo spawns as a stack of 30; other item categories spawn one item.
Spawn
The spawn section spawns creatures and simulation groups.
stalkers_listspawns the selected stalker section near the actor.simulation_group_listspawns the selected squad section into the nearest smart terrain.
If there is no active game or no suitable smart terrain, the action is skipped and logged.
Teleport
The teleport section lists smart terrains. Selecting one moves the actor to that smart terrain.
If the target game vertex belongs to the current level, the panel sets the actor position directly. If it belongs to a
different level, it calls game.jump_to_level. Double-click teleport also closes the main menu after moving the actor.
Registry and Tasks
The registry section lists ALife objects from the simulator, can filter online objects, and can print a registry
summary with manager, scheme, object, smart terrain, event handler, and other collection counts.
The task section lists task config sections, can filter active tasks, and can give the selected task through
TaskManager.
Treasures
The treasures section shows total, given, and found treasure counts. It can:
- give all treasure coordinates;
- give random treasure coordinates;
- give one selected treasure coordinate;
- teleport to the selected treasure restrictor when it exists.
The section also shows debug details for the selected treasure, including given/checked state, refresh flags, remaining items, and treasure type.
Current Shell Sections
player, position, and sound are present as panel sections, but their current TypeScript runtime classes only parse
their form XML and do not bind interactive actions.
Game engine
XRF runs on top of the X-Ray engine used by S.T.A.L.K.E.R. Call of Pripyat style games. The engine owns the executable, renderer, file system, console, configuration loading, Lua VM, luabind exports, server objects, client objects, ALife simulation, and the low-level update loop.
XRF replaces the game script layer. TypeScript sources are compiled to Lua scripts, then loaded by the engine through the same script entry points that vanilla game logic uses.
What the engine owns
The engine starts from the executable. During startup it initializes core services, resolves the file system layout, loads configuration files, creates the console, initializes the Lua script engine, and opens engine bindings for Lua.
At runtime it also owns:
- server-side ALife objects and the object factory;
- client-side game objects and their
object_binderinstances; - save and load packets;
- console command execution;
- render, sound, input, and UI infrastructure;
- frame updates and scheduled object processing.
The source references for these behaviors are the local xray-16 engine tree and the XRF X-Ray 16 SDK declarations.
What XRF adds
XRF provides the Lua scripts that the engine calls into:
_g.scriptpreloadsregister,bind, andstart, then registers global script externals.register.scriptregisters game classes, UI classes, server object classes, and callback functions.start.scriptinitializes managers, schemes, simulation helpers, extensions, and emits the XRFGAME_STARTEDevent.bind.scriptmaps engine object sections and script class names to XRF binder classes.
After that point, most game behavior goes through XRF managers, schemes, binders, and event callbacks.
Where to go next
- Use Command line arguments when changing engine startup behavior.
- Use Console commands for commands available after the console is initialized.
- Use Execution flow to understand the order from executable startup to active gameplay.
- Use Lifecycle when editing binders, managers, save/load code, or online/offline logic.
- Use Luabind when a TypeScript class needs to be visible to the Lua engine runtime.
Command line arguments
Command line arguments are read by the engine before scripts are loaded. Use them for engine startup choices such as filesystem layout, renderer, logs, game mode, Lua JIT, and initial level loading.
npm run cli -- start_game starts the configured game executable. It does not inject arbitrary engine arguments for
you. To pass arguments, run the executable directly, configure a launcher shortcut, or extend the local start command.
Common flags
| Flag | Effect |
|---|---|
-fsltx <file> | Use a specific filesystem configuration file before the engine core is initialized. |
-ltx <file> | Use a specific console/user configuration file instead of the default user.ltx. |
-start <args> | Execute a start ... console command after engine initialization. |
-load <save> | Execute a load ... console command after engine initialization. |
-nointro | Skip intro playback. |
-nogameintro | Skip the in-game intro sequence. |
-nosplash | Disable the startup splash screen. |
-splashnotop | Show the splash screen without forcing it on top. |
-dedicated | Start in dedicated server mode. |
-i | Disable input capture used by the normal game window. |
-overlaypath <path> | Override the app data/logs root used by the engine locator. |
-nolog | Do not create the main log file. |
-unique_logs | Write logs with unique timestamped names. |
-force_flushlog | Flush log output aggressively. Useful when debugging crashes. |
-nojit | Disable LuaJIT JIT compilation. This also changes profiler behavior. |
-dump_bindings | Dump script binding information from the Lua script engine. |
Renderer flags such as -r1, -r2, -r2a, -r2.5, -r3, -r4, and -rgl are engine-build dependent. Verify the
selected executable before documenting a renderer as supported for a pack.
Game mode flags
OpenXRay-style builds can select a compatibility mode from the command line:
-copfor Call of Pripyat mode;-csfor Clear Sky mode;-shocor-socfor Shadow of Chernobyl mode;-unlock_game_modeto allow explicit game mode selection.
If no mode is selected, the engine can fall back to openxray.ltx compatibility settings.
Examples
Start with an explicit filesystem config and user config:
xrEngine.exe -fsltx fsgame.ltx -ltx user.ltx -nointro
Start a new local game through the engine console startup command:
xrEngine.exe -start "server(all/single/alife/new) client(localhost)"
Load a save after initialization:
xrEngine.exe -load quicksave
Quote values that contain spaces. Treat command line support as executable-specific: forks can add, remove, or rename flags.
Console commands
Console commands are available after the engine console is initialized. They can be typed in the in-game console, executed from config files, or triggered from scripts when the engine exposes command execution.
Most boolean commands use on/off. Some use 0/1, numeric ranges, enum values, or custom command strings.
Basic commands
| Command | Use |
|---|---|
help | Print available console command help. |
quit | Exit the game. |
start ... | Start a game session with server/client arguments. |
disconnect | Disconnect from the active session. |
save <name> | Save the current game. |
load <name> | Load a save. |
load_last_save | Load the most recent save. |
main_menu | Return to the main menu. |
cfg_save <file> | Save console settings to a config file. |
cfg_load <file> | Load console settings from a config file. |
flush | Flush engine state where supported by the command implementation. |
clear_log | Clear the current log output. |
Script commands
run_script <name> reloads script paths and executes a script file through the engine script processor.
run_string <lua> executes a Lua string. In the inspected engine, the command preserves the original casing of the
string payload instead of lowercasing it with the command name.
Use these commands for focused debugging. For repeatable development workflows, prefer tracked scripts and XRF externals instead of long console strings.
AI debug commands
The inspected OpenXRay-style engine registers these AI and ALife debugging commands:
ai_debugai_dbg_brainai_dbg_motionai_dbg_frustumai_dbg_funcsai_dbg_alifeai_dbg_goapai_dbg_goap_scriptai_dbg_goap_objectai_dbg_coverai_dbg_animai_dbg_visionai_dbg_monsterai_dbg_stalkerai_statsai_dbg_destroyai_dbg_serializeai_dbg_dialogsai_dbg_infoportionai_dbg_nodeai_dbg_sightai_dbg_inactive_timeai_draw_game_graphai_draw_game_graph_stalkersai_draw_visibility_raysai_animation_stats
Render, UI, sound, and gameplay commands
Useful command families include:
- render toggles:
rs_stats,rs_fps,rs_fps_graph,rs_vis_distance,rs_cam_pos,rs_wireframe; - video settings:
vid_mode,vid_window_mode,vid_restart,renderer; - sound settings:
snd_volume_eff,snd_volume_music,snd_restart,snd_device; - HUD settings:
hud_draw,hud_info,hud_weapon,hud_crosshair,hud_crosshair_dist,hud_fov; - gameplay settings:
g_game_difficulty,g_language,g_sleep_time,wpn_aim_toggle; - Lua debugging:
lua_debug,lua_dump_depth; - ALife tuning:
al_time_factor,al_switch_distance,al_process_time,al_objects_per_update,al_switch_factor.
Some commands are available only in debug builds or specific forks. Check the selected engine source before relying on a command in documentation or tooling.
XRF debug panel
XRF keeps a typed subset of console commands for the debug UI. If a command should be exposed from the panel, add it to the engine constants first and verify the selected engine accepts the same name and value type.
Execution flow
This page describes the normal flow from executable startup to active XRF gameplay. It is intentionally high-level: forks can move engine internals around, but XRF depends on the same script entry points.
1. Executable startup
The engine initializes core services, resolves filesystem paths, loads configuration files, initializes logging, creates the console, and applies startup command line arguments.
Important early choices include:
- filesystem config from
-fsltx; - console/user config from
-ltx; - compatibility mode from
-cop,-cs,-shoc, or-soc; - Lua JIT state from
-nojit; - post-init
startorloadcommands from-startand-load.
2. Lua script engine initialization
The script engine initializes Lua, opens luabind exports, opens the standard Lua libraries used by the selected build,
adds game script paths to package.path, and loads script modules.
In XRF builds, _g.script is the root script entry point. It preloads:
register;bind;start.
It also registers global externals for conditions, effects, dialogs, tasks, and callbacks.
3. Class and callback registration
The engine calls into register.script to register script-visible game classes and resolve class identifiers.
XRF registers:
- server object classes such as actors, stalkers, monsters, smart terrains, squads, items, weapons, anomalies, and physics objects;
- UI classes such as the main menu;
- engine callback functions exposed through global script paths.
The class registration step is what lets spawned engine objects construct the matching TypeScript-to-Lua classes.
4. XRF startup callback
The engine then calls start.callback(isNewGame).
XRF uses this callback to:
- refresh class identifiers;
- register the ALife simulator and ranks;
- unlock system ini overriding;
- initialize managers;
- register scheme implementations;
- register extensions;
- emit
GAME_STARTED.
Managers and schemes are available after this step.
5. Object creation and binding
The engine reads spawn data and creates server objects. When an object goes online on the client side, the engine asks
bind.script for the binder class.
XRF binds engine objects to classes such as:
ActorBinder;StalkerBinder;MonsterBinder;SmartTerrainBinder;RestrictorBinder;AnomalyZoneBinder;WeaponBinder;PhysicObjectBinder.
The binder receives lifecycle calls from the engine and becomes the bridge between low-level object state and XRF managers, schemes, and events.
6. Active gameplay loop
During gameplay, online binders receive updates, engine callbacks emit XRF events, managers react to those events, and save/load packets serialize state. Offline ALife objects continue to exist on the server side even when no client-side game object is active.
Known xray engine forks
XRF targets the Call of Pripyat style X-Ray/OpenXRay API used by the local engine and type declarations. Forks are useful reference points, but they are not a compatibility guarantee. Verify bindings, console commands, save/load behavior, and script callbacks against the exact executable you ship.
Common references
| Fork or baseline | Notes |
|---|---|
| Original Call of Pripyat engine and gamedata | Canonical behavior reference for vanilla script and resource behavior. |
| OpenXRay / xray-16 | Open-source X-Ray continuation used as the main local engine reference for XRF. |
| Call of Chernobyl engine family | Useful second opinion for evolved CoP-era behavior, but not the canonical baseline. |
| Anomaly / X-Ray Monolith family | Heavily modified fork family. Expect changed exports, fixes, callbacks, and engine-side assumptions. |
| OGSR Engine | Shadow of Chernobyl oriented fork with different compatibility expectations. |
| Oxygen and other experimental forks | Treat as fork-specific until the script API is checked directly. |
Compatibility checklist
Before moving XRF scripts to a fork, check:
- luabind class names and exported functions;
object_bindermethod behavior;- game class identifiers and section-to-class mappings;
- console command names and accepted value types;
- command line flags used by your launcher;
- save/load packet order and marker expectations;
- availability of Lua libraries such as
jit,ffi,marshal, andlfs; - callback names and callback argument order;
- ALife online/offline switching behavior.
When a fork disagrees with vanilla resources and OpenXRay source, document the fork behavior as fork-specific instead of treating it as the default.
Lifecycle
The engine lifecycle is split between global startup, server-side ALife objects, client-side game objects, XRF binders, and XRF managers. Most script bugs come from mixing those scopes.
Global startup
Global startup happens once per game process and again at specific script reload points depending on the engine. In XRF, the important global scripts are:
_g.script, which preloads core entry points and registers externals;register.script, which registers classes and callback globals;start.script, which initializes managers, schemes, extensions, and emitsGAME_STARTED;bind.script, which returns binder classes for online objects.
Do not put per-save or per-object state in module globals unless it is intentionally reset during the relevant lifecycle step.
Binder lifecycle
Client-side game objects use engine object_binder lifecycle methods. XRF binders override the methods they need:
| Method | When it is used |
|---|---|
reinit() | Reinitializes binder state and callbacks. Actor reinit also resets portable store state and schedules ALife update stabilization. |
net_spawn(serverObject) | Called when the object goes online and receives its server object. Return false to reject spawn after super.net_spawn(...) fails. |
update(delta) | Called while the client object is online. Use it for object-local work, not broad global polling. |
net_destroy() | Called when the object goes offline or is destroyed. Remove callbacks and unregister object state here. |
save(packet) | Write client-side state to the save packet. Preserve marker and write order. |
load(reader) | Read client-side state from the save packet in the same order it was written. |
Actor, stalker, monster, restrictor, smart terrain, physic object, and item binders all follow this pattern.
Manager lifecycle
Managers extend AbstractManager. A manager can implement:
initialize()to register callbacks or allocate state;destroy()to unregister callbacks and mark state as disposed;update(delta)when it is driven by an update event;save(packet)andload(reader)when it owns serialized state.
Managers should subscribe through EventsManager rather than being called from unrelated binders. This keeps object
lifecycle code small and makes save/load ownership clearer.
Event lifecycle
EventsManager owns typed event subscriptions. Binders and game objects emit events such as:
ACTOR_GO_ONLINE,ACTOR_GO_OFFLINE,ACTOR_REINIT;ACTOR_UPDATE,ACTOR_UPDATE_100,ACTOR_UPDATE_500,ACTOR_UPDATE_1000,ACTOR_UPDATE_5000,ACTOR_UPDATE_10000;STALKER_DEATH,MONSTER_DEATH,HIT;GAME_SAVE,GAME_SAVED,GAME_LOAD,GAME_LOADED;BEFORE_LEVEL_CHANGEandGAME_STARTED.
Actor update drives the global timer manager tick and the throttled actor update events. Prefer those throttled events for recurring manager work that does not need every frame.
Save and load lifecycle
Save/load code must preserve packet order. XRF commonly wraps sections with save/load markers, calls the superclass method, then writes or reads owned state.
If a manager or binder adds state to a save packet, update the corresponding load code in the same change. Never insert a new read without matching old saves or version handling.
AI and logics
XRF AI logic is built on the engine GOAP planners, engine callbacks, XRF schemes, and the XRF stalker state manager. The engine still owns navigation, combat primitives, visibility, danger evaluation, animation execution, and the base planner runtime. XRF adds script-side actions, evaluators, scheme state, and event routing.
Use this page to understand the structure. Use the debugging AI page when you need runtime overlays, planner dumps, or log output.
Motivation planner
Each stalker has an engine motivation action planner. XRF modifies that planner when the stalker binder is reinitialized. The setup adds script evaluators and actions that coordinate engine behavior with XRF-controlled animation and logic state.
The motivation planner includes engine action ids for broad behaviors such as ALife, combat, anomaly, danger, gathering items, smart terrain tasks, and death. XRF adds custom action ids for script activities such as animpoint, walker, remark, sleeper, companion, smart cover, wounded, abuse, and state-to-idle transitions.
State planner
StalkerStateManager owns a separate Lua-side action planner for stalker state control. It manages the target state and
drives sub-planners for:
- weapon state;
- movement;
- look direction;
- mental state;
- body state;
- animstate;
- animation;
- smart cover;
- locked states.
The state planner goal is to reach its END state after the required weapon, movement, mental, body, direction,
animstate, animation, and smart cover evaluators are satisfied.
Evaluators
Evaluators answer yes/no questions for the planner. Examples include whether the stalker is already standing, walking, in danger mental state, using a target weapon state, playing an animation, locked by animation, or inside a smart cover.
Evaluator ids are stable planner contracts. Changing ids can break planner graphs and debug output, even if TypeScript still compiles.
Actions
Actions change world state. XRF actions can strap or unstrap weapons, set movement, turn the stalker, switch mental and body state, start or stop animations, and enter or leave smart cover.
Actions and evaluators used by engine planners must be luabind-visible classes. Keep @LuabindClass() on planner
classes that the engine action planner constructs or stores.
Schemes
Schemes are the script logic layer loaded from LTX logic sections. A scheme activates state for a specific object and section, subscribes handlers, and reacts to scheme events such as switching online/offline, death, hit, use, or extrapolation.
The stalker binder wires schemes into object lifecycle:
- creates
StalkerStateManagerduring reinit; - sets up the state planner and motivation planner;
- initializes object logic on spawn;
- updates the state manager while the object is online;
- emits scheme events when the object switches offline, dies, is hit, or is used.
Keep scheme state in the object registry and clean it through the scheme lifecycle. Avoid storing per-object scheme state only in module globals.
Luabind
Luabind is the bridge between C++ engine code and Lua scripts. The engine exports C++ classes, functions, enums, and helpers into Lua, then game scripts create Lua-side classes that inherit from those bindings.
XRF TypeScript compiles to that Lua layer. A class that must be constructed or called by the engine needs to follow the same luabind-visible shape after compilation.
@LuabindClass()
Use @LuabindClass() on TypeScript classes that must be visible as Lua classes. Common examples include:
- binders that extend
object_binder; - action and evaluator classes used by GOAP planners;
- UI classes that extend engine CUI classes;
- server object classes registered through the factory.
The decorator preserves the class metadata expected by the TypeScript-to-Lua and luabind runtime path.
Class names
Many registrations use the class __name field. XRF passes those names to engine registration code for game classes, UI
classes, and binder construction.
Changing a class name can therefore change runtime behavior even when TypeScript imports still compile. Treat class renames as compatibility changes.
Externals are separate from luabind
XRF also has an extern(...) helper. It writes values into _G or nested global tables so the engine and configs can
find script callbacks such as conditions, effects, task functions, dialog functions, and startup callbacks.
That is not the same as binding a C++ class. Use luabind classes when the engine constructs or calls class instances. Use externals when a named global function or table entry must exist in Lua.
class, property, and super
OpenXRay luabind exposes helper globals such as class, property, and super. They come from the luabind runtime,
not from XRF.
Modern XRF code usually does not call these helpers directly. TypeScript classes and @LuabindClass() generate the Lua
shape that the engine expects.
Verification
Use the XRF X-Ray 16 SDK to check TypeScript-visible API shape. For ambiguous behavior, check the engine binding code in the
selected xray-16 fork, because some binding setters and object methods have engine-specific semantics.
Lua extensions
The engine Lua environment is not plain standalone Lua. OpenXRay-style builds initialize LuaJIT, luabind, engine exports, standard libraries, and a few engine-specific libraries before game scripts run.
The inspected script engine opens the usual Lua libraries such as base, package, table, io, os, math,
string, bit, and ffi. Debug builds can also expose the Lua debug library. LuaJIT is opened unless the executable
starts with -nojit.
Runtime availability
XRF can have TypeScript declarations for a library even when a specific engine executable does not load that library. Always separate:
- compile-time declarations in
src/typedefs; - runtime modules actually opened by the engine;
- modules shipped in the selected gamedata or Lua environment.
This matters for marshal and lfs: XRF has typings for them, but availability depends on the chosen engine/runtime
package.
Script path
The engine appends gamedata script paths to package.path, allowing scripts to be required from the game script
directory. Keep runtime require(...) names aligned with the emitted Lua script layout.
Practical checks
When adding a dependency on a Lua module:
- check the TypeScript declaration under
src/typedefs; - check whether the target executable opens or ships the module;
- run the game with the same executable that will ship to users;
- keep fallback behavior for optional modules.
For engine-bound code, prefer X-Ray APIs and XRF helpers over standalone Lua assumptions. The engine can change module availability, package paths, and debug library access depending on build flags.
Custom Lua
OpenXRay-style builds use a custom LuaJIT runtime rather than a stock standalone Lua executable. The engine initializes Lua, opens luabind, registers engine exports, configures script paths, and then loads game scripts.
This matters for XRF code because TypeScriptToLua output runs inside the game script engine, not inside a generic Lua CLI. Available globals, module search paths, JIT behavior, and engine bindings come from the selected executable.
Libraries opened by the engine
The inspected script engine opens standard Lua libraries and LuaJIT-related libraries used by game scripts:
package,table,io,os,math, andstring;bitandffi;- LuaJIT support unless
-nojitis passed; debugin non-master/debug-capable builds;- engine-specific helpers such as
xrluafix; - Tracy Lua integration when compiled into the engine.
Do not assume every fork opens the same set. Check the selected executable if a script depends on a non-standard module.
Useful flags
-nojit disables LuaJIT JIT compilation. This can make some debugging sessions easier, but it also changes profiler
behavior.
-dump_bindings asks the script engine to dump binding information. Use it when comparing what the engine exported with
what the TypeScript declarations say exists.
Notes for XRF scripts
- Treat
src/typedefsand the XRF X-Ray 16 SDK as declarations for what TypeScript can see, then verify ambiguous behavior against the engine build. - Do not assume optional Lua modules such as LFS or marshal are loaded unless the runtime package opens or provides them.
- Use engine APIs for game objects, packets, configs, and path resolution. Standalone Lua behavior is a weak reference when engine bindings are involved.
Marshal
marshal is a Lua serialization library. XRF has TypeScript declarations for the functions used by the runtime:
marshal.encode(value)converts a Lua value to an encoded representation;marshal.decode(value)reads an encoded representation back;marshal.clone(value)creates a cloned value through marshal semantics.
The declarations reference the upstream Lua marshal project: https://github.com/richardhundt/lua-marshal.
Availability
The inspected engine script initialization does not open marshal as one of the default Lua libraries. Treat it as an
optional runtime dependency unless the selected executable or gamedata package explicitly provides it.
Guard code that depends on marshal, or keep usage in paths where the runtime package is known.
When to use it
Use marshal only when the runtime really needs Lua-level serialization or cloning. For game save data, prefer the engine save packet APIs and XRF save/load helpers so the data remains compatible with the engine lifecycle.
Good candidates are short-lived Lua tables in tooling, debug-only data capture, or controlled runtime features where the package is bundled with the executable. Avoid using it as an implicit dependency for core gameplay scripts.
Validation notes
- Check that
require("marshal")succeeds in the selected executable before using these declarations. - Keep encoded data versioned if it can persist outside the current process.
- Prefer explicit table copies when the shape is small and known;
marshal.cloneis useful only when marshal semantics are the intended behavior.
LFS
LFS is LuaFileSystem. It provides filesystem operations such as directory iteration, attribute inspection, directory creation, links, locks, and current-directory changes.
XRF has TypeScript declarations for common LFS functions:
lfs.attributes(path);lfs.dir(path);lfs.currentdir();lfs.chdir(path);lfs.mkdir(path);lfs.rmdir(path);lfs.link(oldPath, newPath);lfs.touch(path, atime, mtime);lfs.lock(file, mode, start, length);lfs.unlock(file, start, length);lfs.symlinkattributes(path);lfs.setmode(file, mode);lfs.lock_dir(path, seconds).
The upstream library documentation is available at https://lunarmodules.github.io/luafilesystem/.
Availability
The inspected engine script initialization does not open LFS as one of the default Lua libraries. Treat it as optional unless your selected runtime package ships it.
For game paths, prefer engine filesystem helpers and configured path aliases. Use LFS for plain filesystem work only when the runtime dependency is verified.
Practical use
Use LFS for tools or controlled runtime packages where filesystem access is part of the environment contract. Avoid it inside portable gameplay code unless the target executable is known to expose the module.
For game data lookup, prefer engine path aliases and file-system helpers because they follow mounted game paths and mod layout rules. LFS works on process-visible filesystem paths; it does not know about engine virtual paths by itself.
Verification checklist
- Check that
require("lfs")succeeds in the exact runtime package you ship. - Check path separators and working directory assumptions on the target platform.
- Keep save-game and game-state persistence on engine packet APIs instead of plain files unless the feature explicitly owns external files.
Online and offline
X-Ray keeps two related views of many objects:
- a server-side ALife object, which can exist while the object is offline;
- a client-side game object, which exists when the object is online and active on the current level.
Online/offline state is not the same as alive/dead. An offline object can still exist in simulation. An online object
has a live game_object, a binder, callbacks, and client-side updates.
Offline objects
Offline objects live in the ALife simulation. They are represented by server objects and can be queried through simulator APIs. Smart terrains, squads, NPCs, monsters, items, and level changers all have server-side behavior in different ways.
Use server objects for simulation state, spawn data, story ids, smart terrain membership, and logic that must survive outside the active client bubble.
Online objects
When an object switches online, the engine creates or activates a client-side game_object and attaches an
object_binder. XRF uses binders to register object state, set callbacks, emit events, and update active schemes.
Use online objects for:
- direct game object methods;
- visible object state;
- callbacks such as hit, death, use, inventory, or task updates;
- per-frame or throttled client-side updates.
Do not assume level.object_by_id(id) succeeds for an offline object. Use the simulator/server object path when the
object may be offline.
Switching
The engine decides when objects switch online or offline based on ALife rules, level state, distance, and object type.
Console variables such as al_switch_distance, al_objects_per_update, and related ALife settings affect this process.
XRF binders receive net_spawn(...) when an object goes online and net_destroy() when it goes offline or is
destroyed. Put registration and callback setup in the online path, and cleanup in the offline path.
Updates and scheduling
The engine drives updates for online binders. XRF turns those updates into higher-level events and timers so managers do not need to poll unrelated objects directly.
Binder updates
An online binder can receive update(delta) from the engine. Use it for object-local behavior:
- actor update orchestration;
- stalker and monster state managers;
- active restrictor, anomaly, smart terrain, and physic object logic;
- sound manager updates tied to a specific object id.
Call super.update(delta) when overriding an engine binder method unless nearby code shows a deliberate reason not to.
Actor update events
ActorBinder.update(delta) is the central XRF update pump. It emits:
ACTOR_FIRST_UPDATEonce after start or load;ACTOR_UPDATEevery actor update;ACTOR_UPDATE_100;ACTOR_UPDATE_500;ACTOR_UPDATE_1000;ACTOR_UPDATE_5000;ACTOR_UPDATE_10000.
It also ticks the XRF timer manager and refreshes actor-related simulation object availability.
Use the throttled actor events for recurring manager work. For example, weather, input, psy, debug, and UI-related systems can subscribe to the event cadence they actually need.
Timers
EventsManager extends the timer manager and supports delayed and interval callbacks. Timers tick from the actor update
path, so they require an active actor update loop.
Use timers for short delayed script work. Do not use them as durable save/load state unless the owning manager explicitly serializes enough data to restore the behavior.
ALife scheduling
Offline simulation is controlled by the engine and ALife settings. XRF can temporarily adjust object processing during startup; for example, actor reinit allows a broader ALife update window and then schedules a return to the stable configured value.
Keep online binder updates, manager event updates, and offline ALife scheduling separate. They run at different layers and have different save/load assumptions.
Script engine
The script engine chapter documents the XRF gameplay layer: TypeScript scripts, generated Lua, LTX/XML configs, forms, translations, schemes, managers, binders, and gameplay data.
The engine starts Lua and calls XRF entry points. XRF then owns most gameplay behavior above the native X-Ray runtime.
Source layout
| Source area | Purpose |
|---|---|
src/engine/scripts | Lua script entry points and externally callable script declarations. |
src/engine/core | Runtime managers, binders, schemes, objects, utils, and domain logic. |
src/engine/configs | Static and generated LTX/XML game configuration source. |
src/engine/forms | JSX source for generated UI XML forms. |
src/engine/translations | Translation JSON and XML source. |
src/resources | Static resource data copied into gamedata output. |
Generated Lua, generated configs, copied resources, coverage, and packed outputs are written under target/. Do not
edit target/ by hand.
Runtime entry points
The script layer starts from _g.script, then loads register, bind, and start.
registerexposes game classes, UI classes, tasks, dialogs, conditions, effects, and callbacks.bindselects object binder classes for online engine objects.startinitializes managers, schemes, extensions, simulation state, and emitsGAME_STARTED.
Most gameplay work is then handled by managers, schemes, object binders, and event callbacks.
Config-driven behavior
XRF keeps vanilla-style config behavior where possible. LTX logic sections still drive object logic, condlists still call conditions and effects, and XML files still define dialogs, tasks, character descriptions, UI forms, and gameplay data.
When changing behavior, trace the full path:
- config field or XML entry;
- parser or build helper;
- runtime manager, scheme, binder, or extern;
- test or validation command.
For config changes, compare against original gamedata when baseline behavior matters.
Validation
Use focused validation first:
npm test -- <path-or-pattern>
npm run typecheck
npm run cli verify ltx
npm run cli build -- --filter configs
Use broader npm run verify or npm run build when a change touches shared config, generated output, or multiple
runtime systems.
Assets
Assets are static gamedata resources copied into the build output. They are separate from TypeScript source, generated Lua scripts, generated configs, and generated UI XML.
The main source directory is src/resources. Project asset override roots can also be included by the build when asset
overrides are enabled for a language.
What gets copied
The resources build step copies files and folders into target/gamedata. It skips repository metadata and unpacked
working folders such as textures_unpacked and particles_unpacked.
It also rejects resource folders that overlap with generated source areas such as core, configs, lib, and
scripts. Those names are reserved for generated or source-owned content.
Filtering
Build filters are applied to resource paths. Use a filter when you only need to rebuild a focused asset group:
npm run cli build -- --filter textures
npm run cli build -- --filter sounds
The filter behavior is path based. Check the source path when a filtered build appears to skip an expected file.
Editing assets
Treat src/resources as base resource data. Avoid casual edits there unless the work is explicitly about resources. For
new generated game data, prefer the appropriate source folder:
- configs in
src/engine/configs; - UI forms in
src/engine/forms; - translations in
src/engine/translations; - scripts in
src/engine/scriptsandsrc/engine/core.
Do not patch packed output or files under target/.
Validation workflow
After asset changes, run the narrowest build filter that covers the path you touched. Then inspect target/gamedata to
confirm the copied path matches the engine-facing layout.
Use format-specific tools for packed or structured assets:
- icon texture workflows through
iconscommands; particles.xrworkflows throughparticlescommands;- spawn workflows through
spawncommands; - archive inspection through the Tools CLI archive commands.
If an asset change depends on config references, validate the LTX/XML source that points at the asset as well.
Configs
XRF stores game configuration source under src/engine/configs. The build copies static .ltx and .xml files and
generates additional .ltx or .xml files from TypeScript sources.
Config files are runtime behavior. Script configs can switch schemes, call effects, check conditions, spawn objects, define smart terrain jobs, describe tasks, load dialogs, configure weapons, and drive weather.
Domain pages
The config chapter is split by the kind of runtime data being edited.
| Page | Use it for |
|---|---|
| Scheme | How $scheme/*.scheme.ltx files validate LTX sections. |
| Condlists | Conditional expressions used by script configs and scheme switching. |
| Dialogs | Dialog XML sources, phrase graphs, and dialog-related config data. |
| Scripts | Story script configs, scheme sections, effects, conditions, and logic activation. |
| Creatures | Actor, stalker, monster, crow, and online/offline group configs. |
| Zones and anomalies | Anomaly fields, anomaly zones, restrictors, camp zones, and level changers. |
| Smart terrains and jobs | Smart terrain population, jobs, respawn, and simulation behavior. |
| Treasures | Treasure descriptors and hidden stash behavior. |
| Weapons | Weapon section layout and generated weapon config helpers. |
| Weather | Weather cycles, graph sources, and weather config generation. |
Source types
| Source type | Build behavior |
|---|---|
.ltx | Copied to target/gamedata/configs. |
.xml | Copied to target/gamedata/configs. |
.ts | Imported by the CLI and rendered to .ltx with renderJsonToLtx. |
.tsx | Imported by the CLI and rendered to .xml with renderJsxToXmlText. |
$scheme/*.scheme.ltx | Used by verify-ltx to validate config shape. |
Dynamic .ts LTX sources must export create() or config. Dynamic .tsx XML sources must export create().
Includes and inheritance
LTX files use normal X-Ray include and inheritance syntax:
#include "items\weapons\base.ltx"

[wpn_example]:identity_immunities
class = WP_AK74
Generated LTX sources can express includes and section inheritance through the helper symbols used by renderJsonToLtx.
Validation
Run LTX validation after changing config shape, includes, inheritance, or $scheme coverage:
npm run cli verify ltx
Use strict validation when the change is specifically about schema coverage:
npm run cli verify ltx -- --strict
For generated configs, also run a focused build:
npm run cli build -- --filter configs
Do not edit generated files under target/. Fix the source config or generator instead.
LTX scheme
src/engine/configs/$scheme contains validation schemas for LTX configs. The verify-ltx tool uses these files to
check includes, inheritance, field names, and field types.
The root file is scheme.ltx. It includes category schemas such as base.scheme.ltx, script.scheme.ltx,
environment.scheme.ltx, items.scheme.ltx, weapons.scheme.ltx, and zone.scheme.ltx.
Defining a schema section
A schema section starts with a section name. Use inheritance when several config sections share fields:
[$item_weapon]:$item,$item_weapon_sounds,$item_weapon_params
strict = true
ammo_class = ?string[]
ammo_mag_size = ?u32
weapon_class = ?enum:assault_rifle,shotgun,sniper_rifle,heavy_weapon,pistol,grenade,misc
Schema section names commonly start with $ to separate schemas from game config sections.
Field syntax
| Syntax | Meaning |
|---|---|
name = string | Required string field. |
name = ?string | Optional string field. |
name = string[] | Array of strings. |
name = tuple:f32,f32,f32 | Tuple with fixed element types. |
name = enum:on,off | Value must be one of the listed enum values. |
name = section | Value should reference a section. |
* = tuple:f32,f32,f32,f32 | Wildcard rule for arbitrary field names. |
Optional marker ? can be combined with arrays, enums, tuples, and section references.
Available types
Common schema types:
stringsectiontuplecondlistf32u32i32u16i16u8i8boolvectorenumunknownany
Prefer the narrowest type that matches the engine behavior. Use unknown or any only when the field is intentionally
untyped or still being investigated.
Arrays, enums, and tuples
Arrays use []:
levels = ?string[]
installed_upgrades = ?section[]
Enums list allowed values:
scope_status = ?enum:0,1,2
flares = enum:on,off
Tuples define ordered values:
fire_point = ?tuple:f32,f32,f32
hit_power = ?tuple:f32,f32,f32,f32
Strict sections
strict = true means fields not described by the schema are validation errors unless a wildcard rule covers them. Use
strict schemas for stable config formats such as weapons, weather, and script definitions.
Leave strict mode off only when the config format is intentionally open-ended or not fully modeled yet.
Verification
Run:
npm run cli verify ltx
When a valid config fails validation, update the matching schema section instead of weakening unrelated schemas. When a schema accepts invalid data, add a narrower field type or enable strict mode for that schema if the format is stable.
Condlists
Condlists are conditional config expressions used throughout script configs, task configs, dialogs, and scheme switches. A condlist can check info portions, call conditions, apply side effects, and return a value.
Basic shape:
{conditions} value %effects%
Multiple entries are separated by commas and checked in order. The first matching entry wins:
on_info = {+quest_started} walker@active %=play_sound(quest_start)%, sr_idle
Conditions
| Syntax | Meaning |
|---|---|
+info_name | Require an info portion. |
-info_name | Require a missing info portion. |
=condition_name | Call xr_conditions.condition_name and require true. |
!condition_name | Call xr_conditions.condition_name and require false. |
~50 | Pass with a random chance from 1 to 100. |
Function parameters use colon separators:
{=actor_has_item(af_oasis_heart)}
{!npc_in_actor_frustum =dist_to_actor_le(30)}
Effects
Effects live inside %...%:
%=give_inited_task(jup_b1_task) +jup_b1_started -jup_b1_waiting%
Inside effects:
=effect_namecallsxr_effects.effect_name;+info_namegives an info portion;-info_namedisables an info portion.
This means reading a config value can change game state. Check the caller before assuming a condlist is pure.
Generated condlists
Generated LTX sources should use helpers from cli/utils/ltx/condlist.ts:
checkCondition(...)checkNoCondition(...)checkChance(...)checkHasInfo(...)checkNoInfo(...)callEffect(...)addInfo(...)removeInfo(...)createCondlist(...)joinCondlists(...)
These helpers keep generated syntax consistent with the runtime parser.
Parser limits
The parser is pattern-based. Avoid nested commas, nested parentheses, and quoted strings that require custom escaping. If new syntax is needed, update parser tests before relying on it in configs.
Debugging workflow
When a condlist does not behave as expected:
- identify the caller, such as a scheme switch, task field, dialog phrase, or smart terrain job;
- check whether the caller expects a returned section/value or only side effects;
- search for the condition under
src/engine/scripts/declarations/conditions; - search for the effect under
src/engine/scripts/declarations/effects; - add or update tests for parser helpers when generated syntax changes.
Keep side effects guarded with info portions when the same condlist can be evaluated repeatedly.
Dialog configs
Dialog configs define conversation XML and script predicates/actions used by dialog phrases. XRF keeps dialog data under
src/engine/configs/gameplay and dialog script externs under src/engine/scripts/declarations/dialogs.
Use this page when you need to add a phrase, wire a phrase to script, or check why a dialog option is not visible.
Source files
Core dialog XML files:
src/engine/configs/gameplay/dialogs.xmlsrc/engine/configs/gameplay/dialogs_zaton.xmlsrc/engine/configs/gameplay/dialogs_jupiter.xmlsrc/engine/configs/gameplay/dialogs_pripyat.xml
Dialog text lives in translation files such as:
src/engine/translations/st_dialogs.jsonsrc/engine/translations/st_dialogs_zaton.jsonsrc/engine/translations/st_dialogs_jupiter.jsonsrc/engine/translations/st_dialogs_pripyat.json
Script callbacks live in:
src/engine/scripts/declarations/dialogs/dialogs.tssrc/engine/scripts/declarations/dialogs/dialogs_zaton.tssrc/engine/scripts/declarations/dialogs/dialogs_jupiter.tssrc/engine/scripts/declarations/dialogs/dialogs_pripyat.tssrc/engine/scripts/declarations/dialogs/dialog_manager.ts
Generic dialog state is handled by src/engine/core/managers/dialogs/DialogManager.ts. The manager tracks phrase
priority tables, disabled phrases, and generic phrase categories such as hello, job, anomalies, and information.
Runtime hooks
Dialog XML can call script functions through registered dialog externs. XRF registers these from
src/engine/scripts/declarations/dialogs. The global script entry point loads externals_registrator, and the
registrator exposes dialogs, dialogs_zaton, dialogs_jupiter, dialogs_pripyat, and dialog_manager.
dialog_manager.ts also exports callbacks used by generated generic dialogs. Examples include:
dialog_manager.init_new_dialog;dialog_manager.fill_priority_hello_table;dialog_manager.precondition_job_dialogs;dialog_manager.action_information_dialogs;dialog_manager.action_disable_phrase.
Keep XML callback names in sync with the extern name. A typo in XML does not create a TypeScript error at the call site.
When changing a dialog:
- update the XML phrase flow;
- update translation ids used by the phrases;
- update or add dialog predicate/action externs when XML calls script;
- test the dialog declaration code when behavior changes.
Editing workflow
Start from the dialog id and search across gameplay XML, translation JSON, and dialog declarations. Most quest dialogs touch at least two of those areas: XML controls phrase flow, translations hold the text, and declarations decide whether a phrase is visible or what action runs after selection.
For a script-backed phrase:
- add the XML phrase node and translation id;
- reference an existing callback or add a new
extern(...)in the matching declaration file; - update tests beside the declaration when the callback has logic;
- run a focused test for the declaration file, then run config verification if XML changed.
Use location-specific declaration files when the condition belongs to a level quest. Use dialog_manager.ts for generic
dialog category behavior only.
Generated XML
Some gameplay XML is generated from .tsx sources. Dynamic XML sources export create() and are rendered with
renderJsxToXmlText.
Do not edit generated XML under target/. Change the XML source or TSX generator.
Validation notes
externals_registrator.test.tsconfirms the dialog extern namespaces are registered.- Dialog declaration tests check individual callback bindings and branch behavior.
- Translation ids must exist in the matching
st_dialogs*.jsonfile, otherwise the game can show raw ids or missing text. - If a dialog changes quest state, check the related task, info portion, and effect declarations in the same pass.
Script configs
Script configs are LTX files that drive object logic. They live under src/engine/configs/scripts and are copied to
target/gamedata/configs/scripts.
These files are active gameplay data. They select schemes, configure object binders, define section switching, call conditions and effects, and describe smart terrain jobs.
Common structure
Most logic files start from [logic]:
[logic]
active = sr_idle

[sr_idle]
on_info = {+some_info} sr_idle@done %=some_effect%

[sr_idle@done]
The active section name selects the scheme. Suffixes such as @done let one scheme have multiple named states.
Common fields
Common script logic fields include:
activein[logic], selecting the first section;on_info,on_signal,on_timer, and related switch fields;on_actor_inside,on_actor_outside, and zone-related switch fields;on_deathandon_hitfor event-driven switches;suitableandpriorfor smart terrain job selection;spawnfor item sections spawned on activation;- scheme-specific fields such as paths, animations, sounds, dialogs, and combat flags.
Field support depends on the active scheme. Check the scheme implementation before adding a field.
Extern calls
Condlists call short names, but the registered functions live under global namespaces:
{=actor_has_item(wpn_pm)}callsxr_conditions.actor_has_item;%=give_inited_task(task_id)%callsxr_effects.give_inited_task.
Search both the short config name and the full extern name before renaming a condition or effect.
Validation
Use LTX validation after editing script configs:
npm run cli verify ltx
For behavior changes, test the scheme, condition, effect, or manager that reads the field.
Editing workflow
Start from the object, smart terrain job, or restrictor that owns the logic file. Follow [logic] active to the active
section, then identify the scheme from the section prefix before @.
When a switch does not fire, check the pieces in this order:
- the active section name;
- the switch field supported by that scheme;
- the condlist conditions and effects;
- the target section existence;
- any runtime event needed to trigger the manager, such as hit, death, use, signal, or actor-zone update.
Creatures
Creature configs describe the actor, stalkers, monsters, crows, and online/offline squads. They live under
src/engine/configs/creatures and are included through src/engine/configs/creatures/index.ltx.
These files are not only stats tables. A creature section also selects the engine class, script binder, physical settings, perception values, sounds, movement tuning, immunities, and condition sections used by runtime logic.
Source files
| Source | Purpose |
|---|---|
creatures/index.ltx | Includes all creature config files into the final game config tree. |
creatures/base.ltx | Defines shared monster defaults and common physical death-friction parameters. |
creatures/actor.ltx | Defines the playable actor section, condition sections, HUD link, hit sounds, movement, and immunities. |
creatures/m_stalker*.ltx | Defines stalker, monolith stalker, and zombied stalker creature sections. |
creatures/m_*.ltx | Defines monster species such as bloodsucker, boar, burer, chimera, controller, dog, flesh, gigant, poltergeist, pseudodog, snork, and tushkano. |
$scheme/creatures.stalker.scheme.ltx | Validates actor and stalker config fields. |
$scheme/creatures.monster.scheme.ltx | Validates monster config fields. |
$scheme/creatures.misc.scheme.ltx | Validates online/offline group sections used for squad descriptors. |
Runtime binding
Creature sections attach TypeScript runtime code through script_binding.
| Binding | Runtime role |
|---|---|
bind.actor | Attaches actor lifecycle, callbacks, managers, actor state, and save/load behavior. |
bind.stalker | Attaches NPC stalker lifecycle, logic activation, callbacks, smart terrain participation, and planner behavior. |
bind.monster | Attaches monster lifecycle, monster scheme activation, smart terrain participation, and offline handling. |
bind.crow | Attaches crow-specific runtime behavior. |
The engine class still matters. For example, actor sections use an actor class, stalker sections use stalker classes, and monster sections use species-specific monster classes. The script binder extends that engine object with XRF runtime logic.
Actor sections
The actor config starts at [actor] and uses $scheme = $actor. It links the runtime binder through
script_binding = bind.actor.
Actor-related sections cover:
- movement and inventory limits, such as sprint, crouch, jump, and carried mass values;
- physical settings, collision damage, bones, and corpse handling;
- hit probabilities, immunities, condition sections, and hit sounds;
- actor HUD linkage through
player_hud_section; - default quick item slots.
Use the actor schema when adding new actor fields. If validation rejects a real engine field, update the schema instead of bypassing validation in the config.
Stalker sections
Stalker configs use $scheme = $stalker and describe NPC-level behavior visible to both the X-Ray engine and XRF
runtime.
Common stalker fields include:
script_binding, usuallybind.stalker;community, rank, terrain, and movement sections;- visual and sound configuration;
- perception settings such as view distance, visibility, and sound perception;
- condition, damage, immunities, and material sections;
- spawn metadata and editor fields.
Scenario logic is usually not placed directly in the creature section. Stalker behavior for a specific story object is normally driven by script configs, smart terrain jobs, and schemes.
Monster sections
Monster configs inherit from shared monster bases and then specialize by species. The base sections provide common movement, perception, damage, sound, and physical behavior. Species files tune attacks, locomotion, particles, sounds, protections, and spawn sections for each monster family.
Monster runtime behavior is attached through bind.monster. During spawn, the binder registers the object, initializes
scheme logic with the monster scheme type, and later handles section switching, online/offline transitions, sound
cleanup, and smart terrain participation.
When editing monster configs, compare the closest existing species file first. Many fields are species-specific engine parameters, and nearby sections are usually the best source for valid value shape.
Online/offline groups
$scheme/creatures.misc.scheme.ltx validates online_offline_group sections. These sections describe squad-style spawn
groups and can include fields such as faction, NPC section lists, random NPC pools, target smart terrain, behavior,
death conditions, and invulnerability.
Use these sections when the config needs to describe a squad or group that moves through simulation, rather than a single creature section.
Editing checklist
When changing creature configs:
- keep the
$schememarker on sections that validation should check; - keep
script_bindingaligned with the engine class and intended runtime binder; - update referenced condition, immunities, sound, terrain, movement, and damage sections together;
- check script configs and smart terrain jobs before assuming behavior belongs in the creature base section;
- run LTX validation after schema or config changes:
npm run cli verify ltx
Zones and anomalies
Zone configs describe anomaly fields, anomaly mines, campfires, teleport and no-gravity zones, space restrictors, level
changers, and composite anomaly zones that can spawn artifacts. Static zone sections live under
src/engine/configs/zones; script-level zone objects live in src/engine/configs/objects/zone_objects.ltx.
Use this page when you need to decide whether a behavior belongs in a base zone section, a script object section, or a scenario-specific anomaly config.
Source files
| Source | Purpose |
|---|---|
zones/index.ltx | Includes all zone config files into the final game config tree. |
zones/zone_base.ltx | Defines shared zone defaults. XRF sets the base zone script binding to bind.anomaly_field. |
zones/zone_field_*.ltx | Defines acidic, psychic, radioactive, and thermal field zones. |
zones/zone_mine_*.ltx and zones/zone_minefield.ltx | Defines electric, gravitational, acidic, thermal, and minefield anomaly variants. |
zones/zone_campfire.ltx | Defines campfire zone sections. |
zones/zone_teleport.ltx and zones/zone_nogravity.ltx | Defines special movement or transition zones. |
zones/zone_burningfuzz.ltx and zones/zone_fireball.ltx | Defines additional anomaly families. |
objects/zone_objects.ltx | Defines script-level zone objects such as space_restrictor, anomal_zone, camp_zone, level_changer, and script_zone. |
$scheme/zone.scheme.ltx | Validates zone fields and base zone fields. |
scripts/**/anomaly/*.ltx | Defines scenario-specific composite anomaly configs read by AnomalyZoneBinder. |
Runtime binding
Zone-related sections attach runtime behavior through script_binding.
| Binding | Used by |
|---|---|
bind.anomaly_field | Regular anomaly field or mine sections based on zone_base. |
bind.anomaly_zone | Composite anomal_zone script objects that coordinate fields, artifact layers, and respawn rules. |
bind.restrictor | space_restrictor sections. |
bind.camp | camp_zone sections. |
bind.campfire | Campfire zone sections. |
bind.level_changer | Level changer sections. |
bind.arena_zone | Arena script zones when the section is present. |
The binding tells XRF which TypeScript binder should manage the object. The engine class still controls the underlying X-Ray object type, collision behavior, and native zone behavior.
Base zone sections
Most static anomaly sections inherit from [zone_base] or a specialized zone parent and use $scheme = $zone.
Common zone fields include:
- particle and sound names for idle, entrance, hit, and blowout states;
- hit settings such as hit type, hit impulse, and power values;
- light, wind, postprocess, and visual shape settings;
- artifact handling flags such as
ignore_artefacts; - spawn metadata and editor fields.
Use inheritance for variants such as weak, average, and strong anomaly sections. Keep the shared behavior on the parent section and override only the values that differ.
Script zone objects
objects/zone_objects.ltx defines script-level objects that are not ordinary anomaly damage sections.
Important sections include:
[space_restrictor], managed bybind.restrictor;[anomal_zone], managed bybind.anomaly_zone;[camp_zone], managed bybind.camp;[level_changer], managed bybind.level_changer;[script_zone], used for arena-style script zones.
Choose these sections when the object is meant to drive script logic, travel, restrictions, camps, or composite anomaly behavior rather than a standalone damage field.
Composite anomaly zones
Composite anomaly zones are managed by AnomalyZoneBinder. The binder reads the spawned object’s anomal_zone section
and may also read an additional config file from the cfg field.
The binder reads fields such as:
layers_count;respawn_tries;max_artefacts;applying_force_xzandapplying_force_y;artefacts;start_artefact;artefact_ways;field_name;coeff;coeffs_section.
Each layer_N section can override artifact counts, respawn tries, maximum artifacts, forces, artifact lists, starting
artifacts, and waypoint lists for that layer.
Use composite anomaly configs when the gameplay object needs to coordinate several anomaly fields and artifact spawning rules. Use a normal zone section when you only need an individual field, mine, or damage source.
Editing checklist
When changing zones or anomalies:
- keep
script_bindingaligned with the section’s runtime role; - do not mix regular field sections with
anomal_zonecomposite configs; - keep
$scheme = $zoneon sections validated byzone.scheme.ltx; - verify referenced particles, sounds, postprocess names, artifact sections, and waypoint names;
- check story links and map placement when changing level changers or restrictors;
- run LTX validation after config or schema changes:
npm run cli verify ltx
Smart terrains and jobs
Smart terrain configs describe places where squads and individual objects can work. Job configs decide which object can take which logic section and with what priority.
The source files live mostly under src/engine/configs/scripts/**/smart plus shared smart terrain configs such as
sim_smart_base.ltx and sim_smart_resource.ltx.
Smart terrain role
A smart terrain is a server-side simulation object. It owns jobs, tracks assigned objects, and participates in offline ALife simulation. When an assigned object goes online, its binder and scheme logic run on the client side.
Use smart terrain configs for simulation placement and job selection. Use scheme sections for the actual object behavior once the job is active.
Job fields
Common job fields include:
logic, pointing to the script config and section used by the object;prior, defining selection priority;suitable, checking whether the object can take the job;active, selecting the active logic section;path_walkandpath_look, used by walker-style schemes;on_infoand other condlists for switching job state.
The exact fields depend on the scheme used by the job.
Editing workflow
When changing a smart terrain job:
- find the smart terrain section and job section;
- follow
logicoractiveto the scheme section; - check
suitableandpriorif the NPC does not select the job; - check scheme implementation and parser support for any new field;
- validate LTX includes and schema.
Run:
npm run cli verify ltx
Treasures
Treasure configs describe hidden stashes and the rewards assigned to them. XRF reads treasure data through
TreasureManager and related treasure utilities.
Use this page when you need to add a stash, grant stash coordinates from a quest, or check why a marked stash does not produce the expected reward.
Source files
Treasure manager source files live under:
src/engine/configs/managers/treasure_manager.ltxsrc/engine/configs/managers/treasures/treasures_zaton.ltxsrc/engine/configs/managers/treasures/treasures_jupiter.ltxsrc/engine/configs/managers/treasures/treasures_pripyat.ltx
Script configs can also reference treasure inventory boxes, for example
src/engine/configs/scripts/treasure_inventory_box.ltx.
Quest and restrictor scripts grant stash coordinates with the give_treasure effect. Examples exist in task configs and
script logic, including:
src/engine/configs/managers/tasks/tasks_zaton.ltx;src/engine/configs/managers/tasks/tasks_jupiter.ltx;src/engine/configs/scripts/jupiter/jup_b43_task_giver_restrictor.ltx;src/engine/configs/scripts/pripyat/pri_b36_sr_ahi_place_pda.ltx.
Runtime behavior
Treasure data is loaded by the treasure manager. It tracks which treasures are available, found, or already looted, and coordinates map spot display through map utilities.
The script effect xr_effects.give_treasure calls TreasureManager.giveActorTreasureCoordinates(...) for each passed
treasure id. This grants coordinates; the treasure definition still controls the stash metadata and reward contents.
Physical treasure containers enter the manager through object binders. ObjectPhysic and ObjectHangingLamp call
TreasureManager.registerItem(this) when they are constructed, so the manager can connect spawned world objects to
treasure data.
When changing treasure behavior, check both:
- the manager config that defines treasure metadata and rewards;
- the script config or object section that represents the stash in the world.
Example grant
This pattern appears in Jupiter quest logic. It grants one treasure once and then records that the reward was already given:
[sr_idle@reward]
on_info = {+jup_b43_contract_brought_first_artefact -jup_b43_once_treasure_give_1} %=give_treasure(jup_hiding_place_5) +jup_b43_once_treasure_give_1%
Use an info portion guard when the same logic section can be evaluated more than once.
Editing checklist
- Keep treasure ids stable once saves can reference them.
- Keep reward sections valid and included.
- Check map spot behavior when a treasure should appear on the PDA.
- Check the world object or inventory box section that represents the stash.
- Check quest scripts that grant the treasure with
give_treasure. - Test
TreasureManageror treasure utility code when changing runtime behavior. - Run
npm run cli verify ltxafter config edits.
Weapons
Weapon configs live under src/engine/configs/items/weapons. They define base weapon sections, HUD sections, sounds,
ballistics, upgrade links, add-ons, ammo classes, and mounted weapons.
Source layout
Important files and folders:
base.ltxfor shared weapon definitions;index.ltxfor includes;w_*.ltxfor individual weapon sections;upgrades/*.ltxfor weapon upgrade trees;weapon_upgrades.ltxandupgrades_properties.ltxfor shared upgrade data;$scheme/weapons.scheme.ltxfor validation coverage.
Validation schema
Weapon schemas are mostly strict. They model common sections such as:
$item_weapon;$item_weapon_hud;$item_weapon_sounds;$item_weapon_attachable;$item_weapon_params;$item_weapon_grenade;$item_weapon_knife;$weapon_mounted.
If a valid weapon field fails validation, update the narrow matching schema instead of disabling strict validation for the whole weapon category.
Runtime links
Weapon configs reference assets and other config sections:
visual,item_visual, HUD positions, and bones;- sound aliases such as
snd_shootandsnd_reload; - particle aliases such as
flame_particlesandshell_particles; - ammo sections through
ammo_class; - upgrade sections through
upgrades,installed_upgrades, andupgrade_scheme; - add-on sections for scopes, silencers, and grenade launchers.
Check all referenced sections and assets when adding a weapon variant.
Editing checklist
- Compare against a nearby weapon with the same weapon class.
- Keep HUD and world model sections separate.
- Validate upgrade section names and include order.
- Run
npm run cli verify ltx. - Test script-side weapon utilities only when changing runtime TypeScript behavior.
Common failure points
- Missing include order can make a weapon section valid in isolation but unavailable from the final item index.
- HUD section names must stay aligned with the weapon section fields that reference them.
- Ammo, scope, silencer, and grenade-launcher section names must exist before the weapon can use them.
- Texture, model, sound, and particle references are not fixed by LTX formatting; verify the referenced resource files separately.
Weather
Weather configs define environment cycles, ambient sounds, fog, suns, thunderbolts, weather effects, and manager-level
weather selection. Runtime weather behavior is handled by WeatherManager.
Source layout
Important source areas:
src/engine/configs/environment/environment.ltx;src/engine/configs/environment/weathers/*.ltx;src/engine/configs/environment/weather_effects/*.ltx;src/engine/configs/environment/ambients/*.ltx;src/engine/configs/environment/ambient_channels/*.ltx;src/engine/configs/environment/fog/*.ltx;src/engine/configs/environment/dynamic_weather_graphs.ltx;src/engine/configs/managers/weather_manager.ltx;src/engine/configs/managers/weather/weather_manager_levels.ltx.
Weather sections
The $weather schema is strict and includes fields for sky, fog, rain, sun, clouds, wind, water, ambient, thunderbolt,
and sun shafts. A weather cycle is built from time sections that point the engine at these values.
Weather effect sections describe temporary events such as surge, blowout, and psi storm effects. They reference particles, sound, wind, and lifetime fields.
Runtime manager
WeatherManager subscribes to actor update events and actor online events. It applies configured weather and exposes
debug information through the XRF debug panel.
On actor network spawn, the manager reads the current level’s weathers value from game.ltx. If no level-specific
value is configured, it uses the AtmosFear-style dynamic weather section. The selected value is parsed as a condition
list and becomes the source for later weather section selection.
During actor updates, the manager:
- checks hourly changes and advances weather graph state;
- changes good/bad weather periods when the configured period boundary is reached;
- marks pre-blowout weather when a surge or weather FX is close;
- updates DOF every five game seconds for active AtmosFear weather;
- saves and loads weather section, period, graph state, and active weather FX data.
When changing weather selection logic, update manager tests. When changing only LTX values, validate the configs and check the result in game.
Validation
Run:
npm run cli verify ltx
Use the debugging weather page for in-game inspection and debug panel workflow.
Editing notes
- Edit weather cycle values under
environment/weatherswhen changing sky, fog, rain, sun, or ambient output. - Edit
dynamic_weather_graphs.ltxwhen changing transitions between clear, cloudy, rainy, or related graph states. - Edit
weather_manager_levels.ltxandgame.ltxlinks when changing which weather set a level uses. - Use a save/load check after manager logic changes because weather state is serialized.
Effects and conditions
Effects and conditions are Lua externals called from config condlists. They are the bridge between LTX logic and XRF TypeScript behavior.
Effects are registered under xr_effects. Conditions are registered under xr_conditions.
Source layout
| Source area | Purpose |
|---|---|
src/engine/scripts/declarations/effects | Effect functions called from %...% condlist actions. |
src/engine/scripts/declarations/conditions | Boolean condition functions called from {...} condlist checks. |
src/engine/scripts/register/externals_registrator.ts | Loads declaration modules and prevents duplicate registration. |
src/engine/core/utils/binding.ts | Implements extern(...) and nested global registration. |
src/engine/core/utils/ini | Runtime condlist parsing and execution. |
Config names
Configs call short names:
on_info = {=actor_has_item(af_oasis_heart)} %=give_inited_task(jup_b16_task)%
The registered globals include the namespace:
actor_has_itemresolves toxr_conditions.actor_has_item;give_inited_taskresolves toxr_effects.give_inited_task.
Search both names before changing an effect or condition.
Function shape
Effect and condition declarations commonly receive the actor object, the current object, and a parameter array parsed from the condlist:
%=play_sound(story_sound_id)%
{=dist_to_actor_le(30)}
Parameters in configs are colon-separated. Keep parsing simple and update parser tests before adding syntax that needs nested values or escaping.
Side effects
Conditions should answer a question. Effects may mutate game state: give or remove info portions, start tasks, play sounds, set weather, spawn objects, save the game, or switch object state.
pickSectionFromCondList can run effects while choosing a section. A field that looks like a value read may still
change state if its matching condlist entry contains %...%.
Testing
Effect and condition files have focused Jest tests beside the declarations. When changing behavior, update the matching test:
npm test -- src/engine/scripts/declarations/effects
npm test -- src/engine/scripts/declarations/conditions
For config changes that call the function, also run:
npm run cli verify ltx
Forms
Forms are UI XML sources used by engine CUI classes. XRF keeps most form source in TSX under src/engine/forms and
builds it into XML.
Runtime UI classes live under src/engine/core/ui. They load XML, initialize controls, register callbacks, and update
the UI at runtime.
Source types
| Source type | Build behavior |
|---|---|
src/engine/forms/**/*.tsx | Imported by the UI build and rendered to .xml. |
src/engine/forms/**/*.ts | Imported when it exports a valid create() form source. |
src/engine/forms/**/*.xml | Copied as static UI XML. |
src/engine/forms/textures_descr/*.xml | Texture atlas metadata copied as UI XML. |
Dynamic forms must export create(). The UI build calls it and writes the result through renderJsxToXmlText.
Components
Shared JSX components live under src/engine/forms/components. Common base components include:
XrRoot;XrElement;XrStatic;XrText;Xr3tButton;XrCheckBox;XrEditBox;XrScrollView;XrTab;XrTexture.
Prefer these helpers over manually assembling repeated XML structures.
Runtime loading
Runtime classes use engine UI helpers such as CScriptXmlInit, CUIScriptWnd, CUIStatic, CUI3tButton,
CUIListBox, and related CUI bindings.
When changing a form:
- find the runtime class that loads it;
- keep XML node names stable unless the runtime lookup is updated;
- check paired 16:9 variants such as
name.tsxandname_16.tsx; - update tests for runtime UI classes when element names or callbacks change.
Validation
Run a focused UI build after form changes:
npm run cli build -- --filter ui
Do not edit generated XML under target/.
Debugging workflow
If a control does not appear or a callback does not fire, check the runtime class before changing the form. Most UI classes look up controls by XML node name, so a renamed node can break runtime initialization even when the XML builds.
For layout issues, compare the generated XML with the TSX source and any paired widescreen variant. For behavior issues,
inspect the src/engine/core/ui class that loads the form and binds callbacks.
Patrols
Patrol paths are level-authored waypoint paths used by stalker schemes, monster movement, smart cover targets, travel, spawn helpers, and simulation utilities.
For stalker logic, XRF routes most waypoint behavior through StalkerPatrolManager. Schemes such as walker,
sleeper, patrol, and reach_task configure the manager with path_walk, optional path_look, team
synchronization, suggested states, and waypoint callbacks.
Related schemes
path_walk
path_walk is the movement path. The scheme reads it from config, verifies the patrol path exists, parses waypoint
metadata, and sends the object along the path.
Supported waypoint flags include:
| Flag | Meaning |
|---|---|
a=state | Use a state condlist or state value while moving to or through the waypoint. |
p=percent | Stop probability at the waypoint. If omitted, the manager uses the normal look-path behavior. |
sig=name | Set an active scheme signal when the walk waypoint is reached. |
ret=value | Pass a numeric return value to a registered patrol callback before animation turn handling. |
If no sig is provided on the last walk waypoint, the manager emits path_end.
path_look
path_look is an optional look/idle path paired with path_walk. The engine uses waypoint flags to choose a matching
look point for a reached walk point.
Supported look flags include:
| Flag | Meaning |
|---|---|
a=state | Use a state condlist or state value while standing and looking. |
t=msec | Wait time. * means no timeout. Numeric values must be 0 or in the accepted millisecond range. |
sig=name | Set a signal after turning to the look point. Defaults to turn_end when no signal is provided. |
syn | Wait for the patrol team before emitting the signal. Requires sig. |
sigtm=name | Set a signal when the animation-time callback fires. |
ret=value | Pass a numeric return value to a registered patrol callback after turning. |
syn is intended for terminal coordination. XRF asserts when it is used on a non-terminal waypoint.
Example
Button-style interaction that plays a press state, then switches when the timed animation signal is emitted:
path_look waypoint flags: a=press|t=0|sigtm=pressed
logic field: on_signal = pressed | next_scheme@section
The exact waypoint flag syntax is stored in level patrol data, not in the LTX file. LTX sections reference the patrol
path names through fields such as path_walk and path_look.
Debugging
If a patrol does not work:
- verify
level.patrol_path_exists(path_name)would pass forpath_walkandpath_look; - check that
path_lookis not the same path aspath_walk; - check waypoint flags when look points are not selected;
- check
on_signalwhen the movement reaches a point but the scheme does not switch; - use AI debug overlays and object dumps from the debug panel when the active state is unclear.
UI elements
UI elements are engine CUI bindings exposed to Lua. XRF uses them from runtime UI classes and initializes most controls
from XML generated by src/engine/forms.
Use the XRF X-Ray 16 SDK as the API reference for exact methods. This page gives the practical map of common classes.
XML initialization
CScriptXmlInit loads XML and creates controls from node selectors.
Common methods include:
ParseFile(path);ParseShTexInfo(path);InitWindow(selector, index, window);InitStatic(selector, parent);InitTextWnd(selector, parent);Init3tButton(selector, parent);InitCheck(selector, parent);InitComboBox(selector, parent);InitEditBox(selector, parent);InitListBox(selector, parent);InitScrollView(selector, parent);InitTab(selector, parent);InitTrackBar(selector, parent).
Call ParseFile() before using Init* helpers. Controls created with a parent are attached to that parent by the
engine binding.
Window base classes
| Class | Use |
|---|---|
CUIWindow | Base window rectangle, visibility, enable state, child attachment, and positioning. |
CUIDialogWnd | Dialog window that can be shown, hidden, and attached to a dialog holder. |
CUIScriptWnd | Script-driven dialog window with callbacks, keyboard handling, child registration, and typed lookup helpers. |
Use CUIScriptWnd for custom script windows that need callbacks or registered child controls.
Static and text controls
| Class | Use |
|---|---|
CUIStatic | Static image, texture, animation, or simple visual element. |
CUITextWnd | Text window with text color, alignment, string-table text, and sizing helpers. |
CUILines | Text lines object used by text-capable controls. |
CUISleepStatic | Sleep/static overlay variant used by engine UI. |
Use SetTextST(...) when the text should come from translations.
Buttons and inputs
| Class | Use |
|---|---|
CUIButton | Base button class. |
CUI3tButton | Common three-state button used by menus and dialogs. |
CUICheckButton | Checkbox-style button with checked state. |
CUICustomEdit | Base edit control with text and focus capture. |
CUIEditBox | Edit box with texture initialization. |
CUICustomSpin | Base spin control. |
CUISpinFlt | Float spin control. |
CUISpinNum | Integer spin control. |
CUISpinText | Text spin control. |
CUITrackBar | Slider/track bar with integer or float values. |
For settings screens, prefer the existing option window patterns under src/engine/core/ui/menu/options.
Lists and tabs
| Class | Use |
|---|---|
CUIListBox | Scrollable list box with list-box items. |
CUIListBoxItem | Item for CUIListBox. |
CUIListBoxItemMsgChain | Message-chain list item variant. |
CUIListWnd | Engine list window that owns added list items. |
CUIListItem | Generic list item. |
CUIScrollView | Scroll view container. |
CUITabControl | Tab container with id and index activation. |
CUITabButton | Button used by tab controls. |
Ids and visual indices are not the same for combo boxes, tabs, and lists. Use ids for stable logic and indices for visual order.
Frames, maps, and message windows
| Class | Use |
|---|---|
CUIFrameWindow | Framed panel. |
CUIFrameLineWnd | Repeating frame line. |
CUIComboBox | Dropdown list with item ids. |
CUIMessageBox | Message box static variant. |
CUIMessageBoxEx | Dialog-window message box variant. |
CUIProgressBar | Progress indicator. |
CUIPropertiesBox | Context/properties menu. |
CUIMapInfo | Map metadata control. |
CUIMapList | Multiplayer map list control. |
CUIMMShniaga | Main-menu animated/menu control. |
CServerList | Multiplayer server list control. |
Lifetime and callbacks
Parent-owned controls are adopted by the engine UI tree. After attaching a child or adding an item to a list, treat the parent/list as owning its lifetime.
For CUIScriptWnd, register child controls before adding callbacks or using typed lookup helpers. Callback names depend
on the registered window name, so keep XML node names and registration names aligned.
Runtime Lifecycle
The runtime lifecycle is the path from xray loading Lua scripts to XRF managers, binders, schemes, and server objects owning live gameplay state.
Read this section before changing object registration, manager startup, save/load, online/offline transitions, or event emission order.
Startup Flow
The main game-start callback is start.callback(isNewGame) in src/engine/scripts/start.ts. It runs for both new games
and loaded games.
Startup order:
- update cached class ids from
classIds; - register the ALife simulator;
- register rank descriptors;
- unlock system ini overriding;
- register managers;
- register schemes;
- register extensions;
- emit
GAME_STARTED.
Managers, schemes, and extensions should not depend on object binders already being online during this callback. Online objects arrive later through binder calls from the engine.
Object Flow
The usual runtime path is:
- xray loads script entry modules such as
register,bind, andstart. start.callbackinitializes shared runtime systems.- xray creates an online game object and calls a function from the
bindextern module. - The binder attaches a TypeScript
object_bindersubclass to the game object. net_spawnregisters the object in the runtime registry and sets up callbacks.updateruns per-frame or throttled behavior.net_destroyunregisters callbacks and registry state when the object goes offline.saveandloadpersist binder and scheme state when the object is save-relevant.
Server-side objects use related ALife callbacks such as on_register, on_unregister, STATE_Write, and STATE_Read.
Runtime Owners
| Owner | Source | Owns |
|---|---|---|
| Entry modules | src/engine/scripts | Engine-facing extern names and startup callbacks. |
| Binders | src/engine/core/binders | Client object lifecycle and object-local glue. |
| Managers | src/engine/core/managers | Cross-object systems and singleton runtime state. |
| Registry | src/engine/core/database | Shared runtime tables and focused helper APIs. |
| Schemes | src/engine/core/schemes | Object logic sections driven by configs. |
| Server objects | src/engine/core/objects | ALife-side registration, simulation, and save data. |
| Events | src/engine/core/managers/events | Internal publish-subscribe events and game timers. |
Keep state near the owner that controls its lifecycle. A binder should not become the permanent owner of a cross-object
system. A manager should not store short-lived object state that belongs in registry.objects.
First Places To Check
- For startup order, read
src/engine/scripts/start.ts. - For binder factories, read
src/engine/scripts/bind.ts. - For manager startup, read
src/engine/scripts/register/managers_registrator.ts. - For manager registry helpers, read
src/engine/core/database/managers.ts. - For shared state, read
src/engine/core/database/registry.ts. - For save/load coordination, read
src/engine/core/managers/save/SaveManager.ts.
Editing Checklist
- Identify whether the change belongs to a binder, manager, registry helper, scheme, or server object.
- Check both online and offline paths.
- Check save and load paths if state must survive reload.
- Preserve event order unless the task is specifically about event behavior.
- Add focused tests near the lifecycle owner.
Runtime Binders
Binders attach TypeScript lifecycle code to online xray game objects. They are registered through the bind extern
module in src/engine/scripts/bind.ts.
Use binders for client-side lifecycle glue: registering an object, installing engine callbacks, initializing logic, and cleaning up when the object goes offline.
Binder Families
| Family | Binder functions |
|---|---|
| Creatures | actor, stalker, monster, crow |
| Zones | restrictor, anomaly_zone, anomaly_field, camp, arena_zone, level_changer |
| Physical | physic_object, door, campfire, artefact, phantom, signal_light |
| Items | weapon, helmet, outfit |
| Smart systems | smart_terrain, smart_cover |
| Helicopter | helicopter |
Some binder factories are conditional:
arena_zonebinds only when the spawn ini containsarena_zone;helicopterbinds only when the spawn ini containslogic;physic_objectbinds only when the object haslogicor is an inventory box;smart_terrainbinds only when the spawn ini containssmart_terrain.
Common Lifecycle Methods
Most binders implement some subset of:
reinit: reset local and registry state;net_spawn: object came online;update: object update tick;net_destroy: object went offline;net_save_relevant: whether binder state should be saved;save: write binder and object logic state;load: read binder and object logic state.
Use the same read/write order in save and load. When a binder persists object logic, it usually wraps the operation
in save markers and calls saveObjectLogic / loadObjectLogic.
Actor Binder
ActorBinder is the global update driver for many runtime systems.
On online switch it:
- shows indicators;
- registers actor references;
- initializes actor portable store;
- emits
ACTOR_GO_ONLINE.
On reinit it registers the actor again, resets portable store, installs actor callbacks, enables unlimited ALife
update for the initial spawn buffer, schedules stable ALife updates, and emits ACTOR_REINIT.
On update it emits ACTOR_UPDATE, throttled actor update events, processes EventsManager timers, and updates actor
simulation availability.
Stalker Binder
StalkerBinder owns online stalker setup. It creates the stalker state manager and patrol manager, sets up planners,
registers the stalker in the registry, installs callbacks, initializes sound themes, initializes object logic, and sets
up post-combat idle behavior.
On offline switch it stops sounds, emits scheme offline events, applies on_offline overrides, stores offline state,
and unregisters the stalker.
Restrictor Binder
RestrictorBinder is a compact example for zone lifecycle:
reinitresets object registry state;net_spawnregisters the zone and starts looped sounds;- first
updateinitializes restrictor scheme logic; - later
updatetracks visited state, emits scheme updates, and updates sounds; net_destroyemits scheme offline behavior, stops sounds, and unregisters the zone;saveandloadpersist object logic and visited state.
Guidelines
- Keep binders focused on object lifecycle.
- Use managers for cross-object systems.
- Use registry helpers instead of mutating registry tables directly.
- Reset engine callbacks when an object goes offline.
- Check
net_save_relevantbefore assuming a binder’s save/load methods are used.
Runtime Managers
Managers are singleton runtime services stored in the registry. They own cross-object systems such as events, save/load, sound, simulation, trade, tasks, weather, upgrades, UI state, and debugging.
Managers extend AbstractManager from src/engine/core/managers/abstract/AbstractManager.ts.
Manager Access
Use the registry helper that matches the lifecycle you need:
getManager(SoundManager);
getWeakManager(SoundManager);
getManagerByName("SoundManager");
getManager(ManagerClass) is the normal path. It returns the existing singleton or initializes one.
getWeakManager(ManagerClass) returns null if the manager is not initialized.
getManagerByName(name) is mainly for circular-reference cases where the class reference is not available. It cannot
initialize a missing manager.
Startup Managers
registerManagers() initializes the startup manager list during start.callback.
The current startup list is:
ActorInputManager;ActorInventoryMenuManager;DatabaseManager;DebugManager;DialogManager;EventsManager;GameSettingsManager;LoadScreenManager;LoadoutManager;MapDisplayManager;MusicManager;NotificationManager;PdaManager;PhantomManager;ProfilingManager;ReleaseBodyManager;SaveManager;SimulationManager;SleepManager;SoundManager;StatisticsManager;TaskManager;TradeManager;TravelManager;TreasureManager;UpgradesManager;WeatherManager.
Other managers can still be initialized lazily with getManager. For example, SaveManager initializes SurgeManager
after ACTOR_REINIT.
Lifecycle Methods
AbstractManager defines:
initialize();destroy();update(delta);save(packet);load(reader).
The base update, save, and load methods abort. Implement only the methods the manager actually supports.
disposeManager calls destroy(), marks the manager as destroyed, and removes it from both registry maps.
Common Patterns
Managers that listen to events usually subscribe in initialize() and unsubscribe in destroy().
Managers with persistent state write to net packets through SaveManager or to dynamic save data through helpers. Keep
save and load order synchronized.
Managers with delayed work should check isDestroyed before doing work after disposal.
Where To Add Behavior
- Use a manager for shared behavior across many objects.
- Use a binder when the behavior belongs to one online object.
- Use a scheme manager when the behavior belongs to one config scheme.
- Use a database helper when the behavior is narrow registry access.
Do not construct managers directly in runtime code. Use getManager unless a test is intentionally isolating a manager
class.
Runtime Events and Timers
EventsManager is the internal publish-subscribe layer for runtime lifecycle changes. It also owns game-time intervals
and timeouts through AbstractTimersManager.
Use events when a binder, manager, scheme, or server object needs to announce a lifecycle change without directly depending on every listener.
Event Dispatch
Events are declared in EGameEvent under src/engine/core/managers/events/events_types.ts.
Register callbacks through the manager:
getManager(EventsManager).registerCallback(EGameEvent.ACTOR_UPDATE, this.onActorUpdate, this);
Emit events through the manager or the static helper:
EventsManager.emitEvent(EGameEvent.GAME_STARTED, isNewGame);
Callbacks can be registered with a context. When context is provided, the callback is called with that context.
Event Groups
EGameEvent covers:
- actor registration, online/offline, reinit, death, item, trade, sleep, and update ticks;
- stalker and monster registration, hit, death, and interaction;
- helicopter, squad, smart terrain, smart cover, zone, and item lifecycle;
- task, treasure, surge, notification, hit, and UI menu events;
- save/load and level-change events;
- debug dump requests.
Prefer adding a specific event over overloading an unrelated existing one. Listeners should be able to infer why they were called from the event name.
Timers
EventsManager extends AbstractTimersManager.
Use:
const [cancel] = EventsManager.registerGameTimeout(callback, 1000);
const [stop] = EventsManager.registerGameInterval(callback, 500);
Intervals assert that the period is at least 50 milliseconds. Both intervals and timeouts receive the actual elapsed
offset when they run.
Timers are processed by ActorBinder.update() through eventsManager.tick(). They advance on actor updates, not as
independent operating-system timers.
Cleanup
Unregister callbacks in the lifecycle owner that registered them:
- managers should unregister in
destroy(); - binders should reset object callbacks in offline cleanup;
- one-shot timers remove themselves after running;
- long-lived intervals should keep and call the cancel function when the owner is destroyed.
High-frequency events such as ACTOR_UPDATE should stay light. Use throttled actor update events or an interval when
work does not need to run every actor tick.
Runtime Save and Load
XRF has two save paths:
- engine net-packet save/load for binders, server objects, and selected managers;
- dynamic save data stored beside the game save through marshal-backed files.
Use net-packet save/load for compact state that is part of the engine lifecycle. Use dynamic save data for flexible extension or event state that should not be constrained by packet layout.
Save Manager
SaveManager coordinates core manager save/load and engine save callbacks.
Client manager state is saved and loaded through:
WeatherManager;ReleaseBodyManager;SurgeManager;PsyAntennaManager;SoundManager;StatisticsManager;TreasureManager;TaskManager;ActorInputManager;GameSettingsManager.
Server manager state currently goes through SimulationManager.
SaveManager also handles alife_storage_manager callbacks exposed from
src/engine/scripts/declarations/callbacks/game.ts.
Dynamic Save Data
Before a game save, SaveManager.onBeforeGameSave(saveName):
- emits
GAME_SAVE; - saves extension state;
- writes
registry.dynamicDatawithsaveDynamicGameSave.
When loading starts, SaveManager.onGameLoad(saveName):
- loads
registry.dynamicDatawithloadDynamicGameSave; - loads extension state;
- emits
GAME_LOAD.
After the engine reports successful load, SaveManager.onAfterGameLoad(saveName) emits GAME_LOADED.
Binder Save and Load
Save-relevant binders write their own state from save(packet) and read it in load(reader).
Common binder pattern:
openSaveMarker(packet, BinderClass.__name);
super.save(packet);
saveObjectLogic(this.object, packet);
closeSaveMarker(packet, BinderClass.__name);
The load path must read fields in the same order:
openLoadMarker(reader, BinderClass.__name);
super.load(reader);
loadObjectLogic(this.object, reader);
closeLoadMarker(reader, BinderClass.__name);
saveObjectLogic persists logic file names, active section, smart terrain name, activation time, active scheme save
event, and portable store data. loadObjectLogic restores the matching loaded fields and portable store.
Save Markers
Save markers protect net-packet layout.
openSaveMarkerrecords the current packet offset.closeSaveMarkerwrites the saved block size.openLoadMarkerrecords the current reader offset.closeLoadMarkerchecks that the loaded block size matches the saved block size.
The marker helpers assert when the read/write sizes drift. If a save format changes, update save and load together and adjust tests for the saved data list.
Guidelines
- Keep net-packet data compact.
- Never reorder saved fields without updating the load path.
- Save manager state through
SaveManagerwhen it is part of global runtime state. - Save object logic through binder save/load when it belongs to one online object.
- Use dynamic save data for extension data or flexible event state.
Schemes
Schemes are script-engine behavior blocks attached to an object through its logic config. A logic section chooses the first active scheme, and each scheme section describes what the object does until a switch condition moves it to another section.
[logic]
active = walker@guard

[walker@guard]
path_walk = guard_walk
path_look = guard_look
on_info = {+alarm_started} walker@alarm

[walker@alarm]
path_walk = alarm_walk
def_state_moving = run
The scheme name is the part before the suffix. For example, walker@guard uses the walker implementation, and
sr_idle@wait_for_actor uses the sr_idle implementation.
Section switching
Many active scheme sections support the same switching fields. The engine parses them from the active section and checks
them in the order used by the scheme switch parser. Numbered variants such as on_info1 and on_info2 let one section
define several checks of the same kind.
on_info, on_info1, …
Value shape: condlist.
When the condlist picks a target section.
on_signal, on_signal1, …
Value shape: signal | condlist.
When a waypoint or manager sets the named signal.
on_timer, on_timer1, …
Value shape: milliseconds | condlist.
After the section has been active for the given real-time duration.
on_game_timer, on_game_timer1, …
Value shape: seconds | condlist.
After the section has been active for the given game-time duration.
on_actor_inside
Value shape: condlist.
When the actor is inside the current restrictor object.
on_actor_outside
Value shape: condlist.
When the actor is outside the current restrictor object.
on_actor_in_zone
Value shape: zone | condlist.
When the actor is inside the named zone.
on_actor_not_in_zone
Value shape: zone | condlist.
When the actor is outside the named zone.
on_npc_in_zone
Value shape: story_id | zone | condlist.
When the NPC resolved by story id is inside the named zone.
on_npc_not_in_zone
Value shape: story_id | zone | condlist.
When the NPC resolved by story id is outside the named zone.
on_actor_dist_le
Value shape: distance | condlist.
When the object sees the actor and actor distance is less than or equal to the value.
on_actor_dist_le_nvis
Value shape: distance | condlist.
Same distance check, without requiring actor visibility.
on_actor_dist_ge
Value shape: distance | condlist.
When the object sees the actor and actor distance is greater than the value.
on_actor_dist_ge_nvis
Value shape: distance | condlist.
Same distance check, without requiring actor visibility.
A condlist can also set info portions or run effects while selecting the next section:
on_info = {+actor_has_key} ph_door@open %=play_sound(door_unlock)%
If the condlist returns an empty section, nil, or the current section, the switch is skipped.
nil is a special inactive target, not a registered scheme implementation. Switching helpers use it to clear active
scheme state or skip activation in places where a real section would normally be expected.
Scheme families
Stalker schemes
Examples: walker, patrol, remark, animpoint, smartcover.
Human NPC movement, idle states, combat support, meetings, and scripted actions.
Monster schemes
Examples: mob_walker, mob_home, mob_remark, mob_combat.
Monster movement, territory, scripted animations, and combat hooks.
Restrictor schemes
Examples: sr_idle, sr_timer, sr_teleport, sr_particle, sr_cutscene.
Trigger volumes, timers, effects, postprocess, and actor-facing scripted events.
Physical schemes
Examples: ph_idle, ph_button, ph_door, ph_code, ph_on_hit.
Scripted behavior for physical objects and usable scene objects.
Helicopter schemes
Examples: heli_move.
Helicopter patrol, movement, targeting, and attack behavior.
Generic schemes
Examples: combat, danger, death, hit, meet, post_combat_idle, wounded.
Shared behavior that can be enabled alongside active stalker or monster logic.
Patrol names
Several schemes read patrol path fields such as path_walk and path_look. When an object is running under a smart
terrain, relative path names are resolved against the smart terrain name. For example, path_walk = guard_walk in smart
terrain zat_b40_smart_terrain resolves to zat_b40_smart_terrain_guard_walk.
Use full path names when the path does not belong to the active smart terrain.
Common checks
path_walkis usually required for movement schemes.path_lookmust not be the same path aspath_walk.- Scheme sections can have suffixes, such as
walker@start,walker@alarm, orsr_timer@lab_countdown. - For timed transitions, section activation time is reset when switching to a different section.
- For switch-heavy logic, prefer
sr_idlewhen the object should do nothing except wait for conditions.
abuse
abuse is a generic stalker scheme that makes an NPC react when the actor abuses it repeatedly. The current action
reaction is a punch animation aimed at the actor.
Parameters
abuse has no scheme-specific LTX fields in the current TypeScript implementation.
Runtime values are stored in AbuseManager:
isEnabled
Default: true.
Enables or disables abuse accumulation.
abuseRate
Default: 2.
Multiplier used when abuse is added.
abuseThreshold
Default: 5.
Threshold at which the evaluator reports abuse.
abuseValue
Default: 0.
Current accumulated abuse value. It decays over time.
Runtime behavior
The scheme adds an IS_ABUSED evaluator and an abuse action to the stalker planner. The action can run only while the
NPC is alive, not in danger, and not wounded. When selected, it clears desired position and direction and sets the NPC
state to punch, looking at the actor.
AbuseManager.update() decays accumulated abuse over time, clamps it near the threshold, and returns whether the value
is currently above the threshold.
Example
[logic]
active = walker@idle

[walker@idle]
path_walk = guard_walk
path_look = guard_look
abuse is installed as a generic stalker scheme. It is not normally selected as the active section in [logic].
Notes
- The public manager API exposes
addAbuse,clearAbuse,enableAbuse,disableAbuse, andsetAbuseRate. - The page documents the current engine behavior. It does not define a separate config field for changing the abuse threshold or rate from LTX.
animpoint
animpoint moves a stalker to a registered smart cover point and plays an idle animation there. Use it for traders,
quest NPCs, camp idles, and fixed scene poses where the NPC should stand, sit, or perform an ambient animation at a
known point.
The scheme uses a smart cover record as its anchor. The cover position gives the animation position, and the cover angle gives the look direction.
Parameters
cover_name
Type: string. Optional. Default: $script_id$_cover.
Registered smart cover name used as the animation anchor.
use_camp
Type: boolean. Optional. Default: true.
Allows camp manager integration when the animpoint position is inside a camp zone.
reach_movement
Type: stalker state. Optional. Default: walk.
Movement state used while walking to the animpoint.
reach_distance
Type: number. Optional. Default: 0.75.
Distance threshold for reaching the animpoint. The engine stores it as squared distance.
avail_animations
Type: comma-separated strings. Optional. Default: null.
Explicit animation states to choose from. When absent, animations are selected from predicates for the smart cover description.
The section also supports common switch fields such as on_info, on_timer, and on_signal.
Usage
Use animpoint when the map has a smart cover that represents the desired pose location. The smart cover must be
registered before the scheme starts, otherwise activation aborts when the manager calculates the position.
If avail_animations is not set, the engine uses the smart cover description to find compatible animation predicates.
If the description has no registered predicate list, avail_animations is required.
With use_camp = true, the animpoint can register with a camp manager. Camp roles can choose director or listener
animations from the approved action list.
Example
[logic]
active = animpoint@trader

[animpoint@trader]
cover_name = zat_trader_cover
use_camp = false
reach_movement = walk
reach_distance = 1.0
avail_animations = wait, wait_trade
on_info = {+zat_trader_alarm} walker@alarm
Notes
- The smart cover named by
cover_namemust exist in the smart cover registry. avail_animationsis parsed as a comma-separated list.- The planner uses one action to reach the point and another action to play the selected animation.
- The scheme is interrupted by enemy, anomaly, wounded, abuse, corpse, item, and meet states through common planner preconditions.
camper
camper makes a stalker hold a combat position, scan look points, and fire from cover. Use it for ambushes, snipers,
defensive posts, and scripted combat positions.
The scheme owns a combat-camping planner action. It can block regular ALife, item gathering, corpse search, and wounded helping until close-combat camping is finished.
Parameters
path_walk
Type: string. Required. Default: none.
Patrol path used for movement between camp points. Relative names are resolved against the active smart terrain.
path_look
Type: string. Required. Default: none.
Patrol path used for look and scan points. It must not equal path_walk.
sniper
Type: boolean. Optional. Default: false.
Enables sniper scan behavior and sniper update rate.
no_retreat
Type: boolean. Optional. Default: false.
Stored in scheme state. Invalid together with sniper = true.
shoot
Type: always, none, or terminal. Optional. Default: always.
Controls when the NPC may fire at the visible enemy.
sniper_anim
Type: stalker state. Optional. Default: hide_na.
Sniper animation state stored by the scheme.
radius
Type: number. Optional. Default: 20.
Close-combat radius used by the close-combat evaluator.
def_state_moving
Type: stalker state. Optional. Default: null.
Suggested movement state.
def_state_moving_fire
Type: stalker state. Optional. Default: null.
Suggested movement-with-fire state.
def_state_campering
Type: stalker state. Optional. Default: null.
Suggested cover/scanning state.
def_state_standing
Type: stalker state. Optional. Default: def_state_campering.
Suggested standing state.
def_state_campering_fire
Type: stalker state. Optional. Default: null.
Suggested cover firing state.
scantime_free
Type: number. Optional. Default: 60000.
Time to keep scanning without enemy contact before resuming patrol movement.
attack_sound
Type: string or false. Optional. Default: fight_attack.
Sound played when firing. false disables it.
enemy_idle
Type: number. Optional. Default: 60000.
Enemy memory timeout before the action stops treating the remembered enemy as active.
The section also supports common switch fields such as on_info, on_timer, and on_signal.
Shooting modes
always
Fire whenever the enemy is visible and the action can shoot.
none
Never fire from this camper action.
terminal
Fire only from the terminal waypoint of path_walk.
Any other value aborts with a config error.
Sniper mode
With sniper = true, the action builds a scan table from flags on path_look, enables the object’s sniper update rate,
and scans look points while the NPC is on a camp patrol walk point.
sniper = true cannot be combined with no_retreat = true.
Example
[logic]
active = camper@ambush

[camper@ambush]
path_walk = ambush_walk
path_look = ambush_look
sniper = true
shoot = terminal
def_state_campering = hide_na
def_state_campering_fire = hide_sniper_fire
attack_sound = fight_attack
on_info = {+ambush_done} walker@after_ambush
Notes
path_walkandpath_lookare both required.path_lookcannot be the same aspath_walk.- Danger handling can temporarily override scanning with danger-facing states.
- The implementation uses fixed internal scan constants for enemy dispersion, scan delta, and scan time delta.
combat
combat configures scripted combat style for stalker NPCs. It selects a combat type through a condlist and installs the
planner hooks used by camper and zombied combat helpers.
Parameters
combat_type
Type: condlist. Optional. Default: null.
Resolves to a scripted combat type. Supported enum values in the TypeScript source are camper, zombied, and
monolith.
The section also supports common switch fields. They are parsed into state.logic, although the main combat behavior is
driven through planner evaluators and actions.
Runtime behavior
On activation, the scheme:
- marks combat overrides as enabled;
- reads
combat_type; - defaults zombied-community NPCs to
combat_type = zombiedwhen no field is provided; - resolves the selected combat type with
pickSectionFromCondList; - stores it on the object registry state as
scriptCombatType.
The add method registers IS_SCRIPTED_COMBAT, changes the base combat action precondition, and installs helper
actions for combat_camper and combat_zombied.
Runtime sequence
- Activation checks whether the section exists or whether the NPC community is
zombied. - The scheme reads common switch fields and
combat_type. - Zombied-community NPCs get
combat_type = zombiedwhen no field is configured. setCombatTyperesolves the condlist and storesscriptCombatTypeon the object registry state.addregistersIS_SCRIPTED_COMBATand blocks the baseCOMBATaction while scripted combat is active.- Camper and zombied helper actions are installed into the planner.
Example
[logic]
active = walker@guard

[walker@guard]
path_walk = guard_walk
path_look = guard_look
combat_type = {+ambush_started} camper, nil
Notes
combatis usually combined with another active movement or state scheme. It changes combat planner behavior rather than replacing movement by itself.- The
monolithvalue exists in the enum, but the inspected implementation only wires specific helper actions for camper and zombied combat. - Use the
combat_camperandcombat_zombiedpages when debugging the helper actions installed by this scheme.
combat_camper
combat_camper is an internal helper installed by the combat scheme. It makes an NPC hide, remember the last seen
enemy position, and shoot only when the scripted combat type is camper.
Parameters
combat_camper has no standalone LTX fields in the current TypeScript implementation.
Enable it through combat_type on a section handled by combat:
[walker@ambush]
path_walk = ambush_walk
path_look = ambush_look
combat_type = camper
Runtime behavior
The helper adds two evaluators:
IS_COMBAT_CAMPING_ENABLED
Returns true when the object registry scriptCombatType is camper.
SEE_BEST_ENEMY
Returns true when the NPC sees its best enemy and stores the enemy position.
It also adds two actions:
SHOOT
Sets stalker state to hide_fire and looks at the best enemy.
LOOK_AROUND
Sets stalker state to hide, looks near the last seen enemy position, and periodically changes search direction.
Where it is installed
combat_camper is installed by SchemeCombat. It relies on registry.objects[object.id()].scriptCombatType being
camper, which is set from combat_type = camper on the active combat-capable section.
Use it for ambush NPCs that should hold a position, hide, and shoot when they see the best enemy. Do not use it as a movement scheme; path and base activity still come from the section that activates combat behavior.
Notes
LOOK_AROUNDforgets the last seen position after30_000ms.- The search direction changes after
10_000ms initially, then every random2_000to4_000ms. - Hit callbacks while looking around can refresh the last seen enemy position if the hit came from the best enemy.
- If an NPC never enters camper combat, check the active section’s
combat_typeand whether normal combat activation ran for the object.
combat_ignore
combat_ignore controls whether a stalker should accept a potential enemy while scripted logic is active. It is used
for base behavior and quest scenes where combat can be ignored until conditions change.
Parameters
combat_ignore has no scheme-specific section fields in SchemeCombatIgnore.
The runtime state can receive logic overrides from the object registry. In particular, combatIgnoreKeepWhenAttacked
keeps combat ignore enabled when the actor hits the NPC.
Runtime behavior
On reset, the scheme:
- installs an enemy callback on the object;
- subscribes
CombatProcessEnemyManager; - enables the scheme state;
- copies current logic overrides into the scheme state.
The enemy callback asks canObjectSelectAsEnemy. If an enemy can be selected and the NPC is assigned to a smart
terrain, the manager starts the smart terrain alarm. If the actor attacked a controlled smart terrain, the terrain
control is notified.
When the NPC is hit by the actor, the manager disables combat ignore unless overrides keep it active.
Runtime sequence
- Activation creates state without reading a dedicated section.
addcreatesCombatProcessEnemyManagerand stores it on the state.- Reset installs
object.set_enemy_callback(...), subscribes the manager, enables the state, and copies overrides. - The enemy callback records actor combat state when the potential enemy is the actor.
- If the enemy can be selected and the NPC belongs to a smart terrain, the terrain alarm starts.
- Actor hits disable the state unless
combatIgnoreKeepWhenAttackedis set.
Example
[logic]
active = walker@base
combat_ignore = true

[walker@base]
path_walk = base_walk
path_look = base_look
Notes
- The exact
combat_ignoreoverride syntax is parsed outsideSchemeCombatIgnore; this page documents the scheme implementation that consumes the resolved override state. - Enemy selection is rejected when the source and enemy are farther apart than the configured attack distance.
disableclears the enemy callback and unsubscribes the stored manager action.
combat_zombied
combat_zombied is an internal helper installed by the combat scheme. It provides simplified combat actions for
zombied-community stalkers: advance toward the enemy, shoot, and move toward danger sources.
Parameters
combat_zombied has no standalone LTX fields in the current TypeScript implementation.
Zombied-community NPCs receive combat_type = zombied by default when combat is activated without an explicit
combat_type.
Runtime behavior
The helper adds IS_COMBAT_ZOMBIED_ENABLED. The current evaluator returns true when the object’s community is
zombied.
It also adds two actions:
ZOMBIED_SHOOT
Moves toward the current enemy’s last seen position and uses raid/threat fire states depending on distance and visibility.
ZOMBIED_GO_TO_DANGER
Moves toward the best danger source, ignoring grenade movement targets and reacting to hits.
Where it is installed
combat_zombied is added by the broader combat scheme; it is not normally used as an active section in LTX. Use
combat_type = zombied for intent, but also keep the NPC community as zombied because the evaluator checks community.
This helper is useful for simple zombie-style combat where the NPC should keep pressure on the enemy and react to danger without cover or camper behavior.
Example
[logic]
active = walker@zombie

[walker@zombie]
path_walk = zombie_walk
path_look = zombie_look
combat_type = zombied
Notes
SchemeCombatparses thezombiedcombat type, but the inspectedcombat_zombiedevaluator itself checks the NPC community. Use zombied community data when relying on this behavior.ZOMBIED_SHOOTmay playfight_attackon activation with a 25 percent chance.- Use
combat_camperor the normalcombatflow when the NPC should use cover-like hide/look behavior instead.
companion
companion makes a stalker follow and assist the actor. The current implementation uses a simple walking behavior and
planner action rather than a large LTX parameter set.
Parameters
companion has no scheme-specific LTX fields.
The section supports common switch fields. They are parsed into state.logic.
Runtime behavior
On activation, the scheme sets behavior = 0, which corresponds to the simple walk behavior in
ActionCompanionActivity.
The scheme adds EActionId.COMPANION_ACTIVITY to the state planner. It is a stalker scheme, so it expects a stalker
object with a planner and normal movement access.
The action runs when the NPC is alive, has no enemy, and the companion section is active. It:
- clears desired position and direction;
- enables talk;
- picks an accessible assist point near the actor;
- moves to that point using level path movement;
- chooses
raid,rush, orassaultstate based on distance; - switches to
threatwhile standing near the assist point and looking at the actor.
Example
[logic]
active = companion@follow

[companion@follow]
on_info = {+companion_stop} walker@wait
Notes
- The source defines additional behavior constants for near/ignore/wait modes, but the current activation code always sets simple walking behavior.
- The assist position is chosen to the side of the actor and must be accessible to the NPC.
- Combat or death interrupts the action because the evaluator requires the NPC to be alive and without an enemy.
- Use common switch fields on the companion section to exit follow behavior when quest state changes.
corpse_detection
corpse_detection is a generic stalker scheme for finding nearby lootable corpses. It adds planner logic that sends an
NPC to a corpse within the configured search radius and plays the corpse-search state.
Parameters
corpse_detection_enabled
Type: boolean. Optional. Default: true.
Enables or disables corpse detection for the current reset section.
Runtime behavior
The scheme adds IS_CORPSE_EXISTING and a SEARCH_CORPSE action. The evaluator returns true only when the NPC is
alive, has no enemy, is not in danger, is not zombied, is not wounded, is not the cinematic actor visual, and a nearby
lootable corpse exists within 20 meters.
When a corpse is selected, the evaluator stores the selected corpse id, vertex id, and position in scheme state and
marks the corpse in portable storage so another NPC does not select the same corpse. The action sends the NPC to the
corpse, switches to search_corpse near the target, and plays corpse_loot_begin once.
The finishCorpseLooting helper transfers items from the selected corpse to the looting NPC when the corpse object is
online. It then plays either corpse_loot_good or corpse_loot_bad; empty transfers use the bad-loot sound.
Example
[logic]
active = walker@camp

[walker@camp]
path_walk = camp_walk
path_look = camp_look
corpse_detection_enabled = false
Notes
corpse_detectionis generic stalker behavior. It is usually controlled from the active logic section, not selected as[logic] active.- Finalizing the search action frees the selected corpse marker.
cover
cover sends a stalker to a nearby cover point around a smart terrain and plays an animation while looking toward a
generated reference position.
Parameters
smart
Type: string. Required. Default: none.
Smart terrain name used as the center for cover selection.
anim
Type: condlist. Optional. Default: hide.
Stalker state condlist used after the NPC reaches cover.
sound_idle
Type: string. Optional. Default: null.
Sound alias played while the NPC is in cover.
use_attack_direction
Type: boolean. Optional. Default: true.
Parsed into state. The inspected action does not currently read it.
radius_min
Type: number. Optional. Default: 3.
Minimum random distance from the smart terrain for selecting a cover search point.
radius_max
Type: number. Optional. Default: 5.
Maximum random distance from the smart terrain for selecting a cover search point.
The section also supports common switch fields.
Runtime behavior
On activation, the cover action picks a random direction from the smart terrain level vertex and chooses a point between
radius_min and radius_max. That point is also stored as the look reference. The action asks the engine for the best
cover near it. If no cover is found, it uses the random point itself. If the chosen point is not accessible, it asks the
object for the nearest accessible point.
While moving to cover, the NPC uses the assault state. After reaching the cover position, the action resolves anim
and sets that stalker state, looking toward the generated enemy-facing position. If sound_idle is set, it plays that
sound through the sound manager.
Example
[logic]
active = cover@base

[cover@base]
smart = esc_smart_terrain_1
anim = {+under_attack} hide_fire, hide
sound_idle = state
radius_min = 3
radius_max = 6
on_info = {+leave_cover} walker@guard
Notes
smartis required. Activation aborts when it is missing.- The action blocks normal alife while cover activity is needed.
danger
danger replaces the default danger evaluator for stalkers and updates danger state from heard hostile sounds. It is a
generic planner scheme rather than a normal active movement section.
Parameters
danger has no scheme-specific LTX fields in the current TypeScript implementation.
Runtime constants:
INERTIA_TIME
Value: 15000.
Time in milliseconds to keep danger true after the object stops facing a current danger.
BULLET_REACT_DISTANCE_SQR
Value: 2 * 2.
Distance check for nearby bullet-hit sounds.
ALLIES_SHOOTING_ASSIST_DISTANCE_SQR
Value: 40 * 40.
Distance check for helping allies or reacting to enemy weapon sounds.
Runtime behavior
The scheme replaces DANGER evaluators in the main planner and the nested danger action planner with EvaluatorDanger,
then stores a DangerManager on state.
The evaluator returns true when the object is facing a danger. If the planner is already running the danger action, it
stores the danger time. When no current danger is faced, it can keep returning true while the last danger time is within
INERTIA_TIME.
The manager handles heard sounds. It can set danger time and destination vertex when the NPC hears nearby hostile bullet-hit sounds, enemy weapon sounds, or ally weapon sounds aimed at an enemy.
Example
[logic]
active = walker@guard

[walker@guard]
path_walk = guard_walk
path_look = guard_look
danger is installed generically for stalkers and does not need to be selected as the active section.
Notes
- If a stalker is in a smart terrain and faces danger, the evaluator starts the smart terrain alarm.
- The manager ignores heard sounds when the NPC already has a best enemy or cannot select the sound source as an enemy.
death
death executes configured condlists when a stalker dies and stores the killer id in the death scheme state.
Parameters
death reads its configuration indirectly:
on_death
Location: active logic section. Type: section name. Optional.
Names the death configuration section.
on_info
Location: death configuration section. Type: condlist. Optional.
First condlist executed on death.
on_info2
Location: death configuration section. Type: condlist. Optional.
Second condlist executed on death.
Runtime behavior
On reset, the scheme reads on_death from the current logic section. If it is set, the named section must exist. The
scheme then parses on_info and on_info2 from that section.
On death, the manager stores the killer object id, or -1 when no killer is provided. It then evaluates both parsed
condlists with the actor and the dead object as context. The return value is not used for section switching; use effects
inside the condlist for death side effects.
Runtime sequence
SchemeDeath.activatecreates the state for the stalker.SchemeDeath.addsubscribesDeathManager.SchemeDeath.resetreadson_deathfrom the active logic section.- If a death section is named,
on_infoandon_info2are parsed from that section. DeathManager.onDeathstoreskillerIdand evaluates the parsed condlists.
The condlists are evaluated with registry.actor as the first object and the dead stalker as the second object.
Example
[logic]
active = walker@guard
on_death = death@guard

[walker@guard]
path_walk = guard_walk
path_look = guard_look

[death@guard]
on_info = %+guard_dead%
on_info2 = {=killed_by_actor} %+actor_killed_guard%
Notes
- Missing
on_deathis allowed. - If
on_deathnames a section that does not exist, reset aborts. - Use
mob_deathfor monster death callbacks.deathis the stalker scheme.
gather_items
gather_items controls whether a stalker can use the base item-pickup evaluator. It is generic stalker behavior, not an
active movement section.
Use it on the section that becomes active for the NPC. The scheme is reset with that section and reads
gather_items_enabled from it.
Parameters
gather_items_enabled
Type: boolean. Optional. Default: true.
Enables item gathering for the current reset section.
Runtime behavior
The scheme replaces the planner ITEMS evaluator with EvaluatorGatherItems. The evaluator returns true when
gather_items_enabled resolved to true and the engine reports that there are items to pick up through
object.is_there_items_to_pickup().
If the field is omitted, canLootItems is set to true during reset. Setting it to false blocks this evaluator for that
active section only; it does not remove inventory logic from the engine or change item selection rules.
Example
[logic]
active = walker@post

[walker@post]
path_walk = post_walk
path_look = post_look
gather_items_enabled = false
Use this on story NPCs that must stay in position, wounded or dialog scenes where looting would break staging, and escort sections where the NPC should keep moving instead of reacting to nearby loot.
Notes
- Use this field on the active section that is passed to scheme reset.
- The scheme does not choose which items to pick up. It only controls whether the engine item evaluator is allowed to report available pickup work.
- If a later section should allow looting again, omit the field or set
gather_items_enabled = truethere.
hear
hear parses on_sound rules from the current section and switches schemes when the object hears a matching sound. It
is shared by stalker and monster binders.
Parameters
Add one or more on_sound lines to the active section:
on_sound, on_sound1, …
Type: pipe-separated parameter list. Optional.
story_id | sound_type | distance | power | condlist
Parameter meanings:
story_id
Position: 1.
Story id of the sound source. The runtime uses any when the source object has no story id.
sound_type
Position: 2.
Mapped sound type, such as WPN_shoot, WPN_hit, ITM_drop, or MST_attack.
distance
Position: 3.
Maximum distance from the heard sound position to the listening object.
power
Position: 4.
Minimum heard sound power.
condlist
Position: 5.
Section condlist evaluated when the sound matches.
Runtime behavior
On reset, the scheme scans every line in the section and stores entries whose field name matches on_sound with an
optional numeric suffix.
On a hear callback, the scheme first forwards the event to the object’s danger manager when present. It then resolves
the source story id, maps the engine sound mask to a sound type enum, checks configured distance and power, and
evaluates the stored condlist. A non-empty selected section switches the object to that section. An empty selected
section removes that hear rule.
Example
[walker@guard]
path_walk = guard_walk
path_look = guard_look
on_sound = any|WPN_shoot|40|0.2|walker@alert
Notes
- Supported mapped sound names are defined by the TypeScript
ESoundTypeenum: weapon, item, monster, andNILvariants. - Rules are keyed by source story id and sound type. Multiple rules for the same pair overwrite the same stored slot.
heli_move
heli_move moves a helicopter along a patrol path and configures its targeting, weapon ranges, engine sound, fire
trail, and optional combat health UI.
Parameters
path_move
Type: string. Required. Default: none.
Patrol path used for helicopter movement. Must exist.
path_look
Type: string. Optional. Default: null.
Patrol path used as a look point, or actor to keep looking at the actor.
enemy
Type: string. Optional. Default: null.
Enemy preference passed to the fire manager. Runtime handles actor, all, nil, or a story id.
fire_point
Type: string. Optional. Default: null.
Patrol path whose first point is used as a fallback fire point.
max_velocity
Type: number. Required. Default: none.
Maximum helicopter movement velocity.
max_mgun_attack_dist
Type: number. Optional. Default: null.
Overrides helicopter max minigun attack distance.
min_mgun_attack_dist
Type: number. Optional. Default: null.
Overrides helicopter min minigun attack distance.
max_rocket_attack_dist
Type: number. Optional. Default: null.
Overrides helicopter max rocket attack distance.
min_rocket_attack_dist
Type: number. Optional. Default: null.
Overrides helicopter min rocket attack distance.
upd_vis
Type: number. Optional. Default: 10.
Visibility refresh interval passed to the fire manager, in seconds.
use_rocket
Type: boolean. Optional. Default: true.
Enables rocket use during attack.
use_mgun
Type: boolean. Optional. Default: true.
Enables minigun use during attack.
engine_sound
Type: boolean. Optional. Default: true.
Enables helicopter engine sound.
stop_fire
Type: boolean. Optional. Default: false.
With path_look = actor, holds the helicopter position while the actor is visible.
show_health
Type: boolean. Optional. Default: false.
Shows the helicopter combat health UI while active.
fire_trail
Type: boolean. Optional. Default: false.
Enables the helicopter fire trail effect.
invulnerable
Type: boolean. Optional. Default: false.
Sets object registry invulnerable state.
immortal
Type: boolean. Optional. Default: false.
Sets object registry immortal state.
mute
Type: boolean. Optional. Default: false.
Sets object registry mute state.
The section also supports common switch fields. They are checked before movement updates.
Runtime behavior
On activation, the manager asserts that path_move exists, parses waypoint data, creates the movement patrol, and sets
linear acceleration and max velocity from max_velocity. It loops through patrol points and records waypoint signals
from parsed waypoint data into state.signals.
If path_look is set to actor, the look point is refreshed from the actor position on update. If it names a patrol
path, the first point of that path is used as the look point. The manager blocks free look and applies the look target
through the helicopter fly manager.
Weapon distance fields are written to the engine helicopter object when present. use_mgun and use_rocket update the
engine attack flags. The fire manager uses enemy, fire_point, and upd_vis to select or refresh enemies.
Example
[logic]
active = heli_move@patrol

[heli_move@patrol]
path_move = esc_heli_move
path_look = actor
max_velocity = 30
enemy = actor
use_mgun = true
use_rocket = false
upd_vis = 5
show_health = true
on_signal = patrol_done | heli_move@return
Notes
path_moveis required and must exist.- When
path_looknames a patrol path, that patrol path must exist. fire_pointis read as a patrol path name and the first point is used. The current activation code does not assert that the path exists before constructing the patrol.- On save/load, the manager stores movement state, last and next waypoint indices, and whether a waypoint callback was pending.
help_wounded
help_wounded is generic stalker behavior for helping nearby wounded friendly stalkers. It sends a suitable NPC to the
wounded target and plays the medkit-help animation.
Parameters
help_wounded_enabled
Type: boolean. Optional. Default: true.
Enables or disables wounded-helper behavior for the current reset section.
Runtime constants:
DISTANCE_TO_HELP
Value: 30.
Maximum search distance for wounded targets.
HELPING_WOUNDED_OBJECT_KEY
Value: helping_wounded_object.
Portable-store key used to reserve a wounded target for one helper.
Runtime behavior
The scheme adds IS_WOUNDED_EXISTING and a HELP_WOUNDED action. The evaluator only allows helping when the NPC is
alive, has no enemy, is not zombied, is not wounded, is not the cinematic actor visual, and a wounded target is nearby.
When a target is selected, the evaluator stores the wounded object id, vertex id, and position in scheme state, and
marks the target in portable storage so another helper does not claim it. The action runs to the target, then switches
to help_wounded_with_medkit, looks at the wounded position, and plays wounded_medkit once.
The finishObjectHelpWounded helper gives the selected wounded object a medkit and unlocks its wounded manager medkit
use.
Example
[logic]
active = walker@camp

[walker@camp]
path_walk = camp_walk
path_look = camp_look
help_wounded_enabled = false
Notes
- The helper action blocks item gathering and alife actions while a wounded target is selected.
- Finalizing the action frees the wounded target reservation.
hit
hit switches a stalker section when the NPC receives a hit callback. It also records hit metadata that conditions can
use indirectly through the scheme state.
Parameters
hit has no scheme-specific fields.
The section supports common switch fields. They are evaluated from the hit callback.
Runtime behavior
On activation, hit verifies that the configured section exists and parses common switch conditions.
When the NPC is hit, the manager stores the hit bone index and attacker id. Missing attackers are stored as -1. A
zero-damage hit is ignored when the object is not invulnerable. If the object has an active scheme, the manager marks
isDeadlyHit when the hit amount is greater than or equal to current health times 100, tries to switch section, then
clears the flag.
Runtime sequence
SchemeHit.activateaborts if the referenced section does not exist.SchemeHit.addsubscribes aHitManageraction.HitManager.onHitstoresboneIndexin thehitscheme state.- Zero-damage hits are ignored unless the object is invulnerable.
- The manager stores
who.id()or-1. - While switching,
isDeadlyHitis true only for hits whose amount is at leasthealth * 100. - The flag is cleared after the switch attempt.
Example
[logic]
active = hit@guard

[hit@guard]
on_info = walker@angry %=give_info(guard_was_hit)%
Notes
- This scheme is event-driven. Its switch fields are checked when the object is hit.
- Disabling the scheme unsubscribes the stored hit manager.
- Use condition/effect code that reads the scheme state if behavior depends on attacker, bone, or deadly-hit status.
meet
meet controls how a stalker reacts to the actor at interaction distance: greeting sounds, idle animations, use
permission, dialog start, trade availability, abuse state, and interaction text.
Unlike active movement schemes, meet is a generic stalker scheme. The current active section points to a meet section
with a meet = ... field, and the meet scheme is reset whenever the active logic section changes.
Parameters
Most fields are condlists. They can return values such as distances, animation states, sound ids, dialog ids, true,
false, or nil.
close_distance
Type: condlist number. Default source: relation defaults.
Distance for close meet state.
close_anim
Type: condlist state. Default source: relation defaults.
Animation state used during close contact.
close_snd_distance
Type: condlist number. Default source: relation defaults.
Distance for hello and bye sound checks.
close_snd_hello
Type: condlist sound. Default source: relation defaults.
Sound played when the actor first enters close sound distance.
close_snd_bye
Type: condlist sound. Default source: relation defaults.
Sound played after hello when the actor is still inside far sound distance.
close_victim
Type: condlist story id. Default source: relation defaults.
Object story id used as look victim for close animation.
far_distance
Type: condlist number. Default source: relation defaults.
Distance for far meet state.
far_anim
Type: condlist state. Default source: relation defaults.
Animation state used during far contact.
far_snd_distance
Type: condlist number. Default source: relation defaults.
Distance for far sound checks.
far_snd
Type: condlist sound. Default source: relation defaults.
Sound played while executing far meet state.
far_victim
Type: condlist story id. Default source: relation defaults.
Object story id used as look victim for far animation.
snd_on_use
Type: condlist sound. Default source: relation defaults.
Use sound condlist stored by the scheme.
use
Type: condlist value. Default source: relation defaults.
Controls actor use behavior. self starts talk directly.
meet_dialog
Type: condlist dialog id. Default source: relation defaults.
Overrides the object’s start dialog. nil restores the default start dialog.
abuse
Type: condlist boolean. Default source: relation defaults.
Enables or disables abuse state on the object.
trade_enable
Type: condlist boolean. Default source: relation defaults.
Enables or disables trading, unless the NPC is wounded.
allow_break
Type: condlist boolean. Default source: relation defaults.
Allows or blocks breaking the talk dialog.
meet_on_talking
Type: boolean string. Default source: relation defaults.
Treats current talking as close meet contact when enabled.
use_text
Type: condlist string. Default source: relation defaults.
Overrides the interaction tip text. nil restores default use text behavior.
The engine uses enemy defaults for hostile NPCs and neutral defaults for other relations. If the section is no_meet,
interaction is disabled by setting distances to 0, animations and sounds to nil, and use to false.
Usage
Reference a meet section from the active logic section:
[logic]
active = walker@guard

[walker@guard]
path_walk = guard_walk
meet = meet@guard

[meet@guard]
close_distance = 3
close_anim = talk_default
close_snd_hello = meet_hello
use = {=dist_to_actor_le(3)} true, false
meet_dialog = guard_dialog
trade_enable = false
To disable meeting for a section, point meet to the no-meet section used by the project config.
Runtime behavior
The meet manager checks actor distance and visibility each update. It tracks close, far, and reset states. When the actor moves beyond the reset distance, hello and bye flags are cleared.
When meet_dialog changes, the manager updates the object’s start dialog. If the object is already talking, it can run
the actor talk dialog with the current break setting.
use = self starts the talk dialog directly when the actor can use the object and the screen is not black.
Notes
- The reset distance is fixed in config at
30. - Wounded NPCs have trading disabled regardless of
trade_enable. - The meet action blocks ALife and idle reset while the actor is in meet contact.
mob_combat
mob_combat is the generic monster combat switch scheme. It listens for monster combat events and uses common switch
conditions to move the object to another section.
Parameters
mob_combat has no scheme-specific config fields. It reads common switch fields from the section.
on_info, on_info1, …
Type: condlist.
Switch when the condlist selects another section.
on_timer, on_timer1, …
Type: milliseconds | condlist.
Switch after the section has been active for the duration.
on_signal, on_signal1, …
Type: signal | condlist.
Switch when a signal is set.
Runtime behavior
The manager only acts on the combat event. If the scheme is enabled, the monster has an enemy, and the object has an active scheme, it calls the common section switcher.
The scheme can be disabled through SchemeMobCombat.disable, which sets its runtime enabled flag to false.
Runtime sequence
SchemeMobCombat.activateparses common switch fields and setsenabled = true.SchemeMobCombat.addsubscribes aMobCombatManager.MobCombatManager.onCombatruns only when the state is enabled,object.get_enemy()is not null, and the object still has an active scheme.- The manager calls
trySwitchToAnotherSection. disableleaves the action in place but setsenabled = false, so later combat events are ignored.
Example
[logic]
active = mob_home@idle
on_combat = mob_combat@combat

[mob_combat@combat]
on_info = mob_walker@attack
Notes
- This is normally referenced from a monster logic section through
on_combat. - It does not perform combat movement by itself.
- Put movement behavior in the target monster section, such as
mob_home,mob_walker, or another monster scheme.
mob_death
mob_death handles monster death callbacks. It records the killer id and then evaluates common switch logic.
Use it from monster logic through on_death when a death should set info portions, trigger quest effects, or switch to
a cleanup section.
Parameters
mob_death has no scheme-specific config fields. It reads common switch fields from the section.
on_info, on_info1, …
Type: condlist.
Switch when the condlist selects another section.
on_signal, on_signal1, …
Type: signal | condlist.
Switch when a signal is set.
on_timer, on_timer1, …
Type: milliseconds | condlist.
Switch after the section has been active for the duration.
Runtime behavior
On death, the manager stores the killer id in the object’s death state:
killer.id()when a killer exists;-1when the killer is nil.
After that, it calls the common switcher for the mob_death state.
The stored killer id is available in the death state for code that needs to inspect who killed the monster. The scheme does not decide rewards by itself; put reward effects in the condlist.
Example
[logic]
active = mob_home@idle
on_death = mob_death@dead

[mob_death@dead]
on_info = nil %+bloodsucker_dead%
Notes
- This is normally referenced from a monster logic section through
on_death. - Use condlist effects to set info portions, spawn rewards, or advance quest state.
- Use
killer = -1as the nil-killer case when reading the stored state in script code.
mob_home
mob_home assigns a monster to a home area and radius range. Use it to keep monsters near a lair, patrol center, smart
terrain point, or scripted territory.
Parameters
state
Type: monster state. Optional. Default: null.
Base monster state applied on activation.
path_home
Type: string. Optional. Default: null.
Patrol path used as home reference. Relative names are resolved against the active smart terrain.
gulag_point
Type: boolean. Optional. Default: false.
Uses the monster’s smart terrain level vertex as the home point.
aggressive
Type: boolean. Optional. Default: false.
Passed to object.set_home.
home_min_radius
Type: number. Optional. Default: default config.
Minimum home radius.
home_mid_radius
Type: number. Optional. Default: midpoint.
Middle home radius. Clamped to the range between min and max.
home_max_radius
Type: number. Optional. Default: default config.
Maximum home radius.
The section also supports common switch fields.
Runtime behavior
On activation, the manager applies the configured monster state, resolves home parameters, and calls
object.set_home(home, min, max, aggressive, mid).
If path_home is set, waypoint data on its first point can provide minr and maxr values. Explicit home_min_radius
and home_max_radius override waypoint values.
On deactivation, the manager calls object.remove_home().
Example
[logic]
active = mob_home@lair

[mob_home@lair]
path_home = bloodsucker_home
home_min_radius = 5
home_max_radius = 35
aggressive = true
on_info = {+actor_entered_lair} mob_walker@attack
Notes
home_max_radiusmust be greater thanhome_min_radius.- With
gulag_point = true, the home is based on the monster’s current smart terrain.
mob_jump
mob_jump captures a monster, turns it toward a point, and forces a jump. After the jump, it releases the monster from
script control.
Use it for scripted scare jumps and ambush starts.
Parameters
path_jump
Type: string. Optional. Default: null.
Patrol path whose first point is the jump target base. Relative names are resolved against the active smart terrain.
offset
Type: x,y,z string. Required. Default: none.
Offset added to path_jump point 0 to form the final jump target.
ph_jump_factor
Type: number. Optional. Default: 1.8.
Jump factor passed to object.jump.
on_signal
Type: switch field. Required. Default: none.
Required by the scheme parser. Usually listens for jumped.
The section also supports other common switch fields.
Runtime behavior
On activation, the manager captures the monster and resolves the jump point. It commands the monster to look at the
target, waits for the look action to finish, then calls object.jump(point, ph_jump_factor).
After jumping, it sets signal jumped and releases the monster.
Runtime sequence
SchemeMobJump.activaterequireson_signal, readspath_jump,offset, andph_jump_factor.MobJumpManager.activatecaptures the monster for scripted control.- The manager resolves patrol point
0, addsoffset, and stores the final jump point. - On update, the monster is commanded to look at the jump point.
- After the look action ends, the manager calls
object.jump(...). - The manager sets the
jumpedsignal and releases the monster.
Example
[logic]
active = mob_jump@scare

[mob_jump@scare]
path_jump = bloodsucker_jump
offset = 0, 1, 0
ph_jump_factor = 1.8
on_signal = jumped | mob_home@after_jump
Notes
on_signalmust exist in the section.path_jumpmust resolve to an existing patrol path.offsetmust contain three numeric components.- If
path_jumpis omitted, the active smart terrain name is used as the path name.
mob_remark
mob_remark plays scripted monster animations and optional interaction state. Use it for monster idles, scripted threat
displays, scene beats, and temporary talk/tip control.
Parameters
state
Type: monster state. Optional. Default: null.
Monster state applied on activation.
dialog_cond
Type: condlist. Optional. Default: null.
Enables or disables talking based on condlist result.
anim
Type: comma-separated strings. Optional. Default: null.
Animation sequence to command.
anim_movement
Type: boolean. Optional. Default: false.
Uses movement animation command form when true.
anim_head
Type: string. Optional. Default: null.
Parsed and stored; current manager does not use it directly.
tip
Type: string. Optional. Default: null.
Tip notification sent once after activation.
snd
Type: string. Optional. Default: null.
Parsed and stored; current manager does not play it directly.
time
Type: comma-separated numbers. Optional. Default: null.
Per-animation timeout list. Missing values use animation-end condition.
The section also supports common switch fields.
Runtime behavior
On activation, the manager disables talk, applies monster state, captures the monster, and queues each animation from
anim. If a matching time value exists, the animation uses a time-end condition. Otherwise it waits for animation
end.
On update, it:
- toggles talk based on
dialog_cond; - sends
tiponce through the notification manager; - sets signal
action_endonce the scripted action is finished.
Example
[logic]
active = mob_remark@threat

[mob_remark@threat]
state = threat
anim = stand_idle, attack_prepare
time = 2000, 1000
tip = st_monster_warning
on_signal = action_end | mob_walker@attack
Notes
animandtimeare parsed as comma-separated lists.action_endis the usual signal for switching after the scripted remark.noResetis always set totrueby the scheme.
mob_walker
mob_walker makes a monster follow a patrol path and optionally stop at look points for scripted animations, sounds,
and state changes.
Use it for non-combat monster patrols, scripted monster movement, lair idles, and simple ambush staging.
Parameters
path_walk
Type: string. Required. Default: none.
Patrol path used for monster movement. Relative names are resolved against the active smart terrain.
path_look
Type: string. Optional. Default: null.
Patrol path used for look or idle points. It must not equal path_walk.
state
Type: monster state. Optional. Default: null.
Base monster state read by the shared monster-state parser.
no_reset
Type: boolean. Optional. Default: false.
Stored in scheme state for compatibility with monster logic.
The section also supports common switch fields such as on_info, on_signal, on_timer, and actor-zone checks.
Waypoint behavior
When activated, the manager captures the monster for scripted commands and sends it along path_walk.
Movement waypoints can provide extra data parsed from patrol point flags:
sig
Sets a signal on the active scheme state. Use it with on_signal.
s
Schedules a sound to play with the next movement or standing command.
c
Uses crouch or steal movement when set to true.
r
Uses run movement when set to true.
b
Overrides the monster state at that waypoint.
flags
Selects a matching path_look point.
Look waypoints can provide:
t
Standing time in milliseconds.
a
Animation condlist. The selected value is resolved through the engine anim table.
If a movement waypoint has look flags, the manager chooses a matching point from path_look, turns the monster toward
it, plays the selected animation, waits, and then resumes movement.
Example
[logic]
active = mob_walker@lair

[mob_walker@lair]
path_walk = bloodsucker_walk
path_look = bloodsucker_look
state = nvis
on_signal = attack_ready | mob_home@attack
on_info = {+actor_entered_lair} mob_home@attack

[mob_home@attack]
path_home = bloodsucker_home
Use waypoint sig data on bloodsucker_walk to raise attack_ready when the monster reaches the intended patrol
point.
Notes
path_walkis required.path_lookcannot be the same aspath_walk.- The manager reactivates itself if the monster is no longer script-captured.
- If a waypoint requests a look point but no matching look point exists, the scheme aborts with a config error.
patrol
patrol coordinates a group of stalkers around a commander. Use it when several NPCs should move as one patrol instead
of each running an independent walker path.
The scheme is a stalker scheme. It registers each participating object in a shared patrol manager. The first registered
object becomes commander unless a section has commander = true.
Parameters
path_walk
Type: string. Required. Default: none.
Commander movement path. Relative names are resolved against the active smart terrain.
path_look
Type: string. Optional. Default: null.
Optional look path for the commander. It must not equal path_walk.
formation
Type: string. Optional. Default: back.
Formation used by followers. Supported values are defined by the patrol formation config.
silent
Type: boolean. Optional. Default: false.
Disables automatic patrol movement sounds.
move_type
Type: string. Optional. Default: patrol.
Stored movement type for patrol logic compatibility.
commander
Type: boolean. Optional. Default: false.
Marks this NPC as the patrol commander when registering in the patrol manager.
def_state_standing
Type: string. Optional. Default: null.
Suggested standing animation state.
def_state_moving
Type: string. Optional. Default: def_state_moving1.
Suggested commander moving animation state.
def_state_moving1
Type: string. Optional. Default: null.
Compatibility fallback for def_state_moving.
The section also supports common switch fields such as on_info, on_signal, on_timer, and actor-distance checks.
Usage
Give all members of the same patrol the same path_walk. If the NPCs belong to a squad, the engine keys the shared
patrol manager by path name plus squad id, so separate squads can use the same route without sharing one runtime
manager.
Followers update their target roughly once per second. They follow the commander’s current path, direction, movement state, and formation offset. If a follower falls too far behind, the patrol manager can return an accelerated movement state based on the commander’s current state.
The commander can change formation from waypoint callback return values:
0
line
1
around
2
back
Example
[logic]
active = patrol@route

[patrol@route]
path_walk = squad_patrol_walk
path_look = squad_patrol_look
formation = back
commander = true
def_state_moving = patrol
on_info = {+base_alarm} patrol@alarm

[patrol@alarm]
path_walk = squad_alarm_walk
formation = line
silent = true
def_state_moving = rush
Use the same section on the intended patrol members. Set commander = true on the NPC that should drive the formation.
Notes
path_walkis required.path_lookcannot be the same aspath_walk.- A patrol manager rejects attempts to register more than seven objects.
- Objects unregister from the patrol manager on scheme deactivation, death, or offline switch.
ph_button
ph_button plays a button animation and switches sections when the object is used. Use it for physical buttons, levers,
and scripted controls.
The scheme is for physical objects. On activation it sets the object tooltip, subscribes PhysicalButtonManager, and
plays the configured animation cycle.
Parameters
anim
Type: string. Required. Default: none.
Animation cycle played on activation.
anim_blend
Type: boolean. Optional. Default: true.
Passed as the blending flag to object.play_cycle.
on_press
Type: condlist. Optional. Default: null.
Switch condlist evaluated when the active button is used.
tooltip
Type: string. Optional. Default: null.
Tip text shown on the object. Empty text is used when absent.
The section also supports common switch fields such as on_info and on_timer.
Example
[logic]
active = ph_button@off

[ph_button@off]
anim = idle_off
tooltip = st_press_button
on_press = ph_button@on %+button_pressed%

[ph_button@on]
anim = idle_on
anim_blend = false
Runtime sequence
SchemePhysicalButton.activatereads common switch conditions and button fields.- The object tooltip is set to
tooltipor to an empty string whentooltipis absent. PhysicalButtonManager.activatecallsobject.play_cycle(anim, anim_blend).- Manager updates evaluate common section switching such as
on_infoandon_timer. onUseevaluateson_pressonly while the object is still in the activeph_buttonsection.
Notes
animis required.anim_blenddefaults totrue.on_pressonly runs when the object is still in the active button section.- Common switch conditions are checked during update.
- Use
on_pressfor use-triggered transitions and common switch fields for background transitions.
ph_code
ph_code opens a numeric input window for a physical object and evaluates condlists for entered codes. It is mainly
used for code locks.
Parameters
tips
Type: string. Optional. Default: st_codelock.
Tip text assigned to the object.
code
Type: number. Optional. Default: null.
Single accepted numeric code.
on_code
Type: condlist. Optional. Default: null.
Condlist evaluated when entered text equals code.
on_check_code1, on_check_code2, …
Type: string | condlist. Optional. Default: empty.
Per-code condlists used when code is not set.
Usage
There are two modes:
Single code
Config: code plus on_code.
Entering the matching number evaluates on_code when it is configured. If code is set and on_code is absent, the
matching input is accepted by the check but has no documented side effect.
Multiple codes
Config: numbered on_check_codeN fields.
Entering a matching text key evaluates that key’s condlist.
Current implementation evaluates the selected condlist for effects and info portion changes. It does not explicitly switch to the returned section from the code manager.
Example
[logic]
active = ph_code@lock

[ph_code@lock]
tips = st_enter_code
code = 1234
on_code = nil %+door_code_entered =play_sound(code_ok)%
Multiple code form:
[ph_code@multi]
on_check_code1 = 1111 | nil %+first_code_entered%
on_check_code2 = 2222 | nil %+second_code_entered%
Notes
- Activation makes the object script-usable by setting
nonscript_usabletofalse. - Deactivation clears the tip text.
- Use
ph_dooror another section’s switch logic when a successful code should open or change an object state.
ph_door
ph_door controls a physical door object: initial open or closed state, lock state, NPC locking, tips, sounds, use
handling, and hit-on-bone section switches.
Parameters
closed
Type: boolean. Optional. Default: true.
Activates the door as closed when true, open when false.
locked
Type: boolean. Optional. Default: false.
Locks the door and locks it for NPCs.
no_force
Type: boolean. Optional. Default: false.
Uses zero joint force instead of applying opening or closing force.
not_for_npc
Type: boolean. Optional. Default: false.
Locks the door for NPCs without necessarily locking actor use.
show_tips
Type: boolean. Optional. Default: true.
Enables door tip text updates.
tip_open
Type: string. Optional. Default: tip_door_open.
Tip shown when the closed door can be opened.
tip_close
Type: string. Optional. Default: tip_door_close.
Tip shown when the opened door can be closed.
slider
Type: boolean. Optional. Default: false.
Uses slider-style joint angle checks.
snd_open_start
Type: string. Optional. Default: trader_door_open_start.
Sound played when opening starts, and when a locked door is used.
snd_close_start
Type: string. Optional. Default: trader_door_close_start.
Sound played when closing starts.
snd_close_stop
Type: string. Optional. Default: trader_door_close_stop.
Sound played when closing finishes.
on_use
Type: condlist. Optional. Default: null.
Switch condlist evaluated when the door is used.
hit_on_bone
Type: bone descriptor list. Optional. Default: empty.
Maps hit bone indexes to section switch condlists.
The implementation currently reads the locked-door tip from tip_open with default tip_door_locked.
Use and hit behavior
Using the door evaluates on_use and switches to the selected section. Hitting a configured bone evaluates the matching
hit_on_bone condlist and switches to the selected section.
hit_on_bone uses repeated bone_index|condlist descriptors:
hit_on_bone = 1|ph_door@open %+door_forced%|2|ph_door@broken
Example
[logic]
active = ph_door@closed

[ph_door@closed]
closed = true
locked = false
on_use = ph_door@open
tip_open = st_open_door

[ph_door@open]
closed = false
on_use = ph_door@closed
tip_close = st_close_door
Notes
- The object is registered as a door for NPCs when the scheme is added.
- The manager expects a physics shell with a
doorjoint. - Deactivation clears the tip text.
- Common switch conditions are checked during update.
ph_force
ph_force applies a constant force to a physical object toward a patrol point. Use it for scripted pushes, moving
props, and one-shot physical impulses that should last for a configured duration.
Parameters
force
Type: number. Required. Default: none.
Force magnitude. Must be greater than 0.
time
Type: number. Required. Default: none.
Duration passed to object.set_const_force. Must be greater than 0.
delay
Type: number. Optional. Default: 0.
Delay in milliseconds before applying the force.
point
Type: string. Required. Default: none.
Patrol path used to choose the target point.
point_index
Type: number. Optional. Default: 0.
Patrol point index used as the force target.
The section also supports common switch fields. They are checked before force application.
Runtime behavior
On activation the scheme validates force, time, point, and point_index, then stores the selected patrol point in
state. On manager activation, a non-zero delay schedules the first force attempt for a later game time.
Each update first checks common switch conditions. If a switch happens, no force is applied. If processing already finished, the manager returns. Otherwise it waits for the delay, computes the direction from the physical object to the stored patrol point, normalizes it, and calls:
object.set_const_force(direction, force, time);
After the call, the manager marks processing complete.
Example
[logic]
active = ph_force@push

[ph_force@push]
force = 500
time = 2000
delay = 500
point = push_target
point_index = 0
on_timer = 3000 | ph_idle@done
Notes
force,time, andpointare required.forceandtimemust be positive.point_indexmust be inside the patrol path point count.- The force is applied once. After that, the manager marks processing complete.
- Common switch fields run before force application, so a matching switch can prevent the force entirely.
ph_hit
ph_hit applies a scripted hit to a physical object when the section activates. Use it for one-shot impacts, breaking
props, kicking an object, or driving door and physics reactions through the normal hit API.
The hit is created by PhysicalHitManager during activation. The manager does not wait for actor interaction.
Parameters
power
Type: number. Optional. Default: 0.
Hit power.
impulse
Type: number. Optional. Default: 1000.
Hit impulse.
bone
Type: string. Required. Default: none.
Bone name passed to the hit object.
dir_path
Type: string. Required. Default: none.
Patrol path whose first point defines the hit direction.
The section also supports common switch fields such as on_info and on_timer.
Example
[logic]
active = ph_hit@kick

[ph_hit@kick]
power = 0.5
impulse = 1200
bone = door
dir_path = kick_direction
on_timer = 100 | ph_idle@after_hit
Runtime sequence
SchemePhysicalHit.activatereads common switch conditions and hit fields.dir_pathis resolved as a patrol path, and point0is used as the direction target.- The manager builds a
hitobject withpower,impulse,bone,type = hit.strike, and the calculated direction. - The physical object receives the hit through
object.hit(...). - Later updates only evaluate common section switching.
Notes
boneanddir_pathare required. Missing values fail during scheme activation.- The hit direction is calculated from the object position toward point
0ofdir_path. - The hit type is
strike. - The hit is applied on activation. Common switches are checked during later updates.
- Use an
on_timeror another common switch when the object should move to an idle section after the impact.
ph_idle
ph_idle is the neutral physical-object scheme. It keeps an object usable or non-usable, shows an optional tip, and can
switch sections when the object is used or hit on configured bones.
Use it for switches, props, doors, breakable objects, and scene objects that should wait for actor use or damage.
Parameters
hit_on_bone
Type: bone descriptor list. Optional. Default: empty.
Maps hit bone indexes to condlists.
nonscript_usable
Type: boolean. Optional. Default: false.
Passed to object.set_nonscript_usable on activation.
on_use
Type: condlist. Optional. Default: null.
Switch condlist evaluated when the object is used.
tips
Type: string. Optional. Default: empty string.
Tip text assigned to the object.
The section also supports common switch fields such as on_info and on_timer.
Bone hit descriptors
hit_on_bone uses repeated bone_index|condlist descriptors:
hit_on_bone = 1|ph_idle@hit %+box_was_hit%|2|ph_idle@hit
When a matching bone is hit, the manager evaluates the condlist and switches to the selected section.
Runtime sequence
- Activation parses common switch fields,
hit_on_bone,nonscript_usable,on_use, andtips. - The object tip text is set immediately.
- Manager activation calls
object.set_nonscript_usable(...). - Each update checks common switch fields.
onUseevaluateson_useand switches to the selected section.onHitchecks the hit bone index againsthit_on_boneand switches through that condlist when a match exists.
Example
[logic]
active = ph_idle@locked

[ph_idle@locked]
tips = st_locked_box
on_use = {+actor_has_key} ph_idle@open %=play_sound(box_open)%
hit_on_bone = 1|ph_idle@broken %+box_broken%

[ph_idle@open]
nonscript_usable = true
Notes
- The manager clears the tip text on deactivation.
on_useandhit_on_boneuse explicit section switching.- Common switch conditions are checked during update.
- Bone descriptors use engine bone indexes, not bone names.
ph_minigun
ph_minigun controls a physical minigun object. It can aim at a patrol point, the actor, or a story object, and it can
switch sections when a watched target becomes visible or hidden.
Parameters
path_fire
Type: string. Optional. Default: null.
Patrol path used as the fire point when target = points. Smart terrain prefixing is applied.
auto_fire
Type: boolean. Optional. Default: false.
Enables automatic fire for enemy targets when the current target can be hit. Point-target firing uses its own firing path in the manager and is not gated the same way.
fire_time
Type: number. Optional. Default: 1.0.
Fire phase duration in seconds.
fire_repeat
Type: number. Optional. Default: 0.5.
Pause duration in seconds between fire phases. -1 disables the fire/pause timer update.
fire_range
Type: number. Optional. Default: 50.
Maximum distance to an enemy target.
target
Type: string. Optional. Default: points.
Fire target. Supported runtime values are points, actor, or a story object id. Smart terrain prefixing is applied.
track_target
Type: boolean. Optional. Default: false.
Keeps aiming at the enemy target even when the minigun cannot fire at it.
fire_angle
Type: number. Optional. Default: 120.
Horizontal firing arc used by the manager when checking whether the target can be aimed at.
shoot_only_on_visible
Type: boolean. Optional. Default: true.
Requires engine visibility before firing at an enemy target.
on_target_vis
Type: condlist. Optional. Default: null.
story_id | condlist pair. Switches section when that story object is alive and visible to the minigun.
on_target_nvis
Type: condlist. Optional. Default: null.
story_id | condlist pair. Switches section when that story object is alive and not visible to the minigun.
The section also supports common switch fields. They are checked on manager update before minigun-specific processing.
Runtime behavior
On activation, the manager gets the object’s car interface, disables normal script use, clears the tip text, and activates the mounted weapon if the car has one.
When target = points, path_fire must point to an existing patrol path. The minigun aims at the first point of that
path and toggles fire according to the firing timer. When target = actor, the actor is used if alive. Any other
non-null value is resolved as a story object id.
Firing only starts when the target is inside fire_range, inside the configured firing arc, and visible unless
shoot_only_on_visible = false. Enemy target aim height is adjusted for actor, crouching NPCs, wounded NPCs, and normal
standing NPCs.
Example
[logic]
active = ph_minigun@post

[ph_minigun@post]
target = actor
auto_fire = true
fire_range = 60
fire_time = 2
fire_repeat = 1
fire_angle = 90
shoot_only_on_visible = true
on_target_nvis = esc_actor_story | ph_idle@quiet
Notes
on_target_visandon_target_nvisuse a story object id before the|, not a section name.- If
path_fireis configured and the patrol path does not exist, activation aborts. - If the minigun car health reaches zero, the manager stops firing, releases script capture, optionally grants
onDeathInfofrom state, and switches the object tonilon the next update.
ph_on_death
ph_on_death switches a physical object when it receives a death callback. Use it for scripted reactions to destroyed
physics objects.
Parameters
ph_on_death has no scheme-specific fields.
The section supports common switch fields. They are evaluated from the death callback.
Runtime behavior
The manager subscribes to physical object death events. When the object dies and the object still has an active scheme,
it calls the common section-switching logic for the current ph_on_death state.
The death callback receives the dead object and optional killer object. The current manager does not inspect the killer; conditions and effects in the switch fields define the response.
Runtime sequence
SchemePhysicalOnDeath.activateparses common switch conditions withgetConfigSwitchConditions.SchemePhysicalOnDeath.addstores aPhysicalDeathManageraction on the state and subscribes it.PhysicalDeathManager.onDeathchecks that the physical object still has an active scheme.- The manager calls
trySwitchToAnotherSectionfor the current state.
The scheme is event-driven. It does not run a regular update loop and does not evaluate the killer object.
Example
[logic]
active = ph_on_death@barrel

[ph_on_death@barrel]
on_info = ph_idle@dead %=give_info(barrel_destroyed)%
Notes
- The implementation comments note that
disabledoes not unsubscribe from the death callback because death is expected to happen once. - The scheme does not apply damage, spawn particles, or play sounds by itself. Put those effects in the switch condlist.
- Use another physical scheme, such as
ph_idle, for the section that should exist after the destroyed-state switch.
ph_on_hit
ph_on_hit switches a physical object when it receives a hit callback. Use it for breakable or reactive props where the
next section should be chosen only after damage is applied.
Parameters
ph_on_hit has no scheme-specific fields.
The section supports common switch fields such as on_info, on_timer, and zone or distance checks. They are evaluated
from the hit callback, not from a normal per-frame update.
Runtime behavior
The manager subscribes to physical object hit events. When the object is hit and the object still has an active scheme,
it calls the common section-switching logic for the current ph_on_hit state.
Hit amount, direction, attacker, and bone index are received by the callback, but the current implementation only logs the object name, bone index, and hit amount. The switch conditions decide what happens next.
Runtime sequence
SchemePhysicalOnHit.activateparses common switch conditions.SchemePhysicalOnHit.addstores aPhysicalOnHitManageraction and subscribes it.PhysicalOnHitManager.onHitlogs object name, bone index, and hit amount.- If the object still has an active scheme, the manager calls
trySwitchToAnotherSection. SchemePhysicalOnHit.disableunsubscribes the stored action when the state exists.
The callback receives hit direction and attacker, but those values are not written to scheme state by the current implementation.
Example
[logic]
active = ph_on_hit@crate

[ph_on_hit@crate]
on_info = ph_idle@damaged %=give_info(crate_was_hit)%
Notes
- The scheme is event-driven. Without a hit callback, its switch fields are not checked by this manager.
disableunsubscribes the stored manager action when the scheme state exists.- Use
ph_idlebone-hit condlists when the response depends on a specific physical bone;ph_on_hittreats all hits the same.
ph_oscillate
ph_oscillate applies alternating constant force to a physical object joint. Use it for objects that should sway or
rock around a physics bone.
Parameters
joint
Type: string. Required. Default: none.
Physics joint bone name. Smart terrain prefixing is applied by the parser.
period
Type: number. Required. Default: none.
Time interval used by the oscillation manager.
force
Type: number. Required. Default: none.
Force magnitude used to calculate force growth during the active part of the period.
correct_angle
Type: number. Optional. Default: 0.
Rotation angle applied to the next force direction when the oscillation flips.
The section also supports common switch fields, parsed into state with the rest of the section.
Runtime behavior
On activation, the manager:
- stores the current game time;
- chooses a random horizontal direction;
- calculates
force / period; - finds the physics joint by
joint; - starts unpaused.
During update, the manager applies object.set_const_force(direction, elapsed * force / period, 2) until period
passes. It then flips the horizontal direction, rotates it by correct_angle, pauses for half of period, and repeats.
Example
[logic]
active = ph_oscillate@swing

[ph_oscillate@swing]
joint = door_hinge
period = 1000
force = 20
correct_angle = 15
Notes
periodis used directly againsttime_global()deltas, so configure it in the same time units used by engine time.- The manager looks up the joint on activation. The object must have a physics shell and a matching bone joint.
post_combat_idle
post_combat_idle makes a non-zombied stalker wait briefly after combat before returning to alife, looting, or helper
behavior. It is installed by setup code and does not have a hand-authored active section.
Parameters
post_combat_idle has no scheme-specific LTX fields in the current TypeScript implementation.
The wait duration can be affected by resolved logic overrides stored on the object registry:
minPostCombatTime
Default: 5.
Minimum randomized wait time in seconds after a non-actor enemy disappears.
maxPostCombatTime
Default: 10.
Maximum randomized wait time in seconds after a non-actor enemy disappears.
These overrides are consumed by the evaluator. Their parsing is handled outside SchemePostCombatIdle.
Runtime behavior
SchemePostCombatIdle.setup() skips zombied-community stalkers. For other stalkers it:
- creates
post_combat_idlestate in the object registry; - replaces
ENEMYevaluators in the main planner and nested combat planner; - adds the
POST_COMBAT_WAITaction to the combat planner.
The evaluator returns true while a selectable best enemy exists. When the enemy disappears, it starts a timer. Actor
targets reset the timer to the current time. Other enemies use a randomized delay between minPostCombatTime and
maxPostCombatTime, or the default 5 to 10 seconds.
The wait action equips the best weapon, sets danger/crouch/stand posture, uses danger sight, starts the hide animation
when possible, and plays post_combat_wait. On finalize, it plays post_combat_relax and clears the animation state.
Example
[logic]
active = walker@guard

[walker@guard]
path_walk = guard_walk
path_look = guard_look
post_combat_idle is installed by the stalker scheme setup path. It is not selected with [logic] active.
Notes
- The action does not start the hide animation while the NPC is in a smart cover or its weapon is locked.
- If an animation is still clearing after the timer expires, the evaluator can keep returning true until the animation marker is gone.
reach_task
reach_task drives squad members toward their assigned simulation target. It is part of generic stalker alife behavior,
not a hand-authored active section with LTX parameters.
Parameters
reach_task has no scheme-specific LTX fields in the current TypeScript implementation.
Runtime constants:
PATROL_UPDATE_PERIOD
Value: 1000.
Milliseconds between movement-order updates.
FORMATIONS.back
Value: built-in formation list.
Default follower offsets behind the squad commander.
Runtime behavior
SchemeReachTask.setup() installs the SMART_TERRAIN_TASK evaluator and action inside the nested alife planner. The
evaluator returns true when the NPC’s squad has a REACH_TARGET action and the assigned simulation target is not yet
reached.
The action initializes movement toward the squad assigned target. The squad commander moves toward the target game
vertex and level vertex. Other squad members follow orders from ReachTaskPatrolManager, which keeps them in formation
behind the commander and accelerates members that fall behind.
Objects are removed from the patrol manager when they die or switch offline.
Runtime sequence
SchemeReachTask.setupreplaces the nested ALife planner’sSMART_TERRAIN_TASKevaluator and action.EvaluatorReachedTaskLocationreturns true only when the NPC’s squad is doingREACH_TARGETand the assigned simulation target still reports not reached.SchemeReachTask.addsubscribes the existing nestedSMART_TERRAIN_TASKaction for scheme events.- The action sends the commander toward the assigned target and keeps followers in formation.
Example
[logic]
active = walker@idle

[walker@idle]
path_walk = idle_walk
path_look = idle_look
reach_task is driven by squad simulation state. It is not normally configured with a dedicated [reach_task] section.
Notes
- Movement switches between game-path and level-path movement depending on whether the commander is on the target game vertex.
- During surge, reach-task movement uses running with free mental state.
- Debug this through squad simulation state first; there is normally no
[reach_task]LTX section to inspect.
remark
remark plays a short scripted stalker animation, optionally aimed at a target, with optional sound and completion
signals. Use it for scenario beats, one-off gestures, directed looks, and transitions between scripted sections.
Parameters
anim
Type: condlist. Optional. Default: wait.
Animation state selected by condlist when the remark starts.
snd
Type: string. Optional. Default: null.
Sound played by the sound manager after the animation when sound is scheduled.
snd_anim_sync
Type: boolean. Optional. Default: false.
Controls whether sound is scheduled independently from the animation.
target
Type: string. Optional. Default: nil.
Optional look target descriptor.
tips
Type: string. Optional. Default: null.
Tip id stored by the scheme.
tips_sender
Type: string. Optional. Default: null.
Sender id read only when tips is set.
The section also supports common switch fields. remark is commonly paired with on_signal = action_end | ... or
on_signal = anim_end | ....
Targets
target supports three descriptor forms:
story | actor or story | story_id
Looks at the object resolved by story id.
path | patrol_path,point_id
Looks at the selected patrol point.
job | job_section,smart_name
Looks at the object assigned to a smart terrain job.
When target = nil, the animation runs without a target descriptor.
Signals
The remark action sets signals on the active scheme state:
anim_end
The animation callback reaches the sound stage.
action_end
Both animation end and sound end were observed.
The action also observes sound_end and theme_end signals. Those can be set by sound handling code to allow
action_end.
Example
[logic]
active = remark@look_actor

[remark@look_actor]
anim = threat_na
target = story|actor
snd = meet_hide_weapon
on_signal = anim_end | walker@guard
Notes
- Invalid
targetdescriptors abort with a config error. animis a condlist, so it can select different animation states by info portions or conditions.- The planner blocks normal ALife while the remark section is active.
sleeper
sleeper moves a stalker to a sleeping patrol point and then puts the stalker into a sleeping or sitting state. Use it
for beds, camp sleep spots, and scripted rest positions.
Parameters
path_main
Type: string. Required. Default: none.
Patrol path used to derive both walking and look data. Relative names are resolved against the active smart terrain.
wakeable
Type: boolean. Optional. Default: false.
Uses the sitting state instead of the sleeping state when the NPC reaches the final point.
The section also supports common switch fields such as on_info, on_timer, and on_signal.
Runtime behavior
SchemeSleeper.add installs a planner evaluator and SLEEP_ACTIVITY action. The action runs only when the stalker is
alive and not in danger, combat, or anomaly handling.
On action initialization, desired position and direction are cleared, then the action builds walk/look data from
path_main and starts the patrol manager. Reaching the final patrol point switches the stalker to sleep or sit.
Patrol shape
path_main must contain either one or two waypoints.
1
The NPC walks to the single point and then sleeps there.
2
The NPC walks using the main path and looks toward the second point when entering the final state.
Any other waypoint count aborts with a config error.
For a two-point path, the second point is also used as the look position while entering the final state.
Example
[logic]
active = sleeper@bed

[sleeper@bed]
path_main = sleep_place
wakeable = false
on_info = {+alarm_started} walker@wake_up

[walker@wake_up]
path_walk = wake_up_walk
Notes
path_mainis required and must exist as a patrol path.wakeable = truecurrently maps tosit;wakeable = falsemaps tosleep.- The action builds internal
path_walkandpath_lookdata frompath_main; those are not user-facing fields. - Use common switch fields such as
on_infoto wake or redirect the NPC when an alarm or quest state changes.
smartcover
smartcover makes a stalker use a registered smart cover and update the cover target state while the section is active.
Use it for scripted cover positions, lookout points, and controlled firing from cover.
Parameters
cover_name
Type: string. Optional. Default: $script_id$_cover.
Registered smart cover name.
loophole_name
Type: string. Optional. Default: null.
Loophole name stored by the scheme.
cover_state
Type: condlist string. Optional. Default: default_behaviour.
Smart cover state selected each update.
target_enemy
Type: story id. Optional. Default: null.
Story id of the enemy object to target.
target_path
Type: condlist string. Optional. Default: nil.
Condlist selecting a patrol path whose first point becomes the fire target.
idle_min_time
Type: number. Optional. Default: 6.
Minimum idle time passed to the game object.
idle_max_time
Type: number. Optional. Default: 10.
Maximum idle time passed to the game object.
lookout_min_time
Type: number. Optional. Default: 6.
Minimum lookout time passed to the game object.
lookout_max_time
Type: number. Optional. Default: 10.
Maximum lookout time passed to the game object.
exit_body_state
Type: string. Optional. Default: stand.
Exit body state stored by the scheme.
use_precalc_cover
Type: boolean. Optional. Default: false.
Stored by the scheme for cover selection compatibility.
use_in_combat
Type: boolean. Optional. Default: false.
Allows the combat evaluator to permit smart cover use in combat.
weapon_type
Type: string. Optional. Default: null.
Weapon type stored by the scheme.
def_state_moving
Type: stalker state. Optional. Default: sneak.
Movement state stored by the scheme.
sound_idle
Type: string. Optional. Default: null.
Sound played while the smart cover action executes.
The section also supports common switch fields such as on_info, on_timer, and on_signal.
Cover states
cover_state is parsed as a condlist. The selected value is used to choose smart cover target behavior.
idle_target
Calls idle target mode.
lookout_target
Updates target and calls lookout target mode.
fire_target
Calls fire target mode.
fire_no_lookout_target
Updates target and calls fire-without-lookout mode.
default_behaviour or other values
Updates target and uses default target mode.
nil
Clears the target selector.
When target_path selects a patrol path, the first point of that path becomes the smart cover target. If no path is
selected, the action can target target_enemy by story id. A stored target position is also supported by the action,
but the current scheme parser does not read a config field for it.
Signals
When target_enemy is set and the stalker is in smart cover, the action updates:
enemy_in_fov
Target enemy is in the current loophole field of view.
enemy_not_in_fov
Target enemy is not in the current loophole field of view.
Example
[logic]
active = smartcover@post

[smartcover@post]
cover_name = esc_guard_cover
cover_state = {+alarm_started} fire_target, lookout_target
target_path = esc_guard_fire_point
idle_min_time = 4
idle_max_time = 8
sound_idle = state
on_signal = enemy_in_fov | camper@fire
Notes
cover_namemust exist in the smart cover registry when the action initializes.target_pathmust resolve to an existing patrol path when it is selected.- The planner blocks normal ALife while smart cover is needed.
sr_crow_spawner
sr_crow_spawner periodically spawns crow server objects at configured patrol paths while the total crow count on the
level is below a limit.
Use one active crow spawner per level unless the level intentionally needs multiple independent spawn sets.
Parameters
max_crows_on_level
Type: number. Optional. Default: 16.
Maximum allowed registry.crows.count before spawning is throttled.
spawn_path
Type: comma-separated strings. Optional. Default: empty string.
Patrol paths considered as crow spawn points.
The section also supports common switch fields.
Runtime behavior
On activation, the manager initializes a cooldown entry for each spawn path. On update, if enough time has passed and the current crow count is below the configured maximum, it tries the paths in random order.
A path can spawn a crow when:
- its cooldown has elapsed;
- its first patrol point is farther than 100 units from the actor.
The spawned server object section is m_crow. After a spawn, the selected path is put on a 10-second cooldown.
Runtime sequence
- Activation reads common switch fields,
max_crows_on_level, andspawn_path. - Manager activation initializes each path cooldown to
0. - On update, the manager checks the global crow count and update throttle.
- Paths are copied and tried in random order.
- A valid path creates
m_crowat patrol point0with that point’s level and game vertex ids. - Common switch fields are checked after the spawn attempt.
Example
[logic]
active = sr_crow_spawner

[sr_crow_spawner]
max_crows_on_level = 7
spawn_path = zat_crow_spawn_1, zat_crow_spawn_2, zat_crow_spawn_3
Notes
spawn_pathis parsed as a comma-separated list.- If the crow count is already at the limit, the manager waits for the crow update throttle.
- Each path uses point
0as the spawn position. - Keep spawn points away from the actor; paths within 100 units are skipped.
sr_cutscene
sr_cutscene teleports the actor to a point/look pair, disables game UI, and plays one or more camera effectors. Use it
for scripted first-person scenes and controlled transitions where player input should be temporarily blocked.
Parameters
point
Type: string. Required. Default: none.
Patrol path used by the teleport effect as actor position.
look
Type: string. Required. Default: none.
Patrol path used by the teleport effect as actor look target.
global_cameffect
Type: boolean. Optional. Default: false.
Marks generated camera effects as global.
pp_effector
Type: string. Optional. Default: nil.
Postprocess effector name without .ppe. The parser appends .ppe.
cam_effector
Type: comma-separated strings. Required. Default: none.
Camera effectors or named effector sets played in order.
fov
Type: number. Optional. Default: null.
Field of view stored in the scheme state.
enable_ui_on_end
Type: boolean. Optional. Default: true.
Re-enables game UI/input at the end when possible.
outdoor
Type: boolean. Optional. Default: false.
Adds a brighten complex effector for outdoor night cutscenes.
The section also supports common switch fields.
Runtime behavior
On activation, the manager:
- teleports the actor using
xr_effects.teleport_actor(point, look); - starts the configured postprocess when it is not
nil; - disables game UI;
- optionally starts a brighten effector for outdoor night scenes;
- starts the first configured camera effector or effector set.
Camera progression uses scheme signals. When cam_effector_stop is present, the current motion stops and the manager
advances. After the final motion, the manager sets cameff_end.
Example
[logic]
active = sr_cutscene@intro

[sr_cutscene@intro]
point = intro_actor_point
look = intro_actor_look
cam_effector = intro_camera_1, intro_camera_2
pp_effector = fade_in
enable_ui_on_end = true
on_signal = cameff_end | sr_idle@done
Notes
cam_effectoris parsed as a comma-separated list.pp_effector = nilbecomes the nil postprocess constant and is skipped.- The manager stores the active cutscene object and state in cutscene config while running.
sr_deimos
sr_deimos drives a disorientation effect based on actor movement speed. It ramps intensity, starts postprocess and
looped sounds, can play repeated camera effects, and drains actor health when intensity is high.
Parameters
movement_speed
Type: number. Optional. Default: 100.
Target movement speed used to calculate intensity delta.
growing_rate
Type: number. Optional. Default: 0.1.
Multiplier used when intensity is increasing.
lowering_rate
Type: number. Optional. Default: growing_rate.
Multiplier used when intensity is decreasing.
pp_effector
Type: string. Required. Default: none.
Primary postprocess effector name without .ppe.
pp_effector2
Type: string. Required. Default: none.
Secondary postprocess effector name without .ppe.
cam_effector
Type: string. Required. Default: none.
Camera effector animation name without path or extension.
cam_effector_repeating_time
Type: number. Optional. Default: 10.
Seconds between repeated camera effects. Stored as milliseconds.
noise_sound
Type: string. Required. Default: none.
Looped noise sound id.
heartbeat_sound
Type: string. Required. Default: none.
Looped heartbeat sound id.
health_lost
Type: number. Optional. Default: 0.01.
Health amount subtracted when the high-intensity camera effect triggers.
disable_bound
Type: number. Optional. Default: 0.1.
Intensity below which phase effects are stopped.
switch_lower_bound
Type: number. Optional. Default: 0.5.
Intensity where heartbeat phase starts or stops.
switch_upper_bound
Type: number. Optional. Default: 0.75.
Intensity where camera and secondary postprocess can trigger.
The section also supports common switch fields.
Runtime behavior
The manager compares movement_speed with the actor’s current movement speed and adjusts intensity between 0 and 1.
As thresholds are crossed it starts or stops:
- primary postprocess and noise sound;
- heartbeat sound;
- camera effector and secondary postprocess.
When intensity rises above switch_upper_bound, the manager may replay the camera effect after
cam_effector_repeating_time and subtract health_lost from actor health.
When the section switches away, the manager resets related effectors and looped sounds.
Example
[logic]
active = sr_deimos@horror

[sr_deimos@horror]
pp_effector = deimos
pp_effector2 = deimos_flash
cam_effector = deimos_camera
noise_sound = deimos_noise
heartbeat_sound = deimos_heartbeat
movement_speed = 80
switch_upper_bound = 0.75
on_info = {+scene_finished} sr_idle@done
Notes
cam_effector_repeating_timeis configured in seconds and converted to milliseconds.- The manager skips updates while the screen is black.
- If an actor binder provides
deimosIntensity, the manager uses it as the current intensity seed.
sr_idle
sr_idle is a restrictor scheme that waits and checks switch conditions. It does not run its own effect, movement, UI,
or actor interaction behavior.
Use it as a neutral trigger state when a space restrictor should wait for info portions, timers, actor entry, actor exit, or other common switch conditions.
Parameters
sr_idle has no scheme-specific parameters. It reads only common switch fields from the section.
on_info, on_info1, …
Type: condlist.
Switch when the condlist selects another section.
on_timer, on_timer1, …
Type: milliseconds | condlist.
Switch after the section has been active for the duration.
on_game_timer, on_game_timer1, …
Type: seconds | condlist.
Switch after the section has been active for the game-time duration.
on_actor_inside
Type: condlist.
Switch while the actor is inside the current restrictor.
on_actor_outside
Type: condlist.
Switch while the actor is outside the current restrictor.
on_actor_in_zone
Type: zone | condlist.
Switch while the actor is inside another named zone.
on_actor_not_in_zone
Type: zone | condlist.
Switch while the actor is outside another named zone.
on_npc_in_zone
Type: story_id | zone | condlist.
Switch while the named NPC is inside the named zone.
on_npc_not_in_zone
Type: story_id | zone | condlist.
Switch while the named NPC is outside the named zone.
Usage
Use sr_idle when the restrictor is only a condition gate:
- wait until the actor enters a volume;
- wait until an info portion is set;
- call an effect through a condlist and then switch;
- hold a trigger in a disabled state until another section enables it.
Because sr_idle checks conditions every update, avoid condlists that repeatedly return the same active section while
running effects. Effects in a matching condlist can run every update if the switch itself does not move to another
section.
Example
[logic]
active = sr_idle@wait

[sr_idle@wait]
on_actor_inside = sr_idle@inside %=play_sound(alarm_start)%

[sr_idle@inside]
on_actor_outside = sr_idle@wait
on_timer = 10000 | sr_idle@done %+actor_stayed_in_zone%

[sr_idle@done]
The first section waits for the actor to enter the restrictor. The second section waits for either actor exit or a 10-second timer.
sr_light
sr_light registers a restrictor as a light-control zone for stalkers. Other systems can query active light zones to
decide whether a stalker’s torch should be on or off while the stalker is inside the zone.
Parameters
light_on
Type: boolean. Optional. Default: false.
Light flag returned when a stalker is inside the active zone.
The section also supports common switch fields such as on_info, on_timer, and actor-zone checks.
Runtime behavior
On activation, the manager registers itself in registry.lightZones. On update, it checks common switch conditions. If
a switch happens, the manager marks itself inactive and removes the zone from the registry. Otherwise it remains active.
The manager’s checkStalker helper returns two booleans:
- the configured
light_onvalue; - whether the checked stalker is inside this active restrictor zone.
Runtime sequence
SchemeLight.activatereads common switch fields andlight_on.SchemeLight.addsubscribesLightManager.LightManager.activateregisters the manager inregistry.lightZonesby restrictor object id.- Each update tries common section switching.
- If switching happens, the manager marks itself inactive and removes the zone from
registry.lightZones. - Otherwise it marks itself active and can answer
checkStalker(...).
Example
[logic]
active = sr_light@underground

[sr_light@underground]
light_on = true
on_info = {+lab_power_restored} sr_light@off

[sr_light@off]
light_on = false
Notes
- The scheme reset clears all registered light zones.
- Deactivation does not currently unregister the zone directly; updates and reset handle registry cleanup.
checkStalkerreturns(false, false)when the manager is inactive or the stalker is outside the restrictor.
sr_monster
sr_monster stages a monster ambush from a restrictor. While the actor is inside the zone, it moves a warning sound
source along a patrol path. When the path wraps, it spawns a monster and commands it to run to the path endpoint.
Parameters
snd
Type: string. Optional. Default: null.
Sound id played as the moving warning sound source.
delay
Type: number. Optional. Default: 0.
Parsed and stored; current manager does not use it directly.
idle
Type: number. Optional. Default: 30.
Idle duration after the ambush finishes. The parser multiplies this value by 10000, so one configured unit becomes ten
seconds of game-time delay.
sound_path
Type: string list. Optional. Default: null.
Patrol paths used by the moving warning sound. One path is selected at a time.
monster_section
Type: string. Optional. Default: null.
Server object section spawned when the path wraps.
slide_velocity
Type: number. Optional. Default: 7.
Speed for sliding the warning sound position along the path.
The section also supports common switch fields.
Runtime behavior
When the actor enters the restrictor, the manager selects a path from sound_path and starts sliding a sound position
from point to point. When the selected path wraps back to its start:
- it spawns
monster_sectionat the current sound position; - it plays the hard-coded appear sound
monsters\boar\boar_swamp_appear_1; - it captures the spawned monster when it comes online;
- it commands the monster to run to the final point of the current path;
- after the monster reaches the final point, it releases and removes the server object;
- it enters idle state until
idleEnd.
Example
[logic]
active = sr_monster@ambush

[sr_monster@ambush]
snd = monsters_boar_boar_swamp_appear_1
sound_path = ambush_sound_path_1, ambush_sound_path_2
monster_section = boar_normal
slide_velocity = 7
idle = 30
Notes
sound_pathshould contain patrol paths with enough points for the sound slide and final run target.- With multiple paths, the manager avoids immediately selecting the same path again.
- The implementation currently stores
delaybut does not apply it inMonsterManager.
sr_no_weapon
sr_no_weapon tracks whether the actor is inside a restrictor where weapons should be disabled. It emits enter and
leave events and records the zone in registry.noWeaponZones.
Use it for safe areas, story spaces, and bases where the actor should not be able to keep a weapon raised.
Parameters
sr_no_weapon has no scheme-specific fields. It reads common switch fields from the section.
on_info, on_info1, …
Type: condlist.
Switch when the condlist selects another section.
on_timer, on_timer1, …
Type: milliseconds | condlist.
Switch after the section has been active for the duration.
on_actor_inside
Type: condlist.
Switch while the actor is inside the current restrictor.
on_actor_outside
Type: condlist.
Switch while the actor is outside the current restrictor.
Runtime behavior
On activation, the manager removes the zone’s previous registry entry, resets its local actor state, and immediately checks whether the actor is inside the restrictor.
When the actor enters the zone, it:
- sets
registry.noWeaponZones[zone_id] = true; - emits
ACTOR_ENTER_NO_WEAPON_ZONE.
When the actor leaves the zone, it:
- sets
registry.noWeaponZones[zone_id] = false; - emits
ACTOR_LEAVE_NO_WEAPON_ZONE.
If a section switch happens while the actor is inside, the manager emits the leave path before switching away.
Example
[logic]
active = sr_no_weapon@base

[sr_no_weapon@base]
on_info = {+base_alarm} sr_idle@disabled
Notes
- The actual weapon hiding/UI behavior is handled by systems listening to the registry/events, not by this manager.
- Use
sr_idleor another section when the no-weapon zone should be disabled.
sr_particle
sr_particle plays particle effects from a restrictor section. It supports a simple path-following particle and a
complex mode that plays one particle instance per patrol point.
Parameters
name
Type: string. Required. Default: none.
Particle effect name passed to particles_object.
path
Type: string. Required. Default: none.
Patrol path used by the particle effect. Must not be empty.
mode
Type: 1 or 2. Required. Default: none.
Particle behavior mode. 1 is simple, 2 is complex.
looped
Type: boolean. Optional. Default: false.
Restarts playback when the particle is not playing.
The section also supports common switch fields such as on_info, on_timer, and on_signal.
Modes
1
Creates one particle object, loads path, starts path playback, and plays it.
2
Creates one particle object per patrol point and plays each particle at its point after the waypoint delay.
Complex mode reads waypoint key d as delay in milliseconds. Waypoint sound key s is currently a development trap and
aborts if present.
Signals
For non-looped particles, the manager sets particle_end after playback has started and all particle objects have
stopped.
[logic]
active = sr_particle@steam

[sr_particle@steam]
name = anomaly2\steam
path = steam_path
mode = 1
looped = false
on_signal = particle_end | sr_idle@done
Notes
modeaccepts only1and2.- Deactivation stops all playing particle objects.
- Updates are throttled by the particle scheme update period.
sr_postprocess
sr_postprocess applies a gray/noise postprocess effect while the actor is inside a restrictor and applies periodic
radiation and shock hits.
Use it for hazardous visual zones where the actor should see an effect and take damage while inside.
Parameters
intensity
Type: number. Required. Default: none.
Target postprocess intensity. The value is multiplied by 0.01.
intensity_speed
Type: number. Required. Default: none.
Ramp speed for entering and leaving the zone. The value is multiplied by 0.01.
hit_intensity
Type: number. Required. Default: none.
Damage accumulation rate while the actor is inside.
The section also supports common switch fields such as on_info, on_timer, and actor-zone checks.
Runtime behavior
On activation, the manager starts a postprocess effector with id object.id() + 2000. Each update:
- checks common switch conditions first;
- tests whether the actor is inside the restrictor;
- ramps intensity toward the target when inside and back toward zero when outside;
- updates gray color and noise parameters;
- accumulates hit power while inside;
- once per second, applies radiation and shock hits to the actor.
intensity and intensity_speed are converted from percent-style values by multiplying by 0.01. hit_intensity is
used directly as the per-second accumulation rate.
Example
[logic]
active = sr_postprocess@hazard

[sr_postprocess@hazard]
intensity = 40
intensity_speed = 8
hit_intensity = 0.02
on_actor_outside = sr_idle@cooldown
Notes
intensityandintensity_speedare percent-style config values.- Deactivation is not implemented in the current manager and aborts if called.
- The hit direction is zero and impulse is
0. - Use a switch to a non-postprocess section when the restrictor should stop controlling the effect.
sr_psy_antenna
sr_psy_antenna applies psy-zone effects while the actor is inside a restrictor. It adjusts the shared
PsyAntennaManager, enables fake HUD indicators, optionally starts a postprocess effector, and restores the manager
values when the actor leaves.
Parameters
eff_intensity
Type: number. Required. Default: none.
Sound/postprocess intensity. Multiplied by 0.01.
postprocess
Type: string. Optional. Default: psy_antenna.
Postprocess effector name. Use nil to skip adding an effector.
hit_intensity
Type: number. Required. Default: none.
Hit intensity added to the psy antenna manager. Multiplied by 0.01.
phantom_prob
Type: number. Optional. Default: 0.
Phantom spawn probability. Multiplied by 0.01.
mute_sound_threshold
Type: number. Optional. Default: 0.
Added to the manager mute threshold while inside.
no_static
Type: boolean. Optional. Default: false.
Sets the manager noStatic flag.
no_mumble
Type: boolean. Optional. Default: false.
Sets the manager noMumble flag.
hit_type
Type: string. Optional. Default: wound.
Hit type used by the manager.
hit_freq
Type: number. Optional. Default: 5000.
Hit frequency used by the manager.
The section also supports common switch fields.
Runtime behavior
When the actor enters the zone, the manager:
- enables fake HUD indicators;
- adds intensity, hit intensity, mute threshold, and phantom probability to the shared psy manager;
- copies
no_static,no_mumble,hit_type, andhit_freqto the shared manager; - starts the configured postprocess if it is not
nil.
When the actor leaves or the scheme deactivates, those additive values are subtracted and fake indicators are disabled.
The manager saves its inside/outside state in portable storage under key inside.
Example
[logic]
active = sr_psy_antenna@lab

[sr_psy_antenna@lab]
eff_intensity = 60
hit_intensity = 10
phantom_prob = 5
mute_sound_threshold = 0.2
postprocess = psy_antenna
hit_freq = 3000
on_actor_outside = sr_idle@outside
Notes
- Percent-style fields are multiplied by
0.01. - Multiple active psy antenna zones add to the shared manager values.
postprocess = nildisables postprocess creation for this zone.
sr_silence
sr_silence marks a restrictor as a silence zone by registering it in registry.silenceZones. It is used by other
systems to suppress dynamic music, usually in safe places.
Use it for restrictor volumes around bases or scripted quiet areas. It marks the zone; the music behavior comes from systems that read the registry entry.
Parameters
sr_silence has no scheme-specific fields. It reads common switch fields from the section.
on_info, on_info1, …
Type: condlist.
Switch when the condlist selects another section.
on_timer, on_timer1, …
Type: milliseconds | condlist.
Switch after the section has been active for the duration.
Runtime behavior
On activation, the scheme stores the restrictor id and name in registry.silenceZones.
The manager itself is empty in the current implementation. The source notes that deactivation behavior may be missing. Use another section to control logic flow, but do not rely on this manager to unregister itself.
Because registration happens during activation, keep the active section stable for areas that should remain quiet. If a
scenario needs temporary silence, verify the consumer of registry.silenceZones before relying on a section switch to
remove the effect.
Example
[logic]
active = sr_silence@base

[sr_silence@base]
on_info = {+base_alarm} sr_idle@disabled
Notes
- This scheme does not currently implement update or deactivation behavior.
- Music suppression is handled by systems that read
registry.silenceZones. - The stored value is the restrictor name keyed by object id.
sr_teleport
sr_teleport teleports the actor after the actor enters a restrictor and a timeout elapses. It can choose from up to
ten weighted destination/look pairs.
Parameters
timeout
Type: number. Optional. Default: 900.
Delay in milliseconds between actor entry and teleport.
point1 … point10
Type: string. Required: at least one pair. Default: none.
Patrol path whose first point is the teleport position.
look1 … look10
Type: string. Required: at least one pair. Default: none.
Patrol path whose first point defines look direction after teleport.
prob1 … prob10
Type: number. Optional. Default: 100.
Weight for the matching point/look pair.
The section also supports common switch fields. They are checked after teleport processing when the manager is idle.
Runtime behavior
When the actor enters the restrictor, the manager:
- switches from idle to activated state;
- starts the teleport postprocess effector;
- waits
timeoutmilliseconds; - chooses a destination by subtracting weights from a random value in the total probability range;
- teleports the actor to
pointN[0]and looks towardlookN[0] - pointN[0]; - returns to idle state.
The parser stops reading destination pairs when it finds pointN = none or lookN = none.
Example
[logic]
active = sr_teleport@burnt_farm

[sr_teleport@burnt_farm]
timeout = 1000
point1 = teleport_walk_a
look1 = teleport_look_a
prob1 = 25
point2 = teleport_walk_b
look2 = teleport_look_b
prob2 = 75
Notes
- At least one complete
pointNandlookNpair is required. probNis a weight, not a normalized percentage.- The teleport triggers again if the actor remains or re-enters after the manager returns to idle.
sr_timer
sr_timer shows a HUD timer and switches sections when the timer reaches a configured value. Use it for visible
countdowns, elapsed-time displays, evacuation limits, laboratory timers, or mission windows where the player should see
time passing.
The scheme is a restrictor scheme. When activated, it adds the configured HUD static. When deactivated, it removes the timer static and optional label static.
Parameters
type
Type: inc or dec. Optional. Default: inc.
Timer mode. inc counts up from start_value; dec counts down from start_value.
start_value
Type: number. Required: required for dec. Default: 0 for inc.
Starting time in milliseconds.
on_value
Type: number | condlist. Optional. Default: null.
Switch when the timer reaches the value. For dec, the switch happens at or below the value. For inc, it happens at
or above the value.
timer_id
Type: string. Optional. Default: hud_timer.
HUD custom static id used for the timer text.
string
Type: string id. Optional. Default: null.
Optional text string shown in hud_timer_text.
The section also checks common switch fields before updating the timer. If a common switch succeeds, the timer update for that tick is skipped.
Usage
Use type = dec for deadlines and visible countdowns. It requires start_value.
Use type = inc for elapsed-time displays. start_value is optional and defaults to 0.
on_value is separate from on_timer. on_timer switches after section activation time; on_value switches when the
displayed timer value crosses the configured threshold.
Example
[logic]
active = sr_timer@countdown

[sr_timer@countdown]
type = dec
start_value = 60000
timer_id = hud_timer
string = st_lab_countdown
on_value = 0 | sr_idle@failed %+lab_timer_failed%
on_info = {+lab_shutdown_complete} sr_idle@done

[sr_idle@done]

[sr_idle@failed]
This section starts a 60-second countdown. It switches to sr_idle@failed when the displayed value reaches zero, unless
lab_shutdown_complete switches it to sr_idle@done first.
Notes
- Timer values are milliseconds.
- The displayed value is clamped at zero.
typeaccepts onlyincanddec.- Decrement timers without
start_valueare invalid.
walker
walker makes a stalker follow a patrol path while no higher-priority planner state is active. Use it for guards,
ambient movement, scripted walks, and simple station-keeping behavior.
The scheme is a stalker scheme. It adds a walker planner action that runs only while the NPC is alive and not in danger, combat, anomaly handling, wounded handling, corpse search, item gathering, or abuse reactions.
Parameters
path_walk
Type: string. Required. Default: none.
Patrol path used for movement. Relative names are resolved against the active smart terrain.
path_look
Type: string. Optional. Default: null.
Patrol path used for look points. It must not equal path_walk.
team
Type: string. Optional. Default: null.
Patrol team name passed to the stalker patrol manager. Relative names are resolved against the active smart terrain.
sound_idle
Type: string. Optional. Default: null.
Sound played by the sound manager while the NPC is not in a camp zone.
use_camp
Type: boolean. Optional. Default: false.
Allows the NPC to register in a camp story manager when standing inside a camp zone.
def_state_standing
Type: string. Optional. Default: null.
Suggested standing animation state.
def_state_moving
Type: string. Optional. Default: def_state_moving1.
Suggested moving animation state.
def_state_moving1
Type: string. Optional. Default: null.
Compatibility fallback for def_state_moving.
The section also supports common switch fields such as on_info, on_signal, on_timer, and actor-distance checks.
Usage
Use walker when one NPC owns its own patrol. Use patrol instead when several squad members should share a commander
and follow a formation.
The movement path is parsed the first time the action runs. If path_look is present, look waypoints are parsed too.
Waypoint flags and signals are handled by the shared stalker patrol manager.
If use_camp = true, the walker action checks whether the NPC is inside a camp zone each update. Inside a camp, the NPC
registers with the camp manager; outside a camp, sound_idle can play.
Example
[logic]
active = walker@guard

[walker@guard]
path_walk = guard_walk
path_look = guard_look
sound_idle = state
def_state_standing = guard
def_state_moving = walk
on_info = {+zat_b40_alarm} walker@alarm

[walker@alarm]
path_walk = alarm_walk
def_state_moving = run
on_timer = 15000 | walker@guard
In a smart terrain named zat_b40_smart_terrain, the first section resolves guard_walk to
zat_b40_smart_terrain_guard_walk.
Notes
path_walkmust exist as a level patrol path.path_lookcannot be the same aspath_walk.- The scheme does not force combat behavior. Combat, danger, wounded, and other generic schemes can interrupt it.
wounded
wounded captures a stalker when health or psy-health reaches configured breakpoints. The NPC falls into a wounded
state, calls for help, can be helped by another stalker, and can auto-heal after a timeout.
Parameters
The active logic section can point to a wounded configuration section:
wounded
Location: active section or [logic] fallback. Type: section name. Optional.
Section used to configure wounded behavior. nil uses community defaults.
The wounded configuration section supports:
hp_state
Type: wounded data. Optional. Default: community default.
State/sound descriptor for HP wounds when the actor is not seen.
hp_state_see
Type: wounded data. Optional. Default: community default.
State/sound descriptor for HP wounds when the actor is seen.
psy_state
Type: wounded data. Optional. Default: community default.
State/sound descriptor for psy-health wounds.
hp_victim
Type: wounded data. Optional. Default: community default.
Victim descriptor stored in portable state.
hp_cover
Type: wounded data. Optional. Default: community default.
Parsed into state. The inspected manager does not currently store its processed result.
hp_fight
Type: wounded data. Optional. Default: community default.
Controls whether the NPC can keep fighting while wounded.
help_dialog
Type: string. Optional. Default: community default.
Dialog used for wounded help interaction.
help_start_dialog
Type: string. Optional. Default: null.
Start dialog set when the NPC becomes wounded.
use_medkit
Type: boolean. Optional. Default: community default.
Allows medkit use after help or auto-heal unlocks it.
autoheal
Type: boolean. Optional. Default: true.
Allows automatic medkit unlock after wounded timeout.
enable_talk
Type: boolean. Optional. Default: true.
Stores whether talking is enabled while wounded.
not_for_help
Type: boolean. Optional. Default: community default.
Marks the wounded object as not suitable for helper NPCs.
Wounded Data Syntax
Wounded data is parsed as repeated descriptors:
hp|state_condlist@sound_condlist|hp|state_condlist@sound_condlist
Examples:
hp_state = 20|wounded_heavy_2@help_heavy
hp_fight = 20|false
psy_state = 20|{=best_pistol}psy_armed,psy_pain@wounded_psy
Each descriptor has:
hp
Breakpoint compared with current HP or psy-health in the 0..100 range.
state_condlist
Condlist resolved to the stalker state or special value.
sound_condlist
Optional condlist after @, resolved to the sound name.
The parser selects the last descriptor whose breakpoint is greater than or equal to the current value before a higher unmatched breakpoint stops the scan.
Runtime behavior
On reset, the scheme resolves the wounded config section and parses the descriptor fields. Defaults differ for normal, monolith, and zombied communities. Normal stalkers default to a wounded-heavy state with help sounds and medkit use. Monolith and zombied defaults disable outside help.
The wound manager recalculates state on update and hit. Psy wounds are checked first. If no psy wound applies, HP wound
state and sound are selected from hp_state or hp_state_see depending on whether the NPC sees the actor. Fight and
victim results are stored in portable state.
When the wounded action starts, the NPC stops moving, disables trade, sets wounded state, registers as a wounded object, and begins calling for help after the configured delay. If auto-heal is enabled and no helper unlocks medkit use, the manager unlocks medkit use after the wounded timeout.
Example
[logic]
active = walker@guard

[walker@guard]
path_walk = guard_walk
path_look = guard_look
wounded = wounded@guard

[wounded@guard]
hp_state = 25|wounded_heavy_2@help_heavy
hp_state_see = 25|wounded_heavy_3@help_heavy
hp_fight = 25|false
hp_victim = 25|nil
help_dialog = dm_help_wounded_medkit_dialog
use_medkit = true
autoheal = true
not_for_help = false
Notes
- Wounded timing defaults are loaded from
schemes\wounded.ltx: call delay5000, call period5000, wounded timeout60000if the config file does not override them. - If the resolved wounded state is
nilwhile the action is executing, the implementation aborts with a wrong wounded animation error.
Scripts
The script engine is the TypeScript runtime layer that is compiled to Lua and loaded by the xray engine. It owns the Lua extern modules, object binders, scheme registry, global managers, server object classes, and shared helpers used by configs and gameplay logic.
For the object lifecycle, manager startup, event, and save/load flow, start with the Runtime lifecycle section. This page is the lower-level source map for script modules.
The main source roots are:
| Area | Source |
|---|---|
| Lua entry points | src/engine/scripts |
| Runtime binders | src/engine/core/binders |
| Global managers | src/engine/core/managers |
| Runtime registry | src/engine/core/database |
| Scheme implementations | src/engine/core/schemes |
| Server object classes | src/engine/core/objects |
| Shared helpers | src/engine/core/utils |
| UI classes | src/engine/core/ui |
| Animation tables | src/engine/core/animation |
Entry Points
The engine-facing entry points are registered with extern(...).
_g
Loads global runtime declarations. This is the global bridge used before other modules are available.
register
Exposes class-id and class registration helpers:
register.registerGameClassesregister.getGameClassIdregister.getUiClassId
These functions are called by xray while linking script classes to engine class ids.
bind
Exposes binder factories such as bind.actor, bind.stalker, bind.restrictor, bind.weapon, and
bind.smart_terrain. Each function receives a game object and attaches the matching object_binder implementation.
Some binders are conditional. For example, helicopters and physical objects are bound only when their spawn ini or object kind needs script logic.
start
Runs the game-start callback. It updates class ids, registers the simulator and ranks, unlocks system ini overriding,
registers managers, registers schemes, registers extensions, and emits GAME_STARTED.
Runtime Shape
Most gameplay code is not called directly from config files. The usual path is:
- xray loads script entry modules.
start.callbackinitializes shared runtime systems.- xray creates online objects and calls a
bind.*function. - The binder registers the object in
registry. - The binder initializes object logic from spawn ini or generated config.
- Schemes, managers, and events update behavior on object or actor ticks.
Server-side classes such as squads and smart terrains participate through on_register, on_unregister, STATE_Write,
and STATE_Read.
What To Edit
- Add new engine callbacks under
src/engine/scripts/declarations. - Add new object lifecycle behavior under
src/engine/core/binders. - Add cross-object systems under
src/engine/core/managers. - Add runtime object registries under
src/engine/core/databaseonly when the state is shared across modules. - Add shared helpers under
src/engine/core/utilswhen they are stateless or narrowly scoped.
Validation
For script runtime changes, start with focused tests near the changed module. Use broader checks when touching shared runtime contracts:
npm test -- src/engine/scripts
npm test -- src/engine/core/database
npm run typecheck
Animations
Animation scripts define named stalker states, animation sequences, smart-cover descriptors, and helper functions used
by schemes such as walker, remark, animpoint, camper, corpse_detection, and help_wounded.
Source Layout
| Source | Purpose |
|---|---|
src/engine/core/animation/types | State, animation, and patrol descriptor types |
src/engine/core/animation/states | Stalker state descriptors such as movement, mental state, weapon mode, body state |
src/engine/core/animation/animations | Animation sequence tables and callbacks |
src/engine/core/animation/animstates | Additional animation-state mappings |
src/engine/core/animation/smart_covers | Smart-cover and loophole animation descriptors |
src/engine/core/animation/predicates | Predicate lists used to select animpoint-compatible animations |
src/engine/core/utils/animation.ts | Helpers for sequence construction |
State Descriptors
State descriptors map a script state name to engine animation inputs. The base table defines states such as walk,
run, patrol, assault, threat, hide, search_corpse, help_wounded, and wounded states.
A descriptor can set:
- weapon animation mode, such as strapped, unstrapped, fire, drop, or none;
- movement mode, such as stand, walk, or run;
- mental state, such as free, danger, or panic;
- body state, such as standing or crouch;
- animation state or concrete animation name;
- sight direction behavior;
- force flags used by state managers.
Schemes usually pass a state name to setStalkerState. The state manager resolves that name through these tables and
applies the engine-level settings.
Animation Sequences
Animation descriptors define into, idle, rnd, and out sequences. The createSequence(...) helper stores the
sequence as a Lua table using zero-based indexes, which matches the runtime animation code.
Sequence entries can be:
- animation names;
- arrays of candidate animation names;
- action descriptors, such as attaching or detaching an item;
- function callbacks, such as finishing corpse looting or wounded help.
Examples in the base animation table include:
play_guitarandplay_harmonica, which attach camp instruments;punch, which calls the abuse punch helper and then clears abuse state;search_corpse, which calls corpse-loot finalization;help_wounded_with_medkit, which attaches the scripted medkit and finishes wounded help.
Smart Cover Animations
Smart-cover animation files define cover descriptions and loopholes consumed by smartcover and animpoint. The
registered smart_covers.descriptions extern exposes the list to xray.
Animpoint schemes can also use predicate lists to choose compatible animations from a smart-cover description when
avail_animations is not explicitly set.
Common Pitfalls
- State names are runtime API. Changing a name can break LTX sections that refer to it.
- Some sequence callbacks have gameplay side effects, such as transferring loot or healing wounded NPCs.
- Smart-cover descriptors are used both by scripts and engine cover logic. Keep cover and loophole names stable.
Callbacks and Events
Callbacks are the bridge from xray and Lua config scripts into the TypeScript runtime. Events are the engine’s internal publish-subscribe layer for sharing lifecycle changes between managers, binders, and schemes.
External Callbacks
External callbacks live under src/engine/scripts/declarations/callbacks and are loaded by registerExternals().
| Module | Examples |
|---|---|
actor.ts | actor condition notifications, travel dialog callbacks |
game.ts | save/load hooks, level input, visual memory, trade, loadout, outro, class unregister |
interface.ts | load-screen tips, inventory upgrades, actor menu, PDA, weapon UI parameters |
custom.ts | sleep, surge, achievement, task, and cutscene callbacks under engine.* |
The declarations use extern(name, value) to register global functions or modules. Config files and engine code call
those names from Lua.
Binder Callbacks
Object binders register engine callbacks on online objects.
For example, ActorBinder registers callbacks for inventory info, item take/drop, trade, task state, use object, and
HUD animation end. It converts those callbacks to EGameEvent emissions.
StalkerBinder registers hit, death, use, sound, and patrol extrapolate callbacks. These callbacks forward work to
scheme events, managers, and global events such as STALKER_HIT or STALKER_DEATH.
EventsManager
EventsManager is the internal event dispatcher. It stores a Lua table of subscribers for every declared EGameEvent.
Use:
getManager(EventsManager).registerCallback(EGameEvent.ACTOR_UPDATE, this.onActorUpdate, this);
EventsManager.emitEvent(EGameEvent.GAME_STARTED, isNewGame);
Callbacks can be registered with or without an explicit context. When a context is provided, the manager calls the callback with that context.
Timers
EventsManager extends AbstractTimersManager, so it also owns game-time intervals and timeouts.
registerGameInterval(callback, period)repeats after at leastperiodmilliseconds.registerGameTimeout(callback, delay)runs once afterdelaymilliseconds.- intervals assert that the period is at least
50. - timers are processed from
ActorBinder.update()througheventsManager.tick().
Event Groups
EGameEvent includes events for:
- actor lifecycle and throttled actor update ticks;
- stalker, monster, helicopter, item, zone, smart terrain, and squad lifecycle;
- task, treasure, surge, notification, and hit events;
- save/load and level-change events;
- UI events such as main menu on/off;
- debug dump requests.
Guidelines
- Use external callbacks only for names the engine or config files call directly.
- Use
EventsManagerfor internal cross-system notifications. - Unregister callbacks in
destroy()or binder cleanup paths when the owner can be disposed. - Do not put long-running work inside high-frequency actor update events unless it is explicitly throttled.
Managers
Managers are singleton runtime services stored in registry.managers. They own cross-object systems such as events,
save/load, sound, simulation, trade, tasks, map spots, weather, upgrades, and debug state.
Registration
registerManagers() initializes the manager list during start.callback.
The current startup list includes:
- actor input and actor inventory menu;
- database, debug, profiling, and events;
- dialogs, load screen, loadout, map display, music, notifications, PDA;
- phantom, save, simulation, sleep, sound, statistics;
- tasks, trade, travel, treasures, upgrades, weather;
- body release handling.
Each manager is initialized through initializeManager(ManagerClass).
Other managers can be initialized lazily through getManager. For the startup list and lifecycle rules, see the Runtime
managers page.
Manager Registry
Manager instances are stored in two maps:
registry.managers, keyed by class reference;registry.managersByName, keyed by class name.
Use getManager(ManagerClass) for normal access. It initializes the manager if needed.
Use getWeakManager(ManagerClass) only when missing manager state is acceptable.
Use getManagerByName(name) only for circular-reference cases where the class reference is not available.
Lifecycle
Managers extend AbstractManager. The base class defines:
initialize();destroy();update(delta);save(packet);load(reader).
update, save, and load abort by default. A manager should implement only the lifecycle methods it actually uses.
disposeManager calls destroy(), marks the instance as destroyed, and removes it from both registry maps.
Common Patterns
Managers often subscribe to EventsManager in initialize() and unsubscribe in destroy().
Examples:
SoundManagerlistens for actor update/offline and debug dump events.SimulationManagerlistens for actor registration and actor offline events.SaveManagercoordinates client/server save callbacks exposed throughalife_storage_manager.
Managers with persistent state write to net packets or dynamic save data. When editing save/load logic, keep marker order and read/write order synchronized.
Guidelines
- Put shared system state in a manager, not in a binder.
- Keep object-local state in the object’s registry state or binder.
- Register manager callbacks in
initialize()and unregister them indestroy(). - Avoid constructing managers directly; use
getManagerunless a test is isolating the class.
Object Binders
Object binders attach TypeScript lifecycle code to online xray game objects. They are client-side wrappers around
object_binder and are registered through the bind extern module.
Binder Registration
src/engine/scripts/bind.ts exposes one function per bindable object category:
- creatures:
actor,stalker,monster,crow; - zones:
restrictor,anomaly_zone,anomaly_field,camp,arena_zone,level_changer; - physical objects:
physic_object,door,campfire,artefact,phantom,signal_light; - items:
weapon,helmet,outfit; - simulation objects:
smart_terrain,smart_cover; - helicopter:
helicopter.
Some binders are conditional. For example, physic_object binds only when the object has a [logic] section or is an
inventory box, and smart_terrain binds only when the spawn ini contains [smart_terrain].
Lifecycle Methods
Most binders implement some subset of:
reinit: reset local state and registry state;net_spawn: object came online;update: per-frame object update;net_destroy: object went offline;saveandload: client-side save state;net_save_relevant: whether binder state should be saved.
Server object classes use related server callbacks such as on_register, on_unregister, STATE_Write, and
STATE_Read.
ActorBinder
ActorBinder registers the actor object, initializes portable store, emits actor lifecycle events, and drives global
update ticks.
On each update it emits:
ACTOR_UPDATE;ACTOR_UPDATE_100;ACTOR_UPDATE_500;ACTOR_UPDATE_1000;ACTOR_UPDATE_5000;ACTOR_UPDATE_10000.
It also ticks EventsManager timers and updates simulation object availability for the actor server object.
StalkerBinder
StalkerBinder owns online stalker runtime setup:
- resets object registry state;
- creates the state manager and patrol manager;
- sets up state and motivation planners;
- registers the stalker in the global registry;
- initializes sound themes, reach-task behavior, object logic, post-combat idle, trade, and light behavior;
- forwards hit, death, use, sound, and patrol events to schemes and managers.
On offline switch it emits scheme events, runs on_offline overrides, stores offline state, stops sounds, and
unregisters the stalker.
RestrictorBinder
RestrictorBinder registers zones, initializes restrictor scheme logic on first update, tracks visited restrictors,
emits visit events, updates active schemes, and persists visited state.
Guidelines
- Keep binders focused on lifecycle glue.
- Put reusable behavior in schemes, managers, or utilities.
- Always unregister callbacks and registry entries when an object goes offline.
- When adding save/load fields, update the matching load path in the same order.
Registry
The registry is the shared runtime state table for the script engine. It is defined in
src/engine/core/database/registry.ts and re-exported through src/engine/core/database.
Use it for state that must be visible across binders, schemes, managers, and utility modules.
Main State Groups
| Field | Purpose |
|---|---|
simulator | Current ALife simulator |
actor | Online actor game object |
actorServer | Actor server object |
managers / managersByName | Manager singletons |
schemes | Registered scheme constructors |
objects | Online object registry states |
offlineObjects | Saved state for offline objects |
simulationObjects | Objects that can participate in simulation |
storyLink | Story id to object id mappings |
stalkers | Online stalker id set |
smartTerrains | Registered smart terrains |
smartCovers | Registered smart covers |
zones | Active zones by name |
dynamicData | Marshal-backed dynamic save data |
There are also focused registries for wounded objects, doors, helicopters, crows, anomaly zones, light zones, silence zones, no-weapon zones, trade state, camp managers, ranks, goodwill, and save markers.
Object State
registry.objects is the central per-object store. Binders reset and register object state when objects come online.
Schemes attach their state into the same object descriptor by scheme id.
Common object state includes:
- object reference;
- spawn ini and logic section;
- active scheme and active section;
- scheme states;
- overrides;
- state manager and patrol manager for stalkers.
Story Links
Story links are stored both ways:
storyLink.sidById: object id to story id;storyLink.idBySid: story id to object id.
Use the database helpers to register or unregister story links. Do not update these tables by hand unless the helper does not cover the case.
Manager Access
Managers should be accessed through:
getManager(SoundManager);
getWeakManager(SoundManager);
getManagerByName("SoundManager");
Direct reads from registry.managers are reserved for low-level registry helpers and exceptional circular-reference
cases.
Guidelines
- Prefer a focused database helper over direct table mutation.
- Store transient object-specific state under
registry.objects. - Store persistent cross-system state in a manager or
registry.dynamicData. - Clear registry entries in offline, unregister, or destroy paths.
- Keep registry fields narrow. A broad table without a lifecycle owner becomes difficult to save and clean up.
Server Objects
Server object classes extend xray cse_alife_* classes and run on the ALife side of the engine. They register story
links, simulation targets, save/load data, and object-specific ALife behavior.
Runtime server classes live under src/engine/core/objects.
Source Layout
| Source | Purpose |
|---|---|
objects/creature | Actor, stalker, and monster server classes |
objects/item | Item, weapon, ammo, outfit, helmet, detector, torch, box, and related classes |
objects/physic | Scripted physical server object classes |
objects/zone | Restrictor, anomaly, torrid, and visual zone classes |
objects/squad | Online/offline squad group class and actions |
objects/smart_terrain | Smart terrain class, jobs, respawn, and control |
objects/smart_cover | Smart cover server representation |
objects/helicopter | Helicopter server class |
objects/level | Level changer server class |
Class Registration
Server classes are linked to engine class ids through the registration flow exposed by register.registerGameClasses.
Class-id helpers are implemented in src/engine/scripts/register.
The class-id helpers distinguish game class ids, UI class ids, and object class ids. Unknown game types abort during class-id resolution.
Common Lifecycle
Server object classes usually implement some subset of:
on_register;on_unregister;STATE_Write;STATE_Read;on_death;update;- engine-specific task methods.
Registration usually updates registry, story links, simulation objects, and events. Unregistration must reverse those
links.
Actor
The actor server object registers actor server state, story id actor, and simulation participation. It delegates
server save/load to SaveManager and emits ACTOR_REGISTER, ACTOR_UNREGISTER, and ACTOR_DEATH.
As a simulation target, the actor can be selected only when actor simulation is allowed and safe-zone restrictions do not exclude it.
Squad
Squad extends cse_alife_online_offline_group. It is both a server group and a simulation target.
It owns:
- squad target condlists;
- faction behavior;
- current simulation action;
- assigned terrain and target ids;
- map spot state;
- member registration;
- scripted target rotation;
- save/load for target, respawn, and terrain assignment state.
Squads select either SquadReachTargetAction or SquadStayOnTargetAction depending on whether the current target is
already reached.
Smart Terrain
SmartTerrain extends cse_alife_smart_zone. It owns terrain simulation, job assignment, respawn configuration,
campfires, map spot state, alarm/control state, arriving objects, and job save/load data.
Smart terrain registration creates jobs and simulation descriptors. NPC registration either assigns a job immediately or marks the object as arriving until it reaches the terrain.
Guidelines
- Server object state must be saved and loaded in matching order.
- Register story links and simulation objects on
on_register; unregister them onon_unregister. - Keep client-side behavior in binders or schemes. Server classes should own ALife state and server persistence.
Sounds
Sound scripts load sound themes from LTX, play one-shot and looped sounds, save active sound state, and map engine sound masks to script sound classes.
Source Layout
| Source | Purpose |
|---|---|
src/engine/core/managers/sounds | Sound manager, config, sound story classes, playable sound objects |
src/engine/core/managers/sounds/utils | Theme loading, story helpers, playback helpers |
src/engine/core/utils/sound.ts | Console volume helpers and sound-mask mapping |
src/engine/configs | Generated and static sound config inputs |
Sound Config
SoundsConfig.ts loads:
managers\sounds\script_sound.ltx;managers\sounds\sound_stories.ltx.
script_sound.ltx is parsed into soundsConfig.themes. Runtime state is stored in:
soundsConfig.playing: current one-shot sound per object id;soundsConfig.looped: looped sound themes per object id;soundsConfig.managers: story managers by id.
SoundManager
SoundManager is registered during startup. It subscribes to:
DUMP_LUA_DATA;ACTOR_GO_OFFLINE;ACTOR_UPDATE.
The main methods are:
play(objectId, name, faction?, point?);stop(objectId);playLooped(objectId, name);stopLooped(objectId, name);stopAllLooped(objectId);setLoopedSoundVolume(objectId, name, volume);saveObjectandloadObjectfor object-local sound state.
play rejects looped sound themes. playLooped requires a looped theme.
Heard Sound Mapping
mapSoundMaskToSoundType converts xray snd_type bit masks into script enum values used by hear and danger logic.
Supported groups include:
- weapon sounds:
WPN_shoot,WPN_empty,WPN_hit,WPN_reload,WPN; - item sounds:
ITM_pckup,ITM_drop,ITM_hide,ITM_take,ITM_use,ITM; - monster sounds:
MST_die,MST_damage,MST_step,MST_talk,MST_attack,MST_eat,MST; - fallback:
NIL.
Volume Helpers
getMusicVolume, setMusicVolume, getEffectsVolume, and setEffectsVolume read and write xray console variables for
music and effects volume.
Guidelines
- Use
SoundManagerfor scripted playback so save/load and looped state stay consistent. - Use
sound_idlefields in schemes when a scheme already owns the playback. - Do not call
playwith looped themes orplayLoopedwith one-shot themes. - Stop object sounds when objects go offline.
Simulation
Simulation scripts coordinate ALife squads, smart terrains, actor targeting, respawn, map spots, and online/offline movement tasks.
The core implementation is split between SimulationManager, server object classes, smart terrain utilities, and squad
actions.
Source Layout
| Source | Purpose |
|---|---|
src/engine/core/managers/simulation | Simulation manager, config, activity rules, target selection |
src/engine/core/objects/squad | Squad server object and reach/stay actions |
src/engine/core/objects/smart_terrain | Smart terrain simulation target, jobs, respawn, control |
src/engine/core/objects/creature/Actor.ts | Actor as a simulation target |
src/engine/core/database/simulation.ts | Simulation registration helpers |
src/engine/core/utils/alife.ts | ALife update batching helpers |
src/engine/core/utils/squad | Squad state/action helpers |
SimulationManager
SimulationManager is registered during startup. It listens for:
DUMP_LUA_DATA;ACTOR_REGISTER;ACTOR_GO_OFFLINE.
On actor registration it initializes default simulation squads. On actor offline it removes the actor from xray ranking
when that engine callback exists. It also saves and loads the IS_SIMULATION_INITIALIZED flag.
Simulation Targets
The main simulation targets are:
- actor server object;
- squads;
- smart terrains.
Targets expose methods such as:
getSimulationTask;isSimulationAvailable;isValidSimulationTarget;isReachedBySimulationObject;onSimulationTargetSelected;onSimulationTargetDeselected.
Squads
Squad is an online/offline group with a faction, behavior table, assigned target, current action, map spot, story
manager, and optional scripted target condlist.
When updating, a squad either:
- follows a scripted target from
target_smart; - helps the actor if the helper target is available;
- selects a generic simulation target by priority.
It then runs either:
SquadReachTargetAction;SquadStayOnTargetAction.
Smart Terrains
SmartTerrain owns:
- simulation role and simulation properties;
- max population and arrival distance;
- job creation and job assignment;
- respawn configuration;
- campfire state;
- terrain control and alarm state;
- arriving objects and assigned job descriptors.
When a terrain is selected as a target, squad members are soft-reset offline and assigned to the terrain. When NPCs arrive, the terrain assigns jobs from its job list.
ALife Update Rate
setUnlimitedAlifeObjectsUpdate() temporarily allows all ALife objects to update, which smooths initial spawn.
setStableAlifeObjectsUpdate() restores the configured stable update count.
ActorBinder.reinit() enables unlimited updates, then schedules stable updates through an EventsManager timeout.
Guidelines
- Treat squads and smart terrains as server-side simulation objects.
- Do not change target selection from only one layer. Check squad actions, simulation priority utilities, terrain availability, and save/load state together.
- When changing simulation persistence, update both
STATE_WriteandSTATE_Read.
Time
Time helpers live in src/engine/core/utils/time.ts. They format game time, convert weather periods, advance game time,
and serialize xray CTime values for save data.
Formatting
toTimeDigit
Pads values below 10 with a leading zero.
gameTimeToString
Formats a CTime value as:
hh:mm MM/DD/YYYY
globalTimeToString
Formats a duration in milliseconds as:
h:mm:ss
This is used by visible timers such as sr_timer.
hoursToWeatherPeriod
Converts an hour to a weather period section label:
6 -> 06:00:00
12 -> 12:00:00
Time Checks
isInTimeInterval(fromHours, toHours) checks whether the current level hour is inside a range. Ranges that cross
midnight are supported.
For example, 22 to 4 means late night through early morning.
Changing Time
setCurrentTime(hour, min, sec) advances game time to the requested time of day. If the current day has already passed
that time, it advances to the next day.
The helper temporarily sets the level time factor to 10000, waits until game time reaches the target, then restores
the previous time factor.
Use this carefully. It is not a passive setter; it advances the simulation while waiting.
Save and Load
writeTimeToPacket(packet, time) writes a nullable time value to a net packet. null is stored as MAX_U8.
readTimeFromPacket(reader) restores a CTime value or returns null for the null marker.
serializeTime(time) and deserializeTime(data) use marshal to store and restore a CTime tuple as a string.
Guidelines
- Use
globalTimeToStringfor millisecond durations. - Use
gameTimeToStringfor calendar game time. - Use packet helpers for net save data, not ad hoc string formatting.
- Avoid
setCurrentTimein ordinary update paths because it waits while time advances.
UI
Runtime UI scripts load XML forms, initialize xray CUI controls, bind callbacks, and implement menus, debug screens, and in-game dialogs.
This page covers runtime scripts. Form source generation is covered in the Forms page.
Source Layout
| Source | Purpose |
|---|---|
src/engine/core/ui | Runtime UI classes |
src/engine/core/utils/ui | XML loading and element initialization helpers |
src/engine/forms | TSX/static XML form sources |
src/engine/scripts/declarations/callbacks/interface.ts | Engine-facing UI callbacks |
XML Loading
resolveXmlFormPath(path, hasWideScreenSupport) normalizes form paths and optionally selects a .16.xml variant when
the current screen is wide and the file exists.
resolveXmlFile(path, xml?, hasWideScreenSupport?) creates or reuses CScriptXmlInit, resolves the form path, and
calls ParseFile.
In debug mode, XML paths containing / abort because xray expects Windows-style UI paths.
Element Initialization
initializeElement(xml, type, selector, base, descriptor?) initializes CUI controls from XML and can register callbacks
on the owning CUIScriptWnd.
Supported element types include:
- buttons, check buttons, combo boxes, tabs, track bars, edit boxes, list boxes, scroll views;
- static text and text windows;
- frames and frame lines;
- map list and map info controls;
- message boxes;
- generic windows.
initializeStatic and initializeStatics are shortcuts for static controls.
Runtime UI Classes
The runtime UI tree includes:
- main menu and options dialogs;
- save/load dialogs;
- extensions dialog;
- debug dialog and debug sections;
- sleep, numpad, and freeplay dialogs;
- inventory menu integration through actor menu callbacks.
These classes load XML by selector names. If an XML element name changes, update the runtime class and tests together.
Interface Externals
interface.ts registers engine-facing modules such as:
loadscreen;inventory_upgrades;actor_menu;actor_menu_inventory;pda;ui_wpn_params.
These callbacks connect UI XML or C++ UI code to managers such as LoadScreenManager, UpgradesManager,
ActorInventoryMenuManager, TradeManager, and PdaManager.
Guidelines
- Keep generated XML and runtime selectors in sync.
- Check paired 16:9 forms when changing layout.
- Register UI callbacks through
initializeElementwhen the control needs script events. - Use
resolveXmlFileinstead of constructingCScriptXmlInitpaths by hand.
Utils
Utility modules provide shared, mostly stateless helpers used by binders, schemes, managers, config callbacks, and server object classes.
They live under src/engine/core/utils.
Main Utility Areas
| Area | Examples |
|---|---|
ini | LTX reads, condlists, switch parsing |
scheme | scheme setup, switching, events, object logic initialization |
object | object spawn ini, visual setup, wound/setup helpers |
spawn | item, ammo, squad, object, and actor-near spawn helpers |
sound | sound masks, volume console helpers, object sound checks |
time | time formatting and packet serialization |
ui | XML resolution, CUI element setup, screen helpers |
position, vector, patrol, level, vertex | xray spatial helpers |
relation, community, ranks | faction and relationship helpers |
squad, smart_terrain, smart_cover | simulation and job helpers |
logging | LuaLogger and log registry helpers |
game | game-flow checks and waiting helpers |
binding | global extern registration helpers |
Spawn Helpers
spawn.ts wraps common simulator creation paths:
spawnItemsForObject;spawnItemsAtPosition;spawnAmmoForObject;spawnAmmoAtPosition;spawnItemsForObjectFromList;spawnSquadInSmart;spawnObject;spawnObjectInObject;releaseObject;spawnCreatureNearActor.
Ammo helpers respect section box_size and split large ammo counts into engine-safe chunks.
Binding Helpers
binding.ts owns extern and getExtern, which are used by script declarations to expose Lua globals. Use these
helpers instead of assigning globals directly.
INI and Scheme Helpers
The ini helpers parse fields, condlists, string lists, condition lists, timers, switch conditions, and bone
descriptors.
The scheme helpers initialize object logic, register scheme constructors, dispatch scheme events, and switch active
sections.
These helpers are the preferred path for LTX-driven behavior. Avoid ad hoc parsing in schemes when a parser already exists.
Logging
Use LuaLogger for runtime logs. It supports file-aware logging and named log channels used by systems such as
simulation, smart terrain, and psy logic.
Guidelines
- Keep utilities focused and dependency-light.
- Use existing parser/helpers before adding custom string parsing.
- Put stateful cross-object behavior in managers, not utilities.
- Add tests next to utility modules; most utility folders already have focused Jest tests.
Shaders
Shader files are static game resources. XRF does not compile or generate shader source from TypeScript. The build copies
shader files from the resource roots into target/gamedata/shaders as part of the resources build target.
Use this page when you need to find where shader files live, how they reach the game package, or where configs and UI forms reference shader names.
Source Layout
| Source | Purpose |
|---|---|
src/resources/shaders | Base shader files copied to gamedata/shaders. |
src/resources/shaders/r1, r2, r3, gl | Renderer-specific shader directories. |
src/resources/shaders/shared | Shared include files used by shader source. |
src/engine/configs/**/*.ltx | Config references to shader names. |
src/engine/forms/**/*.tsx and static UI XML | UI texture nodes can set a shader attribute. |
src/engine/lib/constants/roots.ts | Defines the $game_shaders$ root alias. |
The base resource directory also contains other static asset folders such as anims, levels, sounds, spawns, and
textures. Shader files follow the same static-resource build path as those folders.
Build Behavior
The CLI resources target copies static assets from configured resource roots:
npm run cli build -- --include resources
The default root is src/resources. When asset overrides are enabled, the CLI also checks locale and override resource
roots from cli/config.json before the base root.
The static resource copier intentionally skips development-only folders such as textures_unpacked and
particles_unpacked. It also rejects resource roots that overlap generated engine folders such as configs, scripts,
core, or lib.
References From Configs
Shader names are usually referenced by engine configs rather than by scripts. Examples include:
shader = font
tracer_shader = effects\bullet_tracer
sun_shader = effects\sun
UI forms can also set shader attributes on texture nodes:
<texture shader={"hud\\p3d"}>ui_inGame2_Detector_icon_acid_big</texture>
Keep these references aligned with files under gamedata/shaders. The game resolves shader names through the normal
X-Ray filesystem aliases, including $game_shaders$.
Guidelines
- Edit shader source under resource roots, not under
target/. - Use the
resourcesbuild target for shader-only changes. - Search configs and forms before renaming a shader path.
- Keep renderer-specific variants together when a shader exists in more than one renderer directory.
- Treat
src/resourcesas resource-owned content. Avoid broad edits unless the task is about assets.
Translations
Translations are string-table source files for UI labels, dialogs, tasks, item names, achievements, subtitles, and other text shown by the game.
XRF keeps the main editable translation source in JSON files under src/engine/translations. The build converts those
sources into X-Ray string-table XML under target/gamedata/configs/text.
Supported Languages
The supported locale keys are defined in cli/config.json:
| Key | Language |
|---|---|
eng | English |
fra | French |
ger | German |
ita | Italian |
pol | Polish |
rus | Russian |
spa | Spanish |
ukr | Ukrainian |
The default build locale is also configured in cli/config.json. It can be overridden with the build command
--language option.
Source Format
Each JSON file is a dictionary keyed by translation id. Each translation id contains one value per supported locale. Values can be strings or string arrays:
{
  "st_example_name": {
    "eng": "Example",
    "fra": "Example",
    "ger": "Example",
    "ita": "Example",
    "pol": "Example",
    "rus": "Example",
    "spa": "Example",
    "ukr": "Example"
  }
}
String arrays are used when XML text contains explicit line breaks. The XML import helper splits \n into arrays when
converting existing string-table XML into JSON.
Build Behavior
The translations build target calls the bundled xrf-cli translation builder:
npm run cli build -- --include translations
The source path is src/engine/translations. The target path is:
target/gamedata/configs/text
Do not edit generated XML under target/. Fix the JSON source or the imported static XML source instead.
Translation Utilities
The local CLI exposes helper commands under translations:
npm run cli translations init <path>
npm run cli translations check
npm run cli translations check -- --language eng
npm run cli translations to_json <path> -- --language eng --output src/engine/translations
Use init to add missing locale keys to JSON translation files. Use check to list missing or invalid entries. Use
to_json when importing existing X-Ray XML string tables.
The XML importer accepts an optional --encoding value. If encoding is not passed, it tries the XML header first and
then falls back to windows-1251 for ukr and rus, or windows-1250 for the other supported locales.
References From Game Data
Translation ids are referenced across multiple source types:
- UI form text nodes;
- dialog XML
textnodes; - task configs and task functors;
- item, weapon, outfit, and upgrade configs;
- script callbacks that return text ids.
When changing an id, search the repository before renaming it. Task fields and dialog conditions may be condlists or script callbacks rather than plain string ids.
Guidelines
- Keep ids stable when only the wording changes.
- Fill every supported locale key used by the file.
- Use arrays only for intentional multiline text.
- Run
npm run cli translations checkafter translation edits. - Run
npm run cli build -- --include translationsbefore packaging. - Do not patch generated files under
target/gamedata/configs/text.